How to sew a decorative scalloped edge

A scalloped edge is an attractive satin stitch finish to an edge of a garment or project.
With the right prep it isn’t too difficult to sew a scalloped edge on your Brother sewing machine. As long as your sewing machine can sew scalloped satin stitches (check your manual!), then you can finish a project with a scalloped edge.
What fabric should I use when sewing a scalloped edge?
Woven cotton, linen or synthetics all work with the correct stabilising.Do I need to use fabric stabiliser when sewing a scalloped edge?
Stabilising the fabric is very important when sewing a scalloped edge.
The stabiliser ensures three things:
- The work stays flat and taut,
- Puckering is reduced, and
- You can safely cut excess fabric away from the edge, without ruining the fabric or cutting into the stitches.
To create the scalloped effect the fabric is trimmed right next to the stitching.
Which fabric stabiliser should I use when sewing a scalloped edge?
When sewing a scalloped satin stich edge, it is best to use a water-soluble stabiliser or temporary stiffening spray. It is important to use a stabiliser that can be removed completely at the end of sewing.
There are three types of stabiliser that are suitable:
- Non-woven water soluble – adhere to the wrong side of the fabric with basting spray. DO NOT use the water-soluble film type, as it will not provide the right amount of support.
- Sticky back woven water-soluble – does the same job, but you won’t need to use a basting spray as this type of stabiliser works just like a sticker. It does require more washing out than the non-sticky version.
- Temporary stiffening spray – spray on stiffeners or old-fashioned starch spray can be used instead.
Make sure that your fabric is stabilised all the way to the edge and lying nice and flat. Sew at least a centimetre away from the edge of the stabilised piece.
Not sure which stabiliser is which? Check out our handy Know Your Stabilisers blog here.
Note: if you’re sewing a scalloped edge onto a softer or thinner fabric, you may need a double layer of stabiliser to provide enough support. We recommend you test on a scrap piece of the same/similar fabric first.
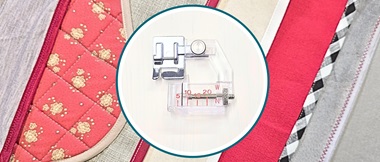
Which presser foot should I use to sew a decorative scalloped edge?
The Advanced N+ monogramming foot or normal N foot.

What thread should I use when sewing a scalloped edge?
Good coverage is key to a neat, scalloped edge.You can use normal sewing thread in the bobbin and the needle (make sure they match).
For really good coverage, try overlocking floss (the fluffy version you can use in the loopers of your overlocker). You can use it in the needle, with a matching colour normal general sewing thread in the bobbin. Test this thoroughly before sewing a scalloped edge on your final project!
What type of sewing do I need to use for a scalloped satin stich edge?
Use a Universal needle for general sewing thread.
If you’re using fluffy threads a needle with a larger eye, like a metallic needle or a top stitching needle, is recommended.
Want to know more about which sewing needle is which? Read our handy guide here.
What is a scalloped stitch and how do I find it on my Brother sewing machine?
Scalloped stitches are available on most Brother machines, with some offering several options.
You will find a scalloped edge in the satin stitch selection on your machine (see images below for examples). To create the scalloped edge effect choose the crescent shaped stitch from the stitch menu.

Do I need to sew a practice piece before sewing a scalloped edge?
Yes! It’s imperative that you do.
- Unpicking the satin stitches will damage the stabiliser and make it hard to get a neat finish when you re-sew. Practice on an offcut or similar piece of fabric to make sure the stitches work on your fabric type.
- Different statin stitches will look different on different fabrics, so experiment with the stitching, but also trim and wash your test before you start your project. For example, it may be hard to get an evenly covered, smooth edge on coarser weaves, and this will only be visible after trimming and washing the stabiliser out.
- Different stitch lengths and widths suit different fabrics, so you’ll need to experiment to get the best result for the fabric you’re using. Remember to make a note of which stitch you used, with your preferred length and width!
Before you test make sure that your scrap piece of fabric is stabilised all the way to the edge and lying nice and flat.
When sewing a scalloped edge, aim for good coverage but be aware that too short a stitch length can cause the stitches to pool, creating thick bits of stitching.
Thinner fabrics normally require a smaller stitch, while looser weaves may need a wider stitch with good coverage to prevent bits of fabric poking out of the stitches after trimming.
It is very important to leave at least 2cm of fabric between the sewing line and the edge of the fabric to prevent the fabric from puckering and distorting.
There are no hard and fast rules. When you test, look for a stitch that gives you minimum puckering, while covering the edge of the fabric well when trimmed.
Tip: you can make an edging from any continuous satin stitch design – try some of the others and see how they work!
How do I finish a sewn scalloped edge?
If you are using water soluble fabric, complete the sewing, then cut away most of the stabiliser, but leave at least a centimetre of stabiliser on either side of the scalloped stitching.
Dab the area with the scalloped edge with a wet sponge. It will get sticky. Leave to dry.
When it is dry and hard, carefully trim the fabric right next to the stitching using fine tipped, curved scissors.
Push the blade against the stitches while cutting but take care not to cut the stitches! Practice on your sample first.
After washing, press well. You can apply an anti-fraying agent like Fray Check to the stitches, leave to dry and then trim any leftover bits of fabric away.
If you do cut the stitches, another drop of Fray Check may save you from disaster, but it is quite possible that you will have to start over. In that case, you can sew another line of scallops just inside the ruined one. Stabilise this part of the fabric first, sew, dampen and dry and cut again.

What are the best tips and tricks when sewing a scalloped edge?
-
Do not sew too close to the edge. Leave at least 2 - 5cm of fabric so the stitching will not pull the fabric up.
- Soak the fabric well, rinse and repeat a few times until all stabiliser is removed from the fabric and it is soft when dry. Press well with a pressing cloth.
- With most satin stitches your Brother sewing machine’s feed dogs will move the fabric forward and sideways. When sewing, keep the fabric feeding straight, so you get a straight line of stitches. Hold the fabric gently and allow the machine to move the fabric itself. If you hold too tightly, or pull during feeding, your stitching will be wonky or puckered, and your fabric could distort.
- If you can, prepare a piece of fabric with the scalloped stitch edge first, remove the stabiliser, then cut your final project pieces. This is especially important if you pair your sewn scalloped edge with a lacy heirloom stitching effect.
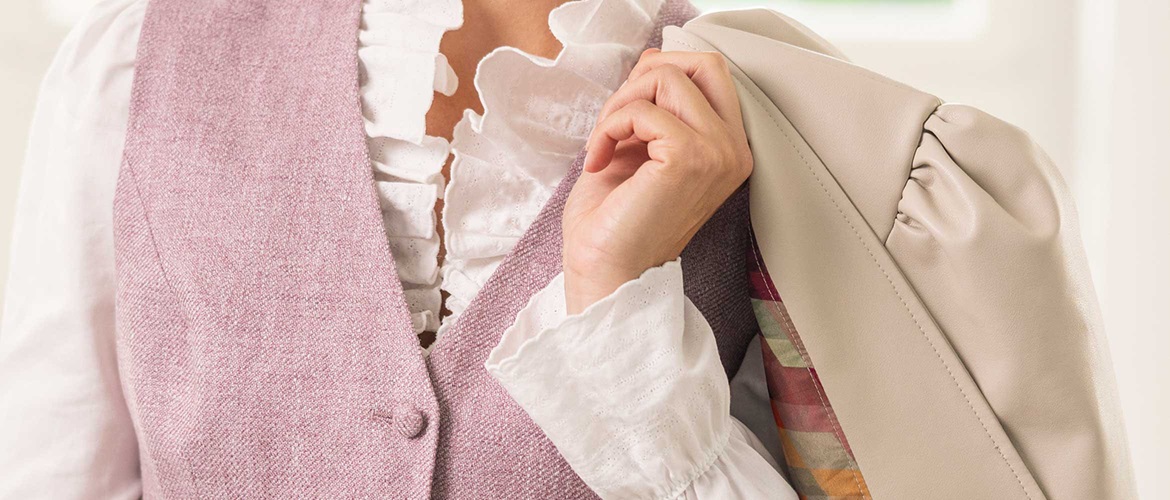
- A scalloped edge looks great finishing off a garment or piece of homewares that has a lacy heirloom stitching style effect – just like the shirt in the photos on this blog. If you’d like to learn how to sew lacy heirloom stitches with your Brother sewing machine, check out our in-depth How To here.