Design your own napkin fold card


Use CanvasWorkspace to design your own napkin fold card from scratch.
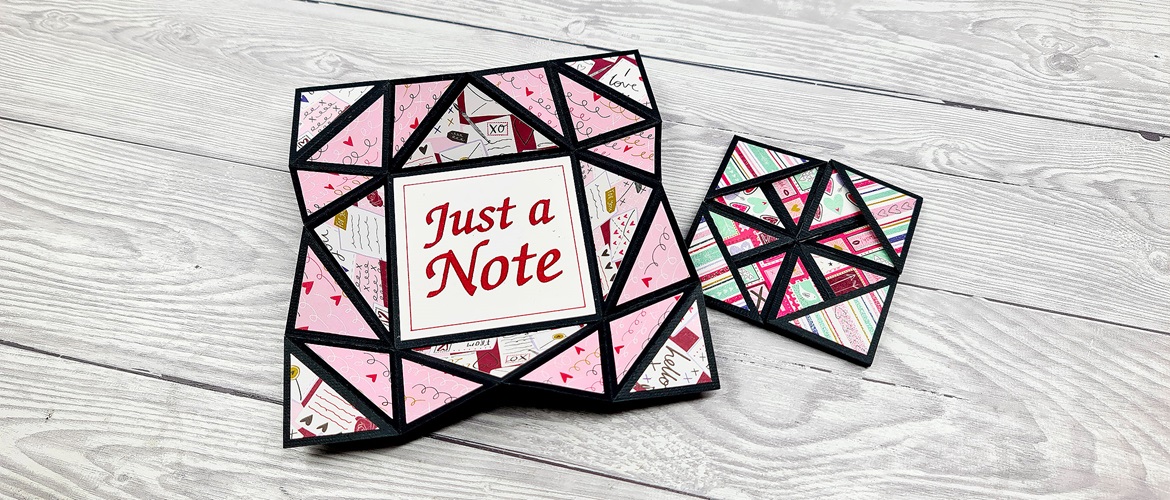
The Gentleman Crafter shows you how with an easy-to-follow video and instructions, so you can create your own napkin fold card with just cardstock and your Brother ScanNCut.We used this design to create some menu dinner cards. As this project can be resized you could use it for cards, wedding invites, party place settings and much more! What will you make with yours?

Materials needed
Paper/card
- 1 sheet of 180gsm/65lb cardstock for the card – minimum size 205 x 205mm/8 x 8”
- 1 sheet of 180gsm/65lb patterned paper for colour 1 of the decorative panels – minimum size 155 x 155mm/6 x 6”
- 1 sheet of 180gsm/65lb patterned paper for colour 2 of the decorative panels – minimum size 155 x 155mm/6 x 6”
- 1 sheet of 180gsm/65lb plain paper for the sentiment – minimum size 155 x 155mm/6 x 6”
Tip: using the lighter weight of card as suggested above, makes it easier to fold and remain flat when folded.
You will also need
- Bookbinding glue or low tack/quick grab glue or double-sided glue
- Tweezers
- For scoring the fold lines, I recommend a fine tipped stylus and a metal ruler
- Embellishments (optional)
Please note: the instructions below are for the basic napkin fold card. You can freely embellish to your liking by adding elements such as text, 3D decals, cut outs, foiling etc. The ScanNCut has a wide range of built-in designs, fonts and applications for this purpose. Additionally, you can find thousands of extra cutting files on the Brother Artspira design app. Have fun!
Equipment needed
ScanNCut - hardware
- Brother ScanNCut – Any CM Model
- Standard mat [CAMATSTD12]
- Standard blade [CABLDP1] and blade holder [CAHLP1]
- Either the small barrel pen holder [CAUNIPHL2] or universal pen holder [CAUNIPHL1] or the pen holder [CAPENHL1] and colour pen set [CAPENP1]
OR
- Brother ScanNCut – Any SDX Model
- Standard mat [CADXMATSTD12]
- Standard auto blade [CADXBLD1] and holder [CADXHLD1]
- Either the small barrel pen holder [CAUNIPHL2] or universal pen holder [CAUNIPHL1] or the pen holder [CAPENHL1] and colour pen set [CAPENP1]
ScanNCut - software
- CanvasWorkspace for PC or Mac
Download CanvasWorkspace for desktop here
Sizing tip
The size of the card in the tutorial will give you a finished card size of 76.2 x 76.2mm/3 x 3”. You can increase the base size to 279.4mm/11”, which will give you a finished card of 139.7 x 139.7mm/5.5 x 5.5” and which will fit nicely into a standard 152.4mm/6” square envelope.
Just remember to group all the elements, including the layers and the sentiment panel, before resizing so everything fits together after cutting.
How to
Before you start
Download the CanvasWorkspace desktop program and install it on your computer. The program and the account are all free to download and set up.
If you’d like some instructions on how to set up and open your free CanvasWorkspace account, read our handy blog post: https://sewingcraft.brother.eu/en/blog/crafting/2022/cws-how-to-open-a-cws-account
Now, watch the video (below) as it’ll walk you through the entire project. If you’d like written instructions too, then read on.
Step 1
Open a new project in CanvasWorkspace desktop version (we cannot use the online/in browser version for this project). Press ‘Ctrl+R’ to enable the ruler. Then in the ‘Artboard’ tab on the right-hand side of the screen, enable ‘Snap to Grid’ and change the grid spacing to half an inch (0.5”).Tip: if you want to change the units of measurement that you’re working in (inches, mm), select ‘Display’ on the top menu bar, scroll down to ‘Unit’ and choose your preferred measurement system. I will continue to use inches for this tutorial.
Step 2
In ‘Shapes’, select the standard square (the first choice, with four pointed corners) and drag onto your workspace. Resize the square to 6” by either:
a) Dragging the bottom right-hand corner until the desired size is achieved, or
b) Go into the ‘Edit’ tab (right-hand side toolbar), leave ‘Maintain Aspect Ratio’ ticked and type ‘6’ into the width (ensure inches is enabled for this tutorial).
Step 3
Using either ‘Zoom Selected Objects’ (if you’ve selected the square) or ‘Zoom ALL On Mat’ in the ‘Display’ tab on the main toolbar, zoom into the square.
Step 4
Select the ‘Path’ tool from the left-hand side toolbar, or by pressing ‘P’ on your keyboard. Create two vertical score lines at 1.5” and 4.5”. Click at the point you want the line to start, and then double click at the end point to set the line in place.
Step 5
Create diagonal score lines using the ‘Path’ tool.
- Start the first diagonal at the same start point as the 1.5” score line you created in Step 4. Then drag diagonally to the 1.5” point on the left-hand side of the square. Double click to set in place.
- For the second diagonal line, click at the 3” point on the top edge of the square. Drag diagonally until it reaches the 3” point on the left-hand side of the square (this line traverses centre middle to centre left). Double click to set in place.
- For the third diagonal line, start at the 3” point on the right-hand side of the square and drag diagonally to the 3” point on bottom edge of the square (from centre right to centre middle). Double click to set in place.
- For the fourth diagonal line, you need to mirror diagonal line 1, going from 1.5” up from the bottom right-hand corner of the square and finishing at the bottom of the 4.5” vertical scoring line you created in Step 4. Double click to set in place.
Step 6
Create horizontal score lines using the ‘Path’ tool.
- Start the first horizontal score line where the last diagonal score line started, 1.5” up from the bottom right-hand corner of the square. Drag across and finish at 1.5” up from the bottom left-hard corner of the square. Double click to set in place.
- Start the second horizontal score line 1.5” down from the top of the right-hand corner, and finish in the same spot on the left-hand side of the square, where the smaller of the two left-hand diagonal scoring lines terminates. Double click to set in place.
Step 7
Repeat the diagonal from Step 5 in the top right and bottom left sides of the square.
Step 8
In the ‘Layers’ palette in the right-hand side toolbar using ‘Shift+left click’ to select all diagonal line layers, bar the original, outer square shape. Press ‘Ctrl+G’ to group everything and name the group ‘Score Lines’.
Tip: creating groups not only instructs your Brother ScanNCut in which order to cut etc, it also allows you to lock and hide groups/layers when working on others. To work within a group, select the group, left click on it in your workspace, and then left click on the item in the group you want to work on.
Step 9
Still in the right-hand tool bar, select the ‘Properties’ tab. Scroll down to ‘Line’ and in ‘Dash Pattern’ use the dropdown to select the appropriate dash pattern. Choose the third option down, which has small dashes with large spacing in between.
Step 10
Go back into the ‘Layers’ tab, move the square shape layer above the ‘Score Lines’ group by dragging and dropping the layer. This will instruct your Brother ScanNCut to cut the score lines first, and cut the main square out second. This will create a much neater end product and reduces the risk of the square moving when the score lines are cut.
Tip: Brother CanvasWorkspace works ‘bottoms up’ meaning that it will instruct your ScanNCut to cut (etc) the bottom layer first, working gradually up to the top layer.
Step 11
Select both layers and group them, following the procedure in Step 8. Call this layer ‘Card Base’. Lock this layer in place using the little padlock icon (which is next to the eye icon on the right-hand side of the layer).
Tip: by grouping every layer together when you move or resize, it will all move or resize as one layer. Considerably cutting your work and any risk of mistakes!
Step 12
Next, we will create the decorative panels. Make sure you’re still zoomed in on the square we created. Using the ‘Path’ tool again trace triangles in each corner of the square following the score lines we have already created (watch the video to get the right placement).
Once you have done the four small triangles that make up the top left-hand corner of the square, you can save yourself a lot of work and copy and paste this into each of the other corners!
To copy and paste: select all four of the small triangles, ‘Ctrl+C’, then ‘Ctrl+V’. Position your mouse curser over the little dot at the top of the copied work until the round arrow icon shows. Hold the ‘Shift’ key on your keyboard to constrain the movement to increments of 45 degrees, then rotate and move the copied shape into the next corner. Do this for all four corners.
Tip: use the ‘Fill’ option from the top toolbar to add a colour to each of your triangles. This will make sure you know where you are up and that you have created all of them. The colours you choose are irrelevant, this is just a visual aid for yourself.
Step 13
Now create decorative panels for the four inner, larger triangles (refer to the video). Once you’ve copied and pasted so you have four triangles, create a decorative panel in the same way for the inner square.
Step 14
Now all the decorative panels are blocked in we want to offset them, so that they’re smaller than the original shape. Select all, then go to the ‘Edit’ tab on the right-hand toolbar, scroll down, click ‘Offset’. Set:
- Spacing: 0.15”
- Offset direction: Inward
- Corner: Bevel
- Selected original line: Delete
- To agree: click ok
Tip: if you don’t like the size of the decorative panels, you can undo it by pressing ‘Ctrl+Z’ and following the same process but changing the size.
Step 15
If you’re going to cut all of the decorative panels from the same colour cardstock, then you can leave the triangles as they are. However, if you’re going to use a directional pattern, or different cardstocks you’ll need to change the cutting orientation/order.
Firstly, add a fill colour to the panels that will be cut from the same cardstock. Once all relevant shapes have been filled, then group the same colour (cardstock) shapes together.
If you’re using a directional pattern, change the orientation of your triangles in each layer, so they will cut as you want from the pattern. Once you are happy with the cutting orientation of the shapes in a group, name the group (eg ‘Colour 1).
Lock and hide the group, then unlock and unhide the next group of triangles to work on and repeat the process.
Tip: to select multiple shapes at once, hold the ‘Shift’ key down as you click on each individual shape.
Step 16
For the centre square you can leave this blank or just use a coloured cardstock, however I’m going to show you how to create a written sentiment for the middle using your ScanNCut’s built-in fonts and drawing function.
First, create an offset:
- Spacing: 0.15”
- Offset direction: Inward
- Corner: Bevel
- Selected original line: Leave as is
- To agree: click ok.
Once you have created the offset, change the ‘inner’ square line you have just created from ‘cut’ to ‘draw’.
Then, press ‘T’ on your keyboard to select the text function, then write and edit your text, adding a fill colour once you’re happy with the font, size and placement. Check that the text has been set to ‘draw’, so that your ScanNCut will write and fill your text (and not cut it out!).
Move the drawn square layer to the top of the layers, and move the text layer underneath the drawn square layer. Group the decorative drawn middle square and the text layer into one layer.
Now that these two layers have been grouped, you can align the text within the square using the ‘Edit’ tab in the right-hand toolbar and scrolling down to ‘Align’.
The final step here, is to move the cutting shape for the middle decorative square into the group you’ve just made. Drag and drop it at the top of this group.
Tip: there is no ‘return’ function in CanvasWorkspace, so if you’d like to make several lines of text, repeat the ‘press T’ process and write/size/position your next line of text. If you have more than one line of text in the same area, use the grouping process you’ve used in the steps above to create one block of text.
Step 17
Check that you’ve got all your layers, and they’re set the way you want them to be by hiding/unhiding in the layers tab.
Step 18
Transfer the cutting files to your ScanNCut using the File>Export/Transfer FCM File menu option and cut/score/draw all the pieces, swapping from the cutting blade to the pen when required.
In your ScanNCut’s settings under ‘Fill/Additional Line’, make sure your ‘Fill Pattern’ setting is set to solid block colour to ensure the text is filled fully – or experiment with the other fill patterns as you wish! Set the ‘Fill Line Spacing’ to the nib size of the pen you will use, otherwise you’ll get a gap between the outline and fill of your text.
When you’re cutting/drawing the middle sentiment. Make sure you have the ‘draw’ option selected from the dropdown before you start drawing. Once it has finished drawing go through the same process and select ‘cut’ to cut the middle sentiment square out.
Tip: if you want to send different layers one at a time (to cut on different card stocks), enable and unlock the layer you want to send. If you want to send all of them at the same time, unlock and enable all and make sure they’re spaced out on your workspace with no overlap. If all your layers fit on one cutting mat, you can use small pieces of card from your scraps pile and use the Brother ScanNCut’s built-in scanner to background scan/align the cutting layers on the ScanNCut’s screen. This is a great way to reduce waste, make materials (and money) go further, and bust scraps!
Step 19
Assemble as per video instructions and voila, you have just designed and made your very own folding napkin card!
Tip: all folds for the folding napkin card are as follows:
- Diagonal lines = mountain folds (folding away from you to form ‘peaks’)
- Horizontals/vertical lines = valley folds (folding towards to make ‘troughs’).
If you make this, remember to tag in Brother on Instagram and Facebook, and myself on Facebook (and give us all a follow too)! You can also find Brother on Pinterest and YouTube for even more ScanNCut inspiration.


