How To: use the Brother Quilting Guide

Quilting guides are a useful tool when sewing a row of stitches, whether straight or decorative.
Primarily used when quilting, they help you sew evenly spaced rows, or close to/following the edge of an item This becomes even more useful when the markings on your sewing machine’s cover plate are covered by your project and the distance is wider than your sewing machine’s presser foot.
Brother has several versions of this handy accessory available, which we list below, followed by a handy tutorial that will help you get the most out of your Brother Quilting Guide.
Once you start using a Brother Quilting Guide you’ll discover many sewing instances where it’s a great help – it’s not just for quilting!
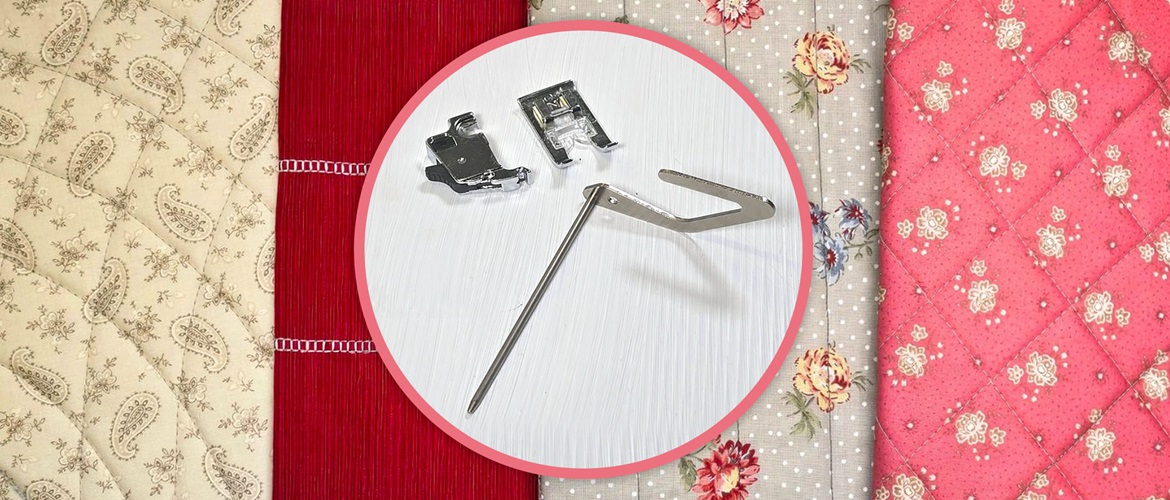
Accessory snapshot
Brother quilting guides are available as a stand-alone product, but also as part of Brother accessory sets.
For all accessories, always check compatibility on support.brother.com or in your Brother machine’s manual prior to purchase.
Quilting Guide F016N
The guide connects to the presser foot holder or the mounting hole in a walking foot and is compatible with multiple Brother sewing machine models.

Dual Feed Quilting Guide (F077)
This set of two Brother quilting guides will fit onto your Brother Dual Feed Attachment or Brother Dual Feed DF1/DF2 (not included with the guides). Included are a right guide and a left guide that are both adjustable up to 2⅜" (6cm) from the centre needle position. Also included are a quilting guide base and screw.

Interchangeable Toe Set for Dynamic Walking Foot (F086)
This handy toe set, compatible with Brother’s Dynamic Walking Foot F085 only, includes a longer quilting guide measuring 2.5cm longer, so you can stitch at even wider intervals! You also benefit from even fabric feeding at the same time.

F086 - Interchangeable Toe Set for Dynamic Walking
How to: use the Brother Quilting Guide
Note: we are using the Quilting Guide (F016N) in this tutorial. For installation of the quilting guides supplied for Dynamic Walking Foot and for use with Brother’s Dual Feed Foot, consult your machine manual or support.brother.com. 'Step 1
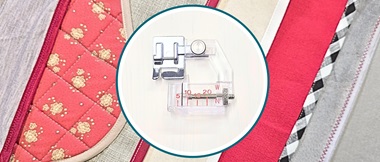
Attach the guide to the presser foot holder. Look at the image below to see where to insert the quilting guide.
Step 2
Decide on your reference point. This could be the edge of the fabric, a line you have sewn or have drawn.The reference needs to be the same length and parallel to where you want to add a line of sewing. You can start at the centre of the project, or on the side, depending on the pattern you want to achieve.
Tip: if the project that you’re sewing onto is large, consider basting the layers with temporary adhesive.

Step 3
Adjust the quilting guide to the width you want the rows of sewing to be apart.
Align the quilting guide with the reference point and lower the presser foot. Start sewing, keeping the quilting guide aligned with the reference.
Tip: if you are sewing straight rows, keep your eye on the point of the guide. When sewing curves, it is best to find a mark on the guide that is directly in line with the needle. Mark it with a piece of washi tape. Keep that mark on the reference for smoother curves.

Step 4
If you want to create a criss-cross effect, draw another reference line for the intersecting set of rows and proceed to sew as before.

Use for decoration
You can also use the Brother quilting guide to add decorative stitching to projects. In this example we added rows of ladder stitch to a placemat.

Tips
- If you’re sewing multiple rows, check from time to time that the guide has not moved. An easy way to keep track is to mark the position where the arm needs to meet the presser foot holder with a small piece of washi tape.
- If you need to quilt a large piece, it is easier to insert the guide from the left and start with the line in the centre. Mark this line carefully and sew the first row on the drawn line. Then sew all the rows to the right, using your last sewn line as the guide for each new row. To complete the other side of the project, rotate it and sew the remaining rows in the same way. This way you never have to accommodate the full width of the project in the throat of the machine.
- Set the guide to a height that will allow the arm to glide just above the reference point. You need it to just touch the surface of the fabric so that you can see it accurately, but not pressed down so far that it gets stuck.
- Make sure there are as little as possible obstructions or loose threads in the way of the arm.