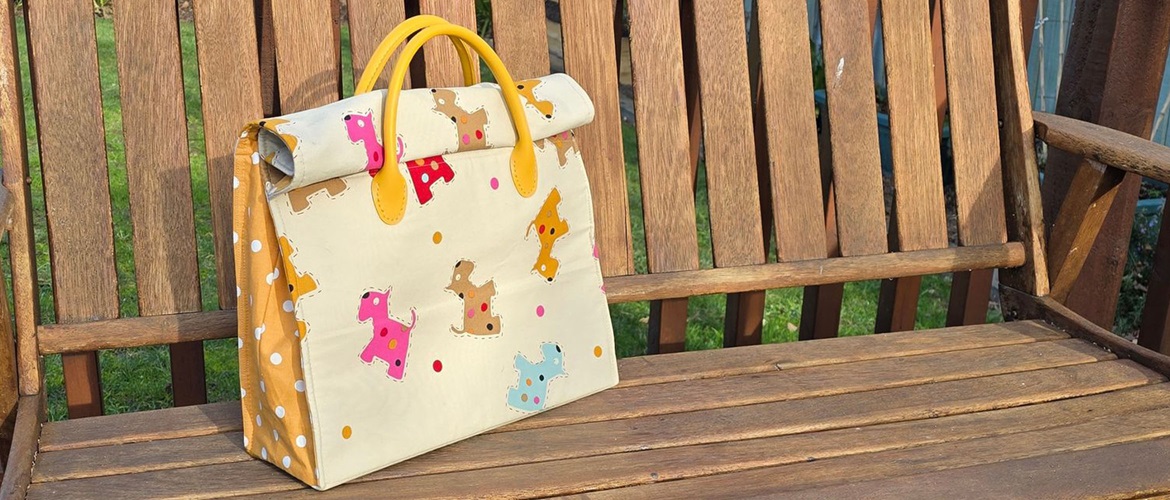
‘Sew easy’ roll up tote bag


Sew a tote bag with a little difference: a reinforced body and a trendy rolled top – and no sewing pattern required!
The tote bag in this sewing project has a generous body, so it is equally good for shopping, the pool or a even a picnic!
This sewing project uses one large piece of fabric to construct the body of the tote bag, so there are fewer pieces for you to sew together. This means you can use fabric with a long pattern, and not worry about cutting into it, or pattern matching pieces!
Adding foam stabiliser gives the tote bag structure, and the rolled top allows you to pack more in without the bag overflowing. The two-piece gusset makes construction easier, because the corners are less tricky. To ensure a super neat finish we’ve included topstitched seams.
Finished tote bag size (with top rolled up): 39cm (w) x 36cm (h) x 13cm (d).

Materials needed
- Main bag body fabric: 50cm x 114cm (width of fabric)*
- Contrast fabric for sides (gussets): 20cm x 114cm (width of fabric)*
- Lining fabric: 70cm x 114cm (width of fabric)
- Foam stabiliser: one 69 x 41cm piece
- Bag handles – we used store bought leatherette handles, 30cm without the tabs
- Matching sewing thread
- Top stitching thread to match handles
*Tip: you can use many different types of fabric when sewing this tote bag. However, we’d recommend you don’t use very light or high stretch fabrics, as they won’t provide the bag with enough support or structure. Extremely bulky fabrics will be difficult to sew together and won’t give the tote bag a good shape.
Equipment needed
- Brother sewing machine – we used the new Inventio range to sew this bag
- Walking foot
- Marker pen or pencil of your choice: the marks will not be visible after sewing (make sure to choose a pen that doesn’t bleed through the fabric, or use a temporary sewing marker)
- Pins
- Sewing clips
- Rotary cutter, cutting mat and ruler
- Basic sewing supplies
- Hand sewing needle
Notes
- We recommend that you use a walking foot throughout this project.
- Seam allowances are 1cm throughout.
- Sew all seams with straight stitch on 2.5 setting, top stitching with stitch length of 3 or 3.5.
- Press all fabrics well before cutting.
- Be precise! Accurate cutting and sewing will give you a neat bag.
How to
Step 1
First prep your fabric pieces for sewing the tote bag.
Cut bag, lining and stabiliser pieces using a rotary cutter, ruler and cutting mat to the following sizes:
From main fabric: one piece of 41 x 109cm.
From contrast fabric: four gusset pieces 8.5 x 49cm each.
From lining fabric: one main piece 41 x 109cm and four gusset pieces 8.5 x 49cm each.
From foam stabiliser: one piece of 69 x 41cm.

Step 2
Lay the main fabric piece with wrong side facing up.
Measuring along each long edge, make a mark at the following measurements (each starting from the short edge):
20cm, 48cm and 54.5cm. The last mark will be in the centre of the long side.
Start at the other end of each long edge and make the same marks – the last mark (54.5cm) should coincide with the centre mark from the first set of marks you made.
Repeat on the other long edge and then connect each coordinating set of marks with a line drawn across the fabric. (See the diagram below.)
The first line from each side (A) shows the placement of the stabiliser, the second (B) are the fold lines for the bottom of the bag and the last two coinciding lines are the centre of the gusset.

Step 3
Cut the foam stabiliser to the exact size as listed above: using a rotary cutter and ruler.Measure and mark lines as per diagram below.

Step 4
Place the stabiliser on the wrong side of the main tote bag body fabric with the short edges of the foam aligning with the A line that you drew in Step 2. Make sure that the B lines you drew in Step 2, align with the lines you marked in Step 3.Pin very well all around the external edges of the foam stabiliser and main fabric. Also pin along the B lines. Sew along the B lines, through the stabiliser and the fabric, using a straight sewing stitch.
Step 5
Install your walking foot and then sew through the fabric and foam stabiliser along the A lines, sewing 1cm in from the line on the stabiliser.Tip: it’s not easy to sew on the edge of the foam stabiliser, so make sure you have both toes of the sewing machine presser foot on the stabiliser when sewing.
Read how to use the Brother Dynamic Walking Foot Set here if you’ve not sewn with a walking foot before.

Step 6
Snip into the main fabric and stabiliser at the ends of the B lines – cut just shy of 1cm in.

Step 7
Lay a pair of tote bag gusset pieces with wrong sides up and long edges aligned.
On the outside bottom corners of each gusset piece, measure and mark short lines 1cm from the side and bottom edges, so they intersect (see image below).

Step 8
Lay the first gusset piece on one side of the main tote bag piece. Match the intersection you marked on the gusset in Step 7 to the end of the snip you made at line B in Step 6.
Align the raw edges and match the top ends of the gusset and the tote bag.
Sew a seam from the top of the main piece, stopping and tying off securely exactly at the marked intersection on the gusset piece.
Repeat with remaining three gusset pieces on each side of the tote bag.

Step 9
Press the seams of the tote bag.
Fold the gusset pieces away from the main bag piece and press.
Top stitch on the edge of the gusset, through the gusset and seam allowance underneath.
Important! Do not sew further than the snip that you made in Step 6!
Repeat on all gusset pieces.

Step 10
Fold the tote bag double, with top edges aligned, right sides together. Make sure the gusset pieces are sticking out of the edges of the bag, with right sides together.
Match the long raw edges of the two facing gusset pieces together and sew from top to bottom edge.
Press the seams open.

Step 11
It’s time to close the bottoms of the tote bag gussets.
Match line C (that you made in Step 6) with the seam on the gusset. Pin. Flatten the tote bag sideways, right sides together (it will look like a triangle with the top taken off).
Match the raw edges and pin: in the corners you will be left with a square shaped opening where the snip you made earlier in the bag has now opened up.
Carefully sew from one open square to the other (as marked with the line in the image below), making sure to catch the little corners.
Repeat at the other bottom opening.
Tip: turn the bag out and check that you do not have holes at the bottom corners of the gussets. If you do, turn it back and sew a little deeper in.

Step 12
How to sew the lining of the tote bag.
Take the lining fabric, and with wrong side facing up, measure and mark lines B and C as per the diagram in Step 2.
Snip at the B lines (as per Step 6). Sew the lining fabric gussets as per Step 8, but when you’re done press the seams open and top stitch on both sides, sewing the seam allowances onto the bag and gussets respectively.
Join the gusset pieces as you did when sewing the main body of the tote bag, leaving a 20cm gap in the centre of one of the seams so you can turn the tote bag out once sewn. Press the seams open.
Sew close the bottoms of the lining as you did on the main body of the tote bag.
Step 13
Turn the tote bag outer (main body) with right side facing out. Push it into the lining, making sure the corners and seams are matching, and the raw edges of the tops align. Pin.
Step 14
Remove the accessory tray from your Brother sewing machine, so that you can use the free arm. Slide the tote bag over the free arm and under the sewing machine presser foot. Sew along the aligned top edges of the bag and the lining. Make sure you catch both layers together all the way around.
Step 15
Turn the bag out through the opening left in the one side of the lining gusset.

Step 16
Carefully push the bag opening (the gap you left in the seam) over the free arm.
Sew an under stitch on the seam connecting the bag and the lining by folding the seam towards the lining and sew close to the fold on the lining.
You will need to stop sewing every now and then to carefully move the fabric around. Make sure to stop with your sewing needle in the down position.
Tip: this will give the tote bag a really great finish, so don’t skip sewing this step!

Step 17
Sew up the gap in the lining with invisible hand sewing stitches and then push the lining into the body of the tote bag. Push the corners of the lining into the corners of the bag.
Flatten the seam at the top of the tote bag, pin and top stitch all around, 1cm from the edge.
Step 18
Fold the edges where the gusset is sewn to the bag tote, making sure to catch the lining into the fold as well. Clip well.
Starting at the top edge, carefully top stitch through all the layers (go slowly!), folding the bottom out of the way as you near line B. Tie off securely.
Repeat on the three remaining edges.
This step will give your bag more definition and structure. It will prevent the gussets from folding out.

Step 19
Sew the handles to the tote bag – place them 22cm up from the bottom and 8cm in from the side edge.
Use a hand sewing needle and top stitching thread. Start with a long tail, from the inside of the bag, and sew running stitch through the holes, turning around at the end and sewing into the gaps to get continuous stitching. End at the wrong side and tie the ends securely with a double knot. Bury the threads between the layers of the body fabric.

Now you’re ready to roll! Fold the tops of the tote bag together and roll it down to close.

Want to see this bag in action? It featured in the promo video for the Brother Inventio sewing machine range – watch it below.
You can read more about the Brother Inventio range sewing machines here – it’s the perfect machine to step-up your sewing skills on.


