
How to bind a quilt


A neat and attractive binding adds a functional edge to a quilt, table runner or placemat, but it also adds the final design element.
It is the frame around the masterpiece that is your careful, artistic work.
Read on to see how to sew a clean and perfect looking binding.
Materials needed
- Finished quilted item: sides trimmed to be straight and corners neat to the angle required
- Fabric for your binding: see our binding calculator below
- Matching sewing thread
Equipment needed
- Sewing machine
- Walking foot or Direct Dual Feed attachment
- Hand sewing needle
- Pins
- Clips
- Scissors
- Marker
- Small ruler
- Ruler with 45-degree line
General information
How wide do you want your finished binding to be?
The final width of a binding can be anything from a very small quarter inch (7mm) to one inch (2.54cm) or even wider. Most quilters use 2 ½” (approx. 6.5cm) strips (that means you can use jelly roll strips). That will give you a binding of about 1/3 of an inch (1.3cm). If you are following a pattern, it should tell you how wide the binding was designed to be as well as how to cut your strips.
How wide should the strips be cut?
The width of the strips should be cut six times the finished width of the binding.
How much binding do I need?
- Calculate how long a piece of fabric you will need to go around your quilt – that is the perimeter. Measure the length and the width of the quilt, add it up and multiply by two (2 x length + 2 x width).
- Add 20% extra for corners and joins (and margin for error!): the perimeter multiplied by 1.2
- Divide this value by the width of the fabric: this will give you the number of strips to cut (it will most probably contain a fraction – just round it up to the next whole number).
Tip: remember, the strips are cut across the width of the fabric, so the width of the fabric = length of strips.
How much fabric do I need to purchase?
Multiply the number of strips you need (calculated above) with the width you will be cutting the strips.
Seam allowance
Your seam allowance when sewing the binding to the quilt is a scant less than what the finished binding will be.
Here is an example:
I have a quilt with a width of 35 inches and length of 47 inches. I want the finished binding to be half an inch wide.
- Calculate the perimeter:
35” + 47” = 82” x 2 = 164”
Add 20% extra for corners and joins: 164” x 1.2 = 196.8”
- How many strips do I need to cut:
The fabric I use is 44” wide
196.8” ÷ 44” = 4.4727272 (scary number, but don’t be scared!)
Rounded up = 5 strips of 44” long required
Remember: the width of the fabric = length of strips
- How wide do I want to cut my strips?
Finished width of binding = ½ inch
½ inch x 6 = 3 inches
I want to cut the strips 3” wide
- How much fabric do I need to buy:
3” wide strips x 5 strips required = 15” of 44” wide fabric needed
Here is a handy table in which you can make your calculations. We have added the values from our example above into the table as a reference.
Download the table here and use it to calculate your bindings.
How to
Preparation
Cut as many strips as you need. Sew them together into one long strip with diagonal seams and press them open.
Square your quilt off neatly.
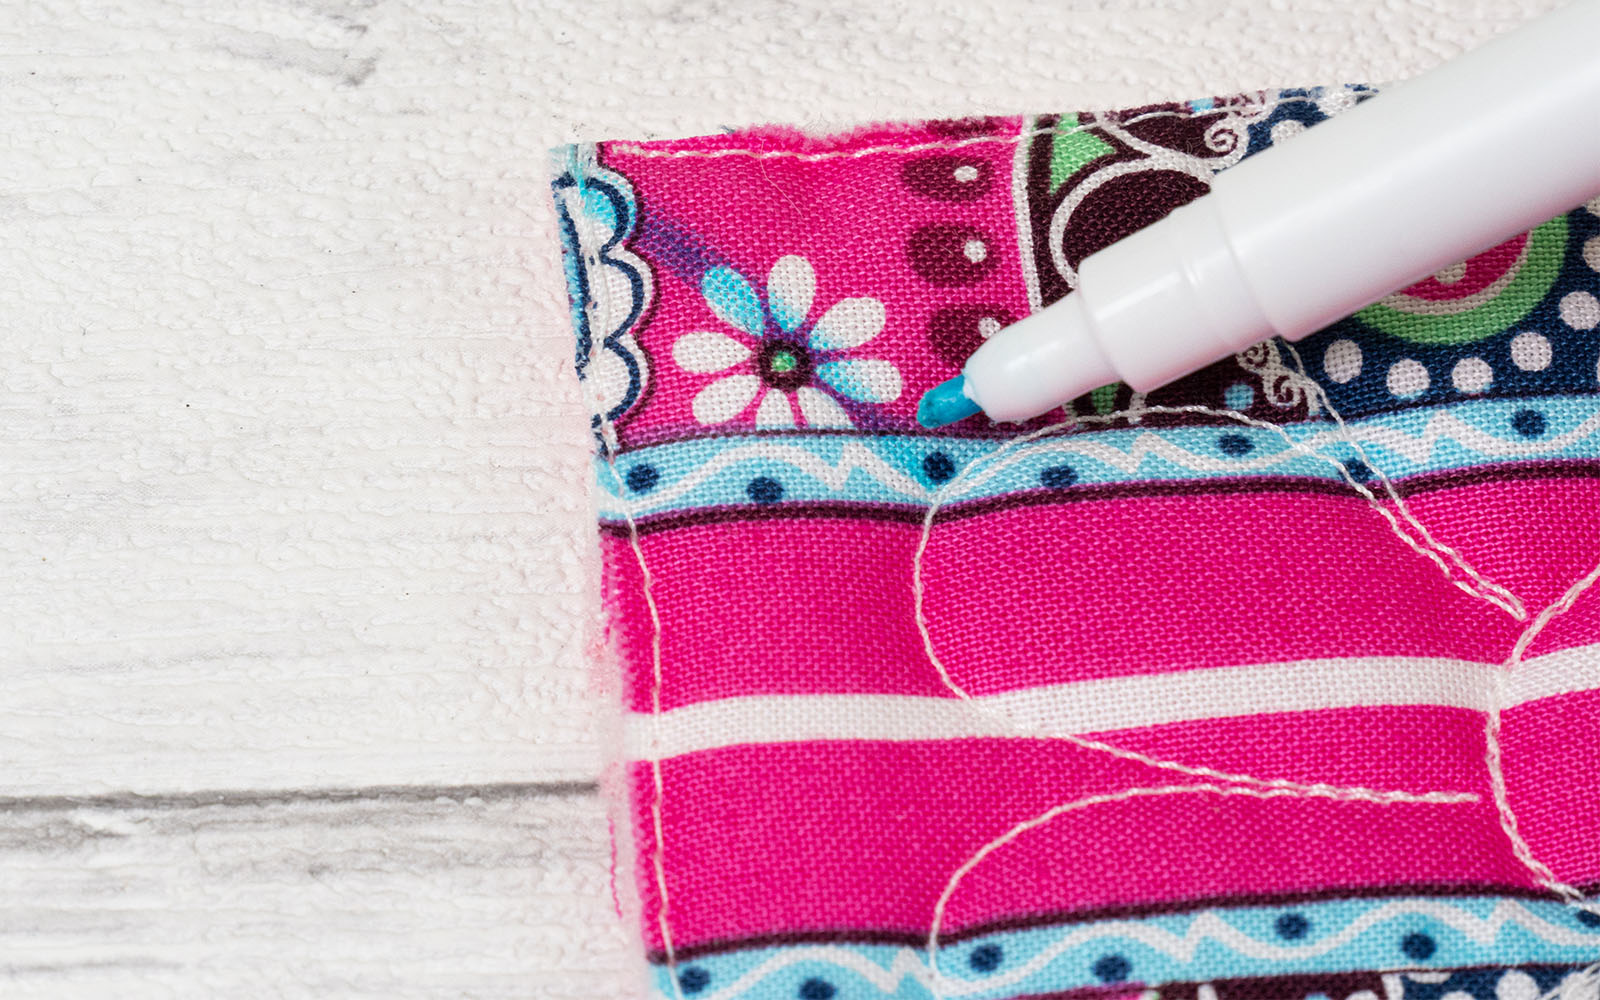
Step 1
On the wrong side of the quilt, draw a line at 45 degrees in each corner. Use the 45-degree line on your quilter’s ruler as a guide.
Tip: if you are binding a table runner or a topper, the corners might not be 90 degrees. The rule is to divide the corner in half. Draw your line on that value. Remember that when you fold the binding around the edge to sew the next edge, the fold in the binding will only reach partly to the edge you have just sewn.
Step 2
Fold your long binding strip lengthways in half, wrong sides of fabric facing inward and raw edges matching.Place a pin roughly 30cm from the one end of the binding strip.
Lay the quilt with the right side up, and on any edge, find the centre. Match this mark with the pin you set in the binding. Align the raw edges of the folded binding with the edge of the quilt and pin up to the first corner.

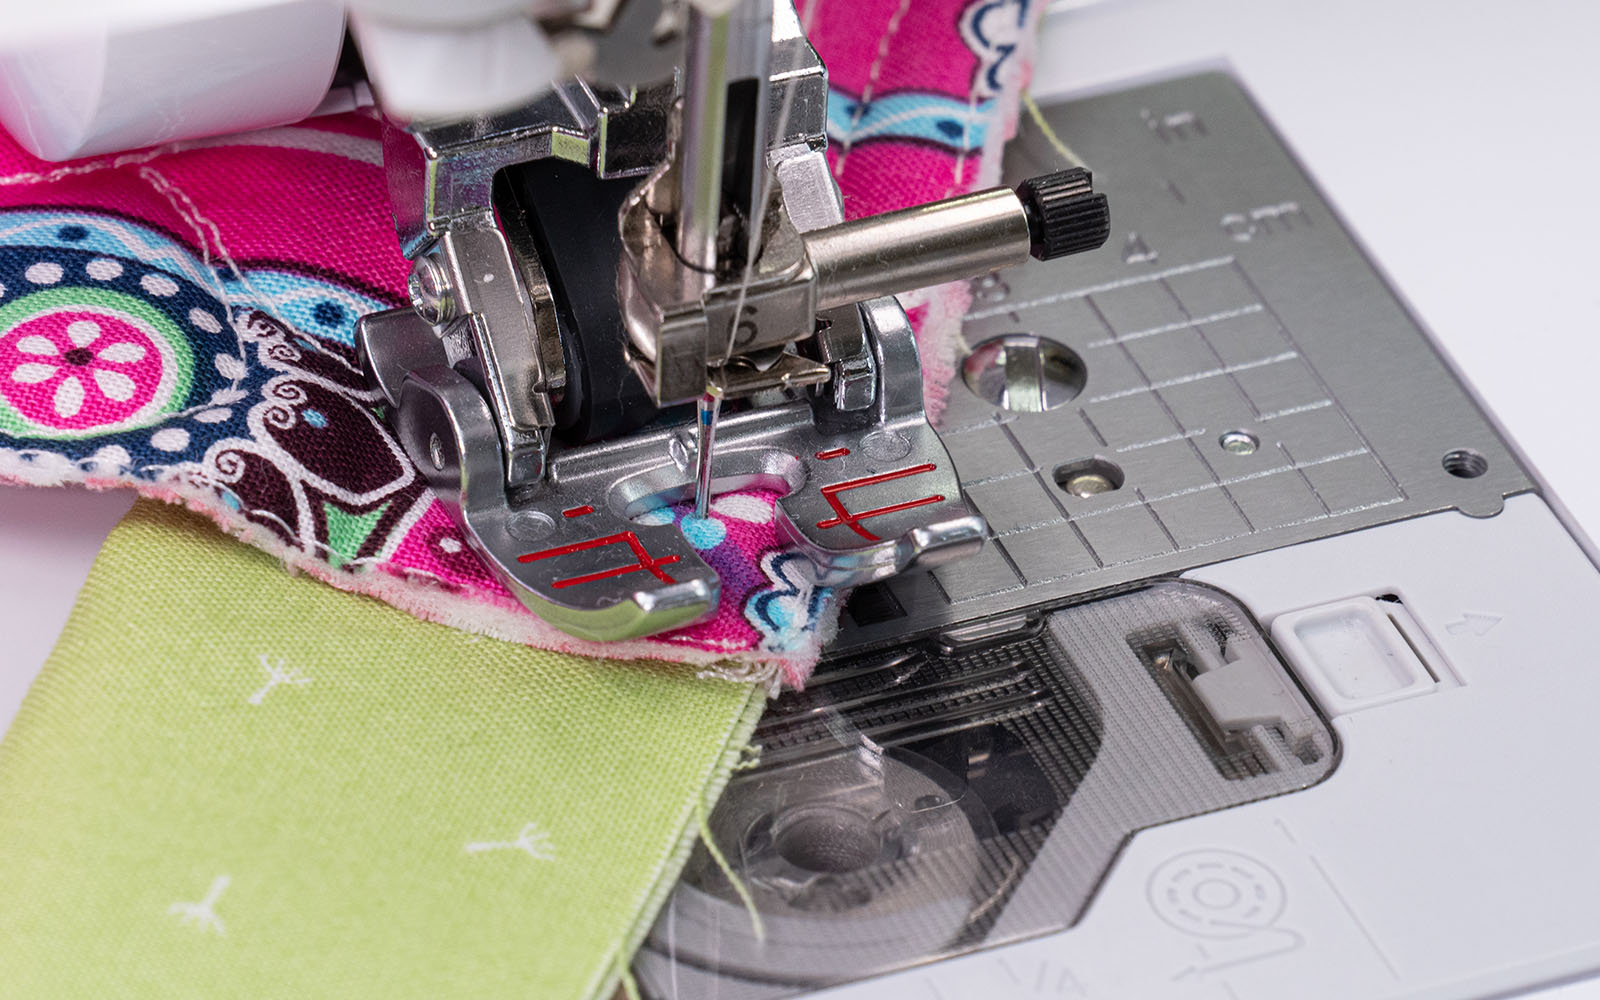
Step 3
Place the quilt in your sewing machine with the backing facing up. Start sewing where you placed the first pin and sew until you reach the 45-degree line in the corner.
Step 4
Stop with the needle down, lift the presser foot and turn the quilt so you can sew on the drawn line and straight into the corner.Reinforce the stitching in the corner, cut the thread and take the quilt out of the machine.
Step 5
Pull the binding edge around the corner and align it with the next edge of the quilt, leaving no slack in the corner.Place a temporary pin or clip about 10cm along the edge to keep the binding in place while you arrange the corner.
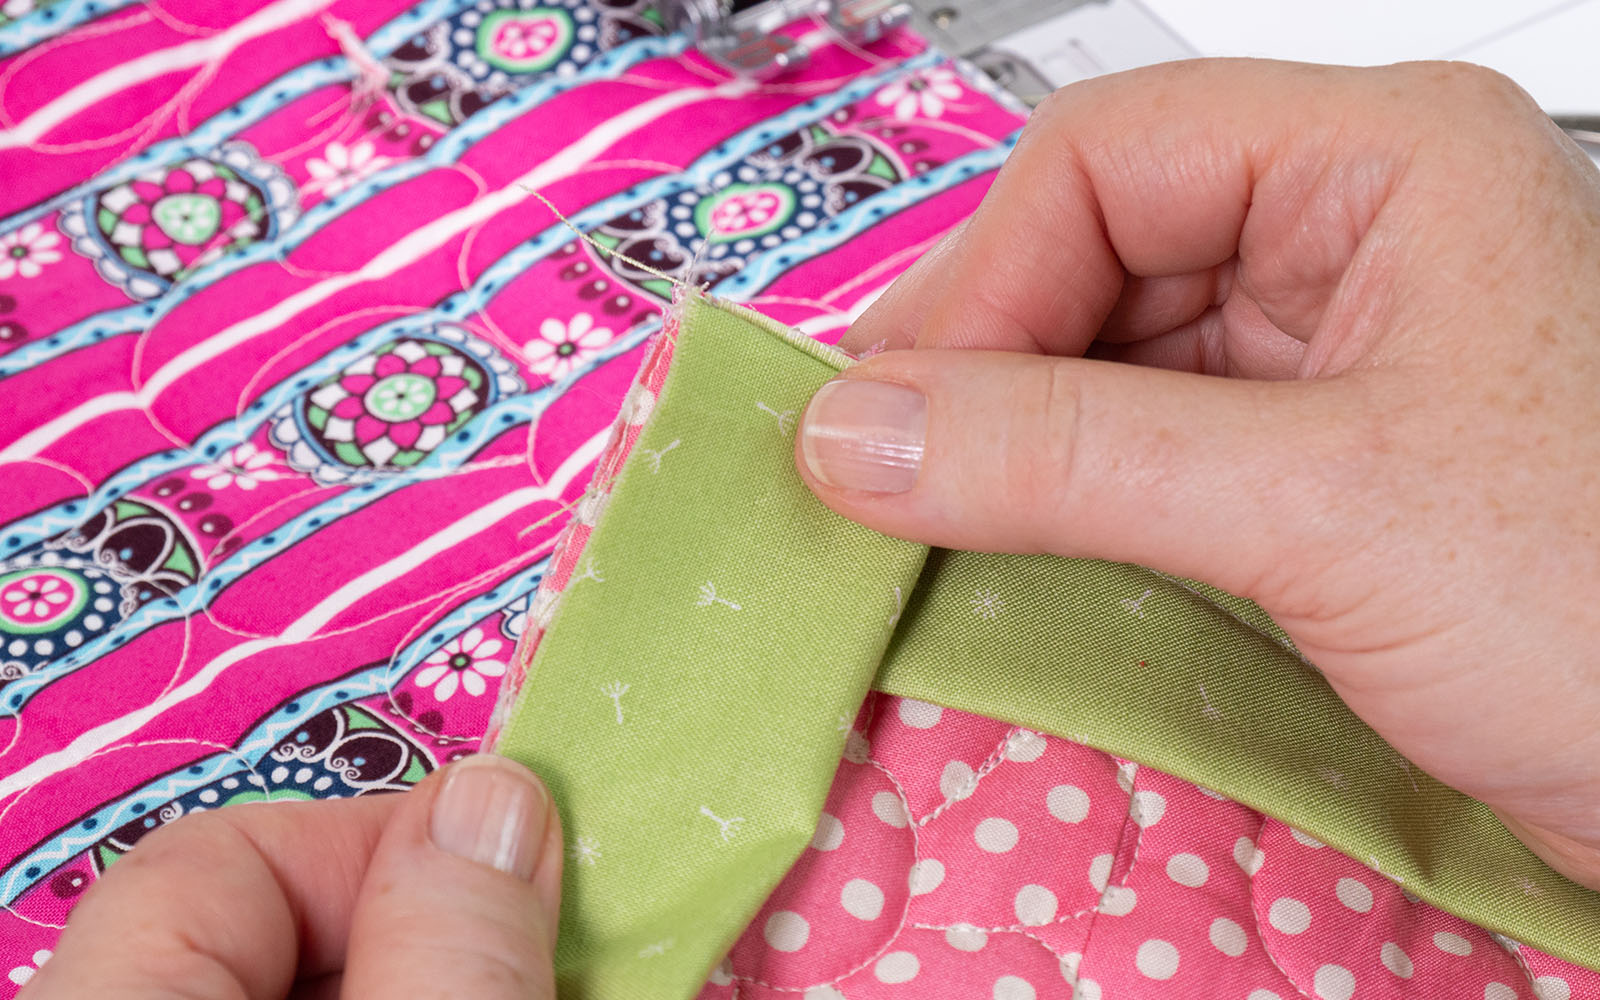
Step 6
Fold the excess that has now formed in the corner up towards the sewn edge: there should be a fold in the binding that lies exactly on the edge you have already sewn. If you lift the corner, you should see another fold, at 45 degrees with the corner of the quilt.
Step 7
Pin or clip the fold in place, and while making sure the edges of the quilt and the folded binding are all aligned, start sewing at the top of the next edge of the quilt, catching the folded edge in the seam. Continue in the same way, shaping each corner, until you have turned the last corner.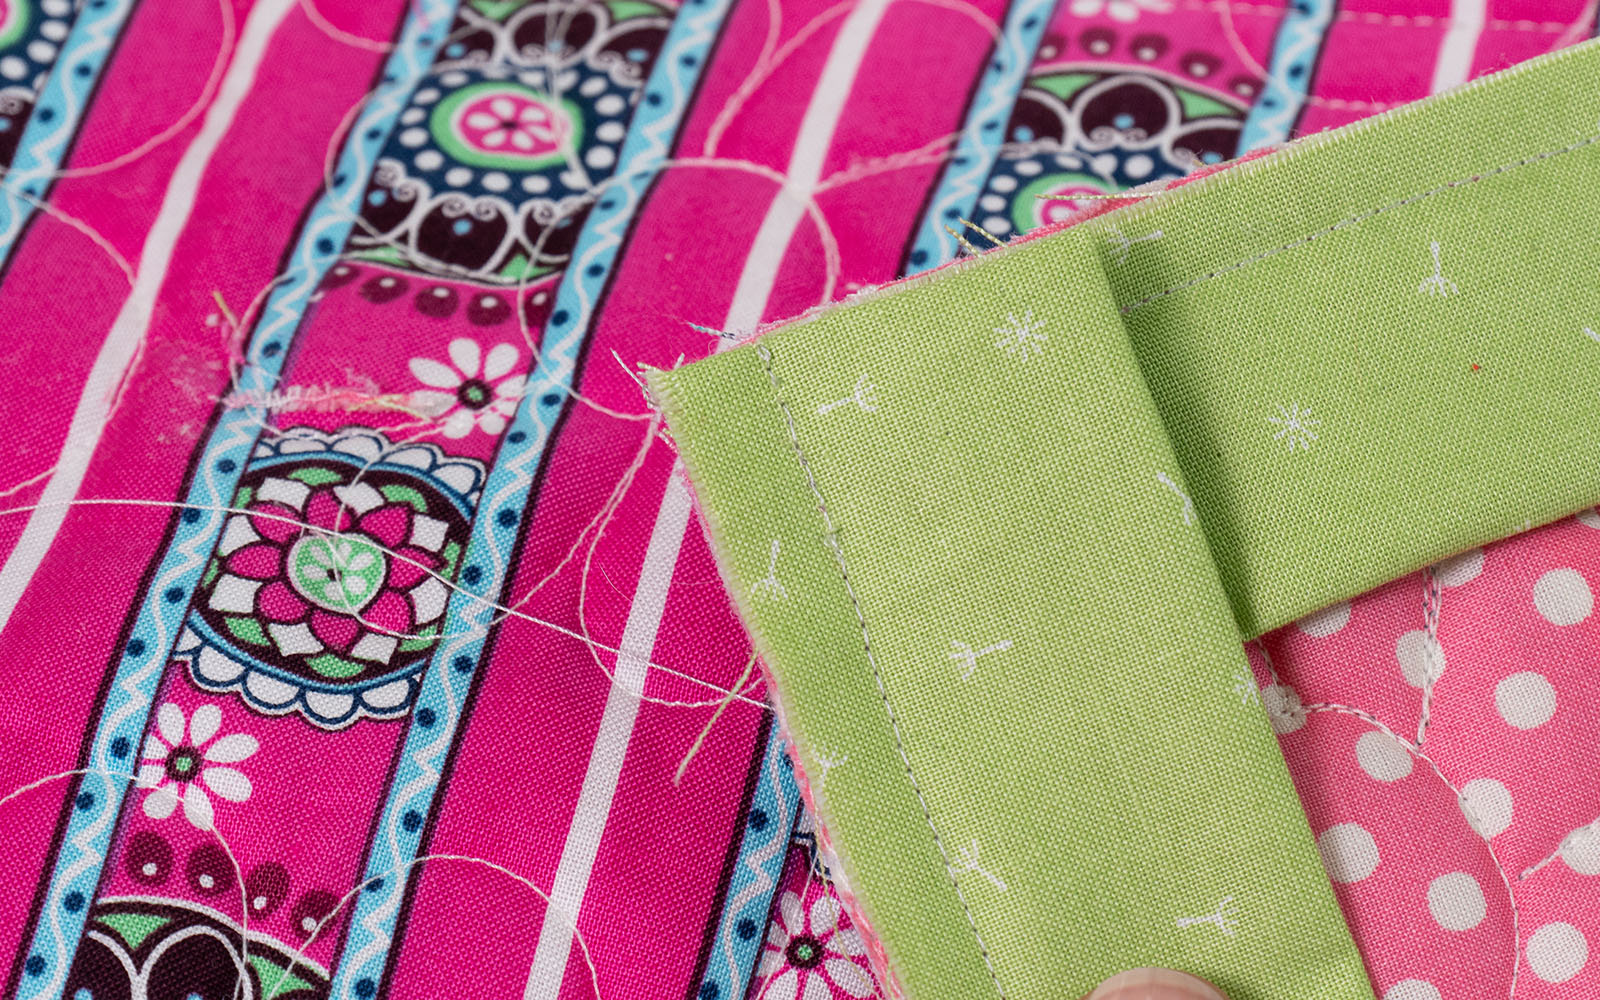
Step 8
Sew about 10 to 15cm along the last edge and stop. Cut the thread and take the quilt out of the sewing machine. Lay it flat on the table, with the right side of the quilt facing up. You should have at least 30cm between where you started sewing the binding and where you stopped sewing after you have gone all around the quilt.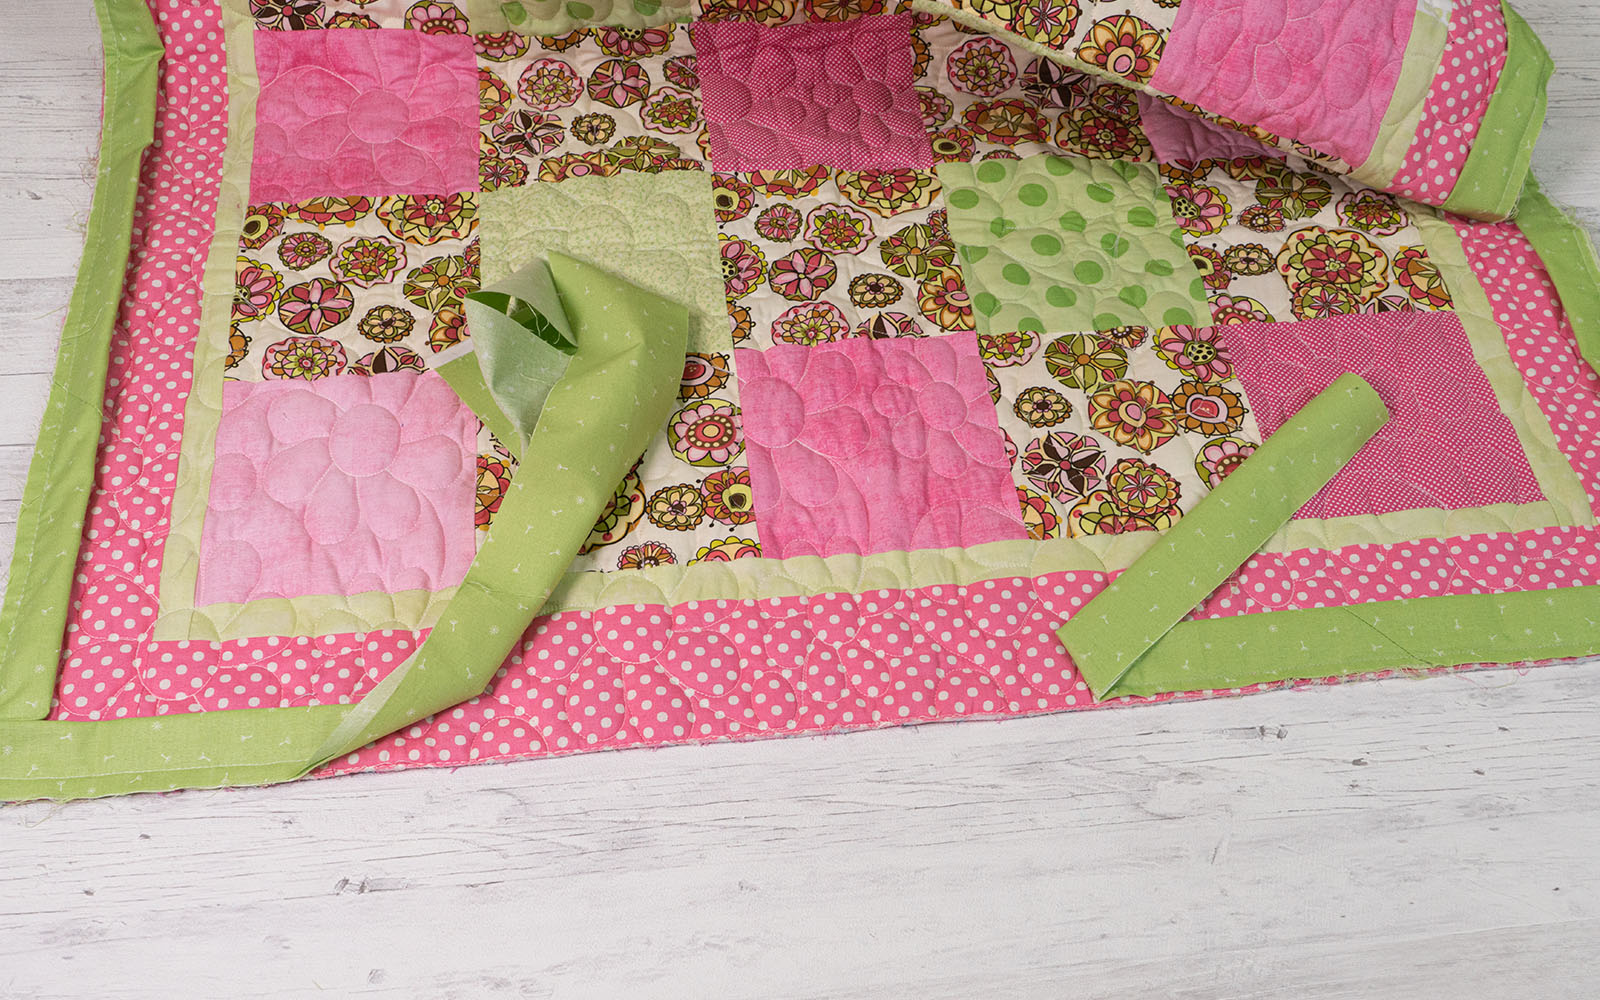
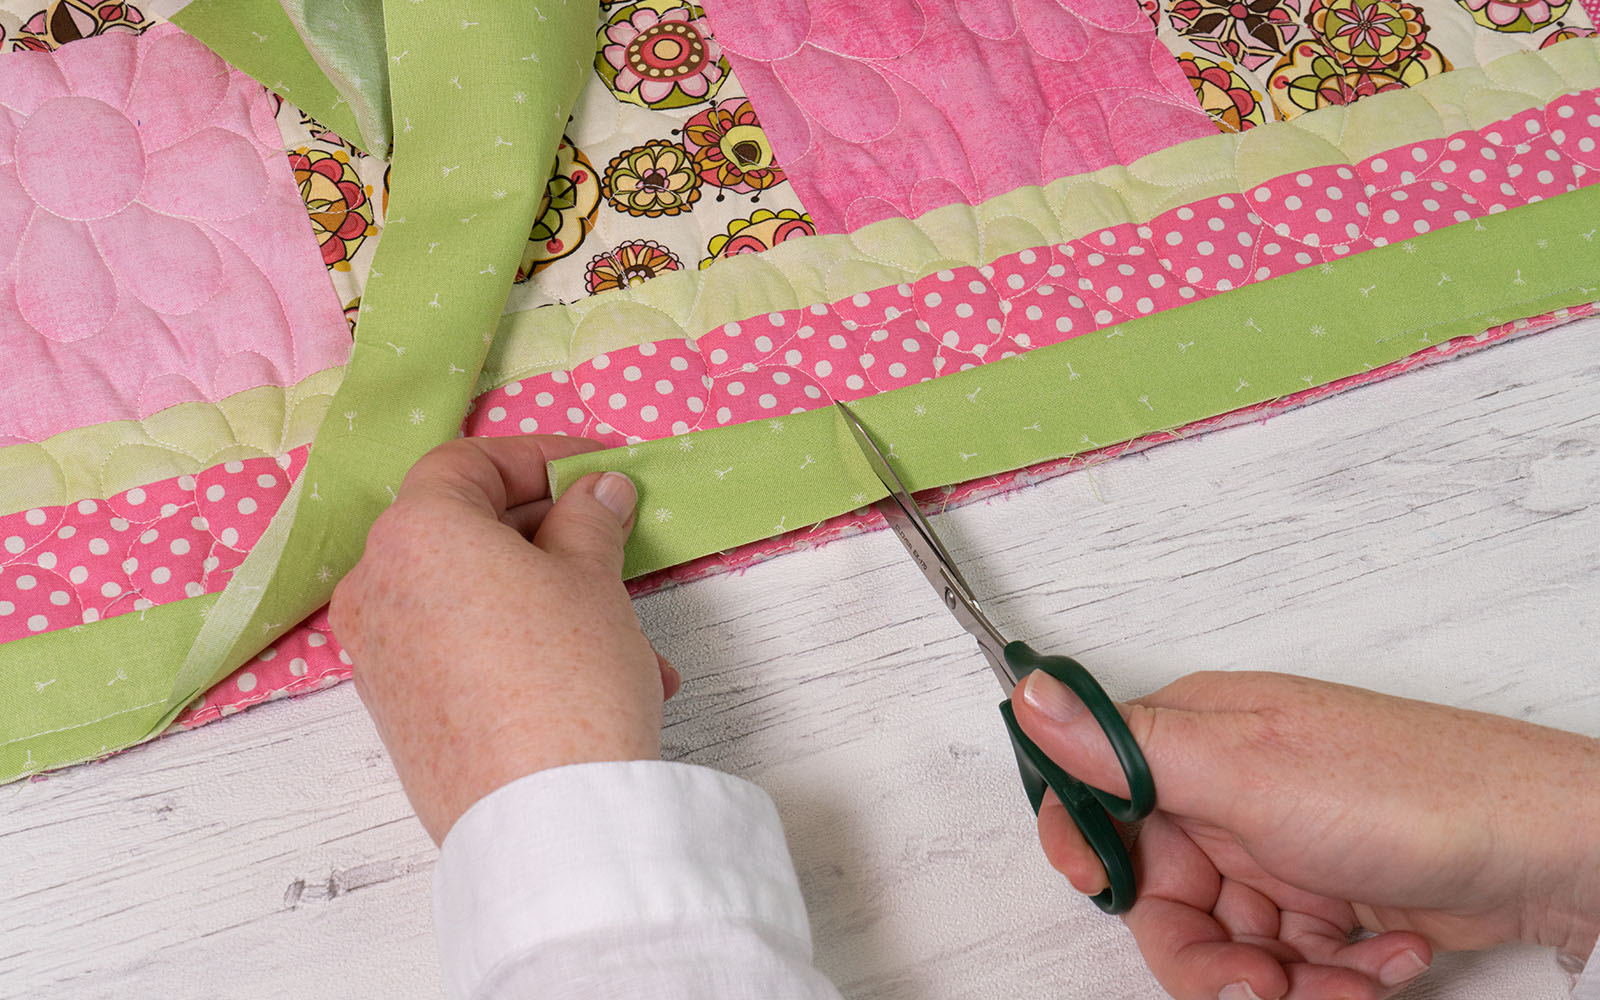
Step 9
Align the right-hand side strip of loose binding with the quilt edge and trim it about halfway towards the mark where the sewing on the left-hand side part of the binding starts.Cut at right angles with the folded binding.
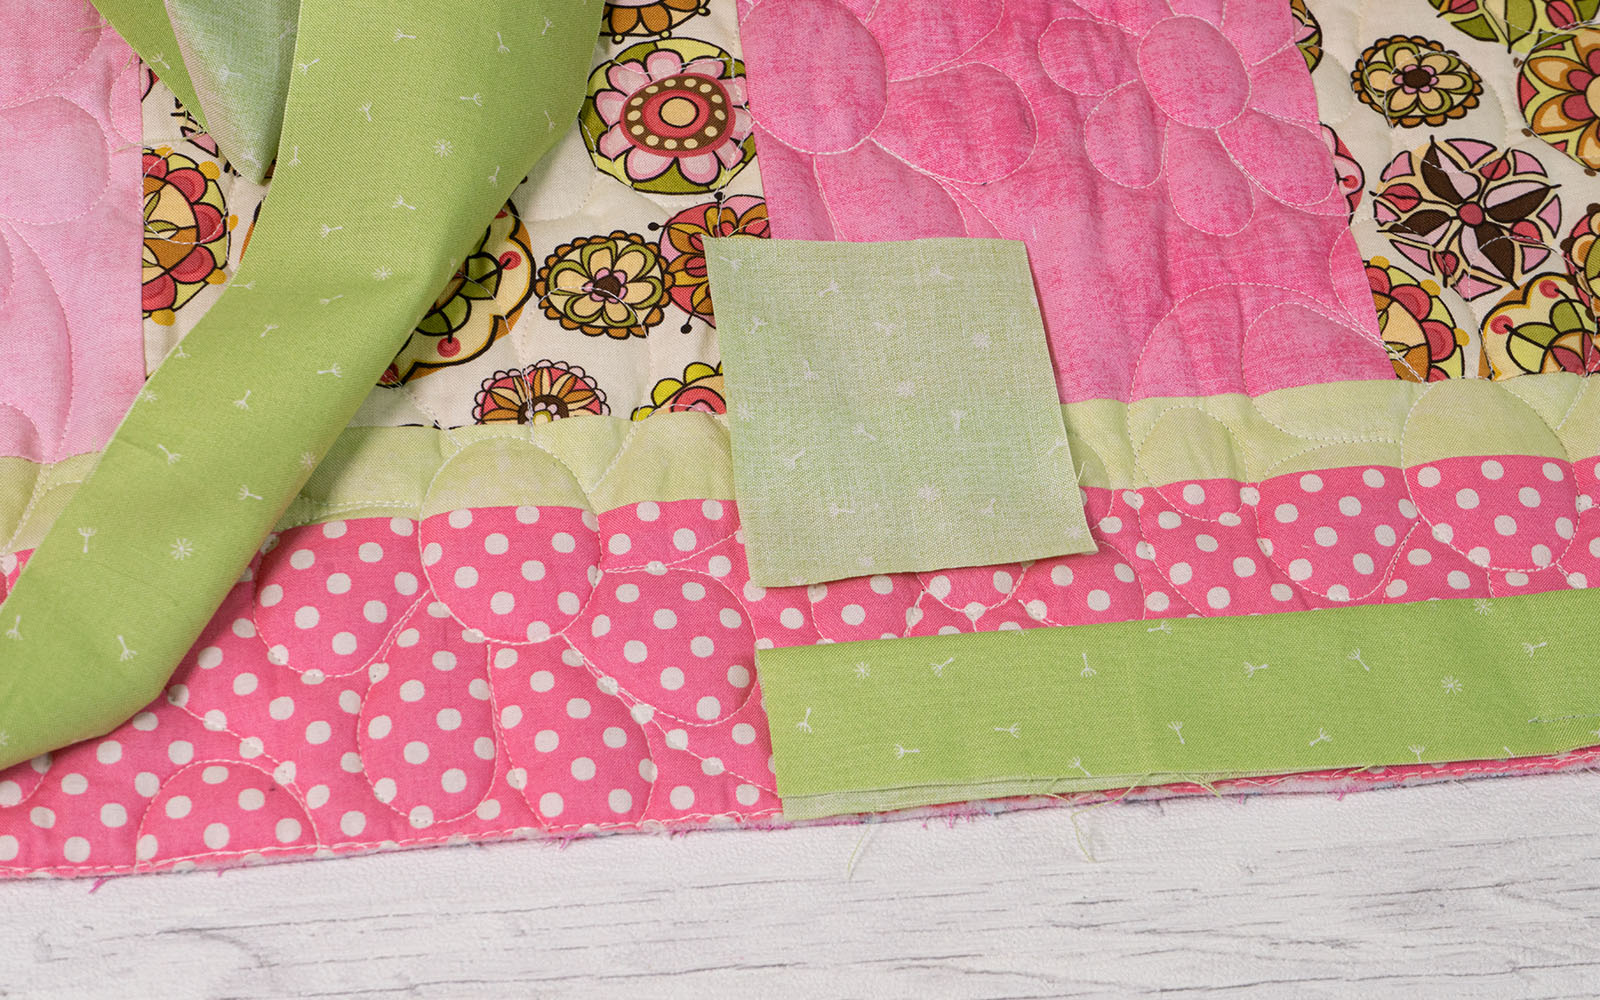
Step 10
Unfold the piece you have trimmed off. Turn it at 90 degrees, so the trimmed edge is in line with the edge of the quilt.Lay it flat, with the left edge in line with the end of the binding you have just trimmed.
Step 11
Lay the left-hand piece of loose binding over the trimmed piece, so they overlap. Trim the top piece in line with the right-hand side edge of the guide piece that was trimmed off the end of the first piece of binding.You will have the two loose ends overlapping each other the same distance as the width the strips were cut before you have sewn them together.
Step 12
Join the ends by turning one end only 90 degrees. Match the corner facing up, and each short edge on a long edge. Pin and draw a line from corner to corner, then sew and trim. Press the seams open. Pull the binding straight and fold raw edges on each other. The binding will fit exactly in the gap! Sew the remainder of the binding to the quilt.
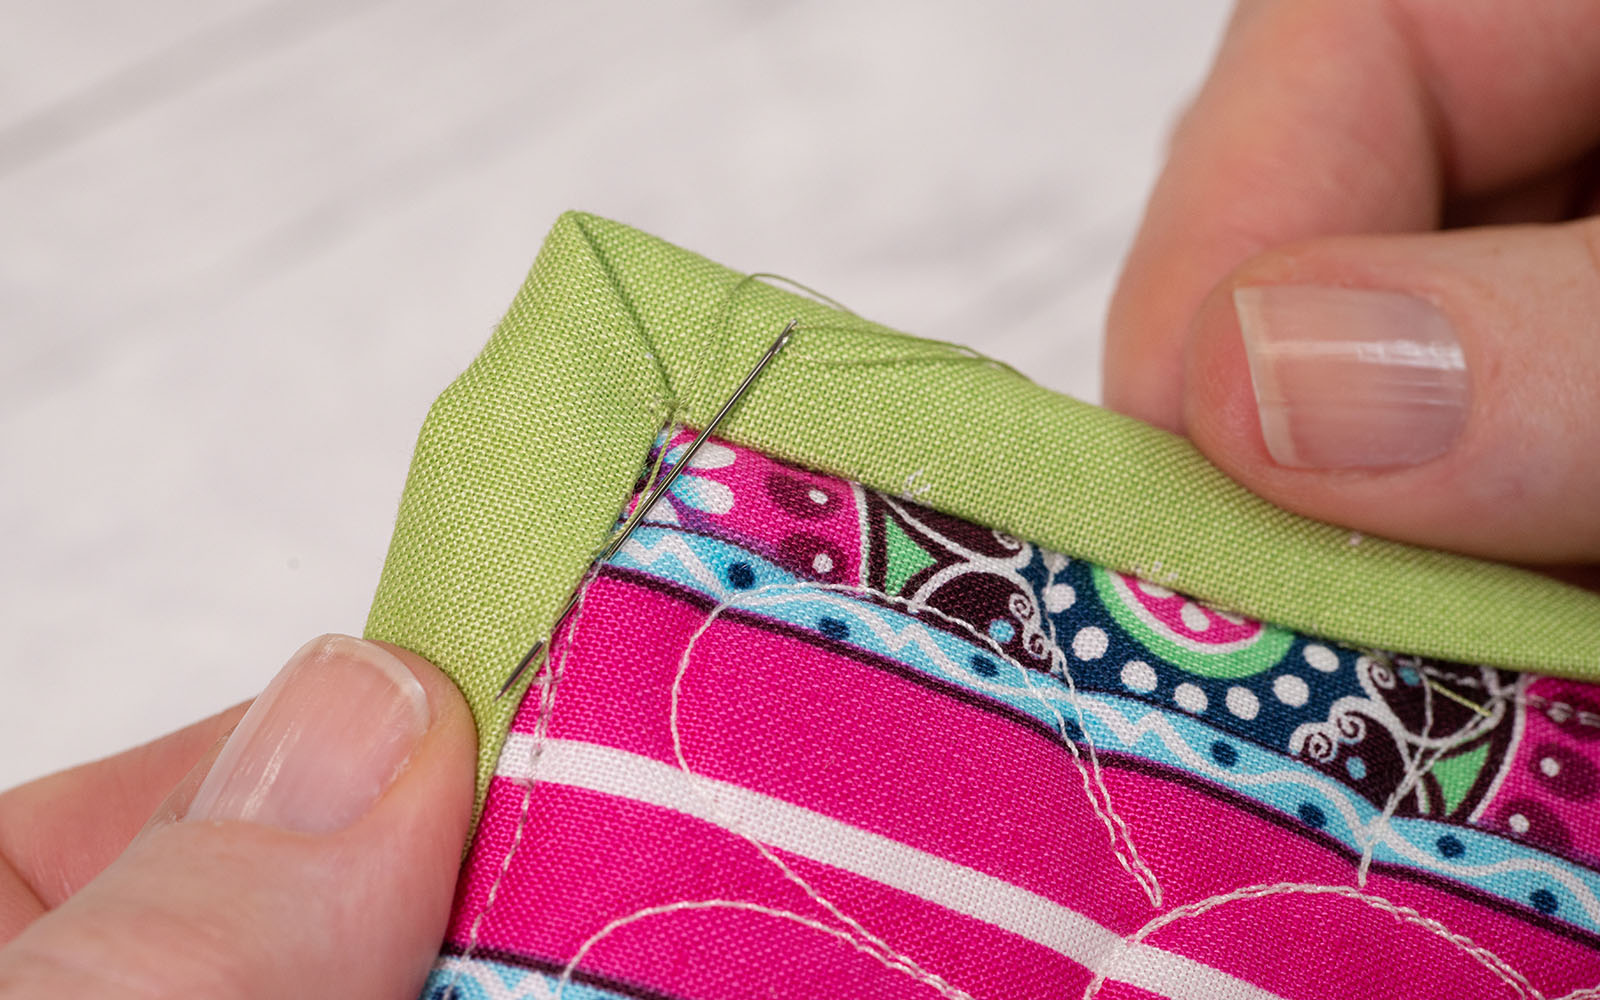
Step 13
Fold the binding to the back and hand sew the fold to the stitching with invisible slip stitches.
To get those neat, sharp mitred corners, make sure to sew all the way to the end of the edge before folding the next edge over.
Have you tried it?


