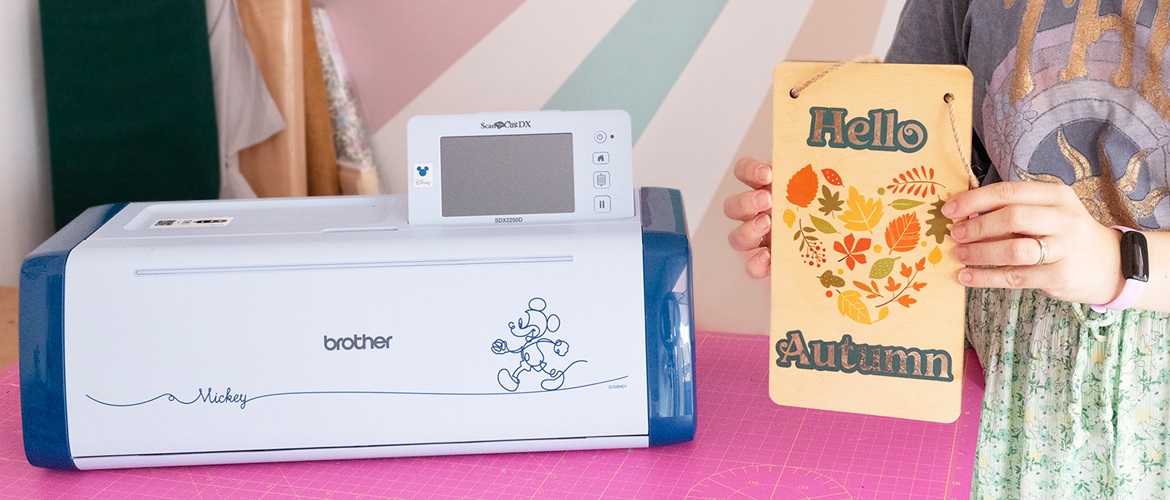
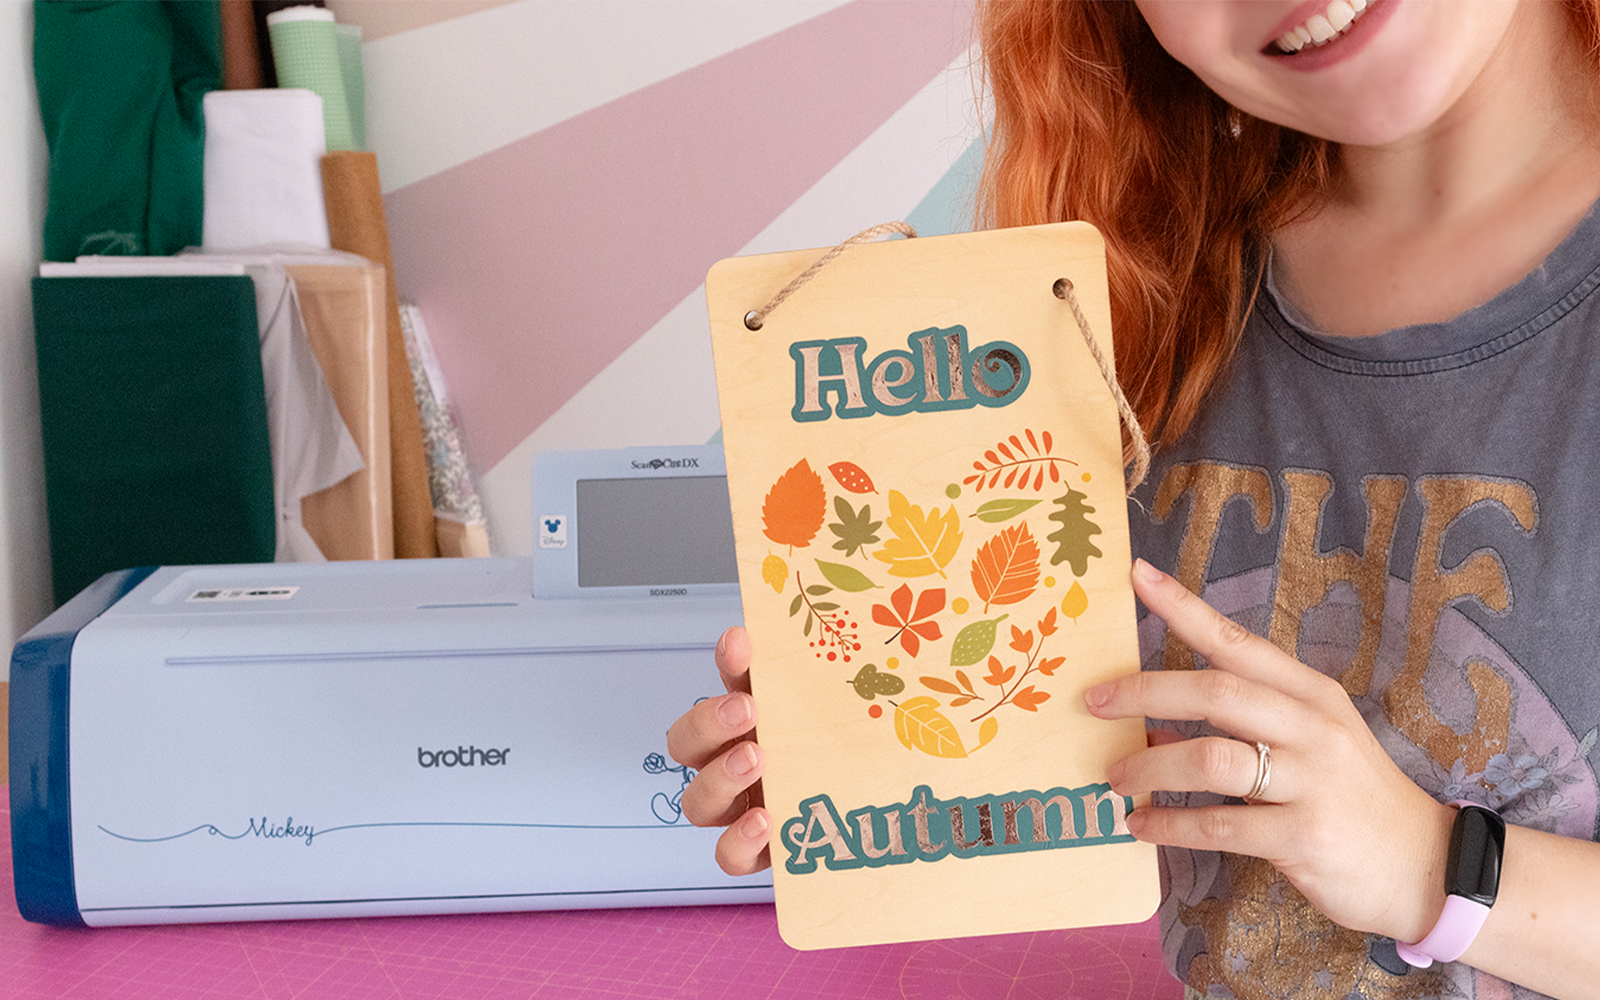
Autumn plywood wall hanging


Bring autumn indoors with this beautiful wooden wall hanging!
In this project, we show you how to sublimate a design onto a plywood sign using the Brother Sublimation Printer SP1.We also cut the words ‘Hello Autumn’ with the Brother ScanNCut machine in heat transfer vinyl (HTV) and added them to the sign to continue the autumnal vibe.
This project is beginner-friendly, combining sublimation with vinyl cutting to create a cute seasonal home decoration.
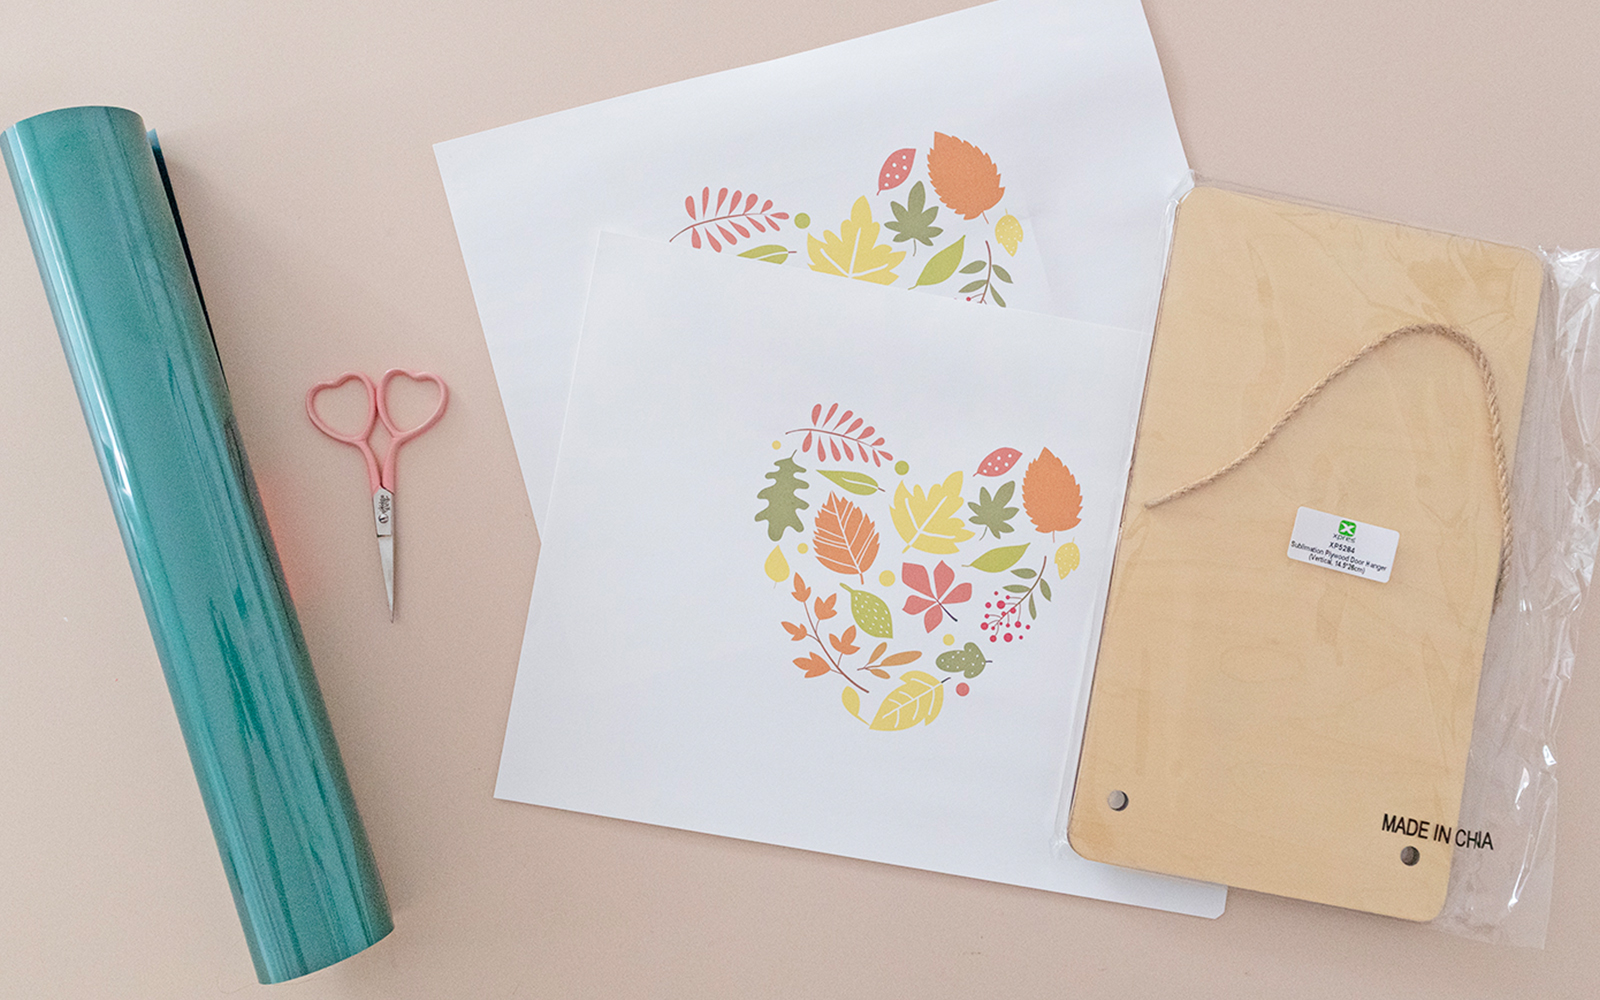
Materials needed
- Sublimation design from Artspira (there are loads to choose from - I selected a lovely, leafy heart-shaped print)
- Heat transfer vinyl (HTV) in green and gold
- Plywood sign (sublimation coated)
Equipment needed
- Artspira App*
- Brother Sublimation Printer SP1
- Brother sublimation paper
- Brother ScanNCut machine
- Standard cut blade or vinyl blade
- Standard cut mat or low tack mat
- Weeding tool
- Brayer tool
- Scissors
- Heat press or iron
- Heat-proof mat
- Heatproof paper
- Heatproof tape
Download the cutting file for the words here
How to
Step 1
Choose an autumn themed design for sublimation on Artspira. There are hundreds of gorgeous designs to choose from.
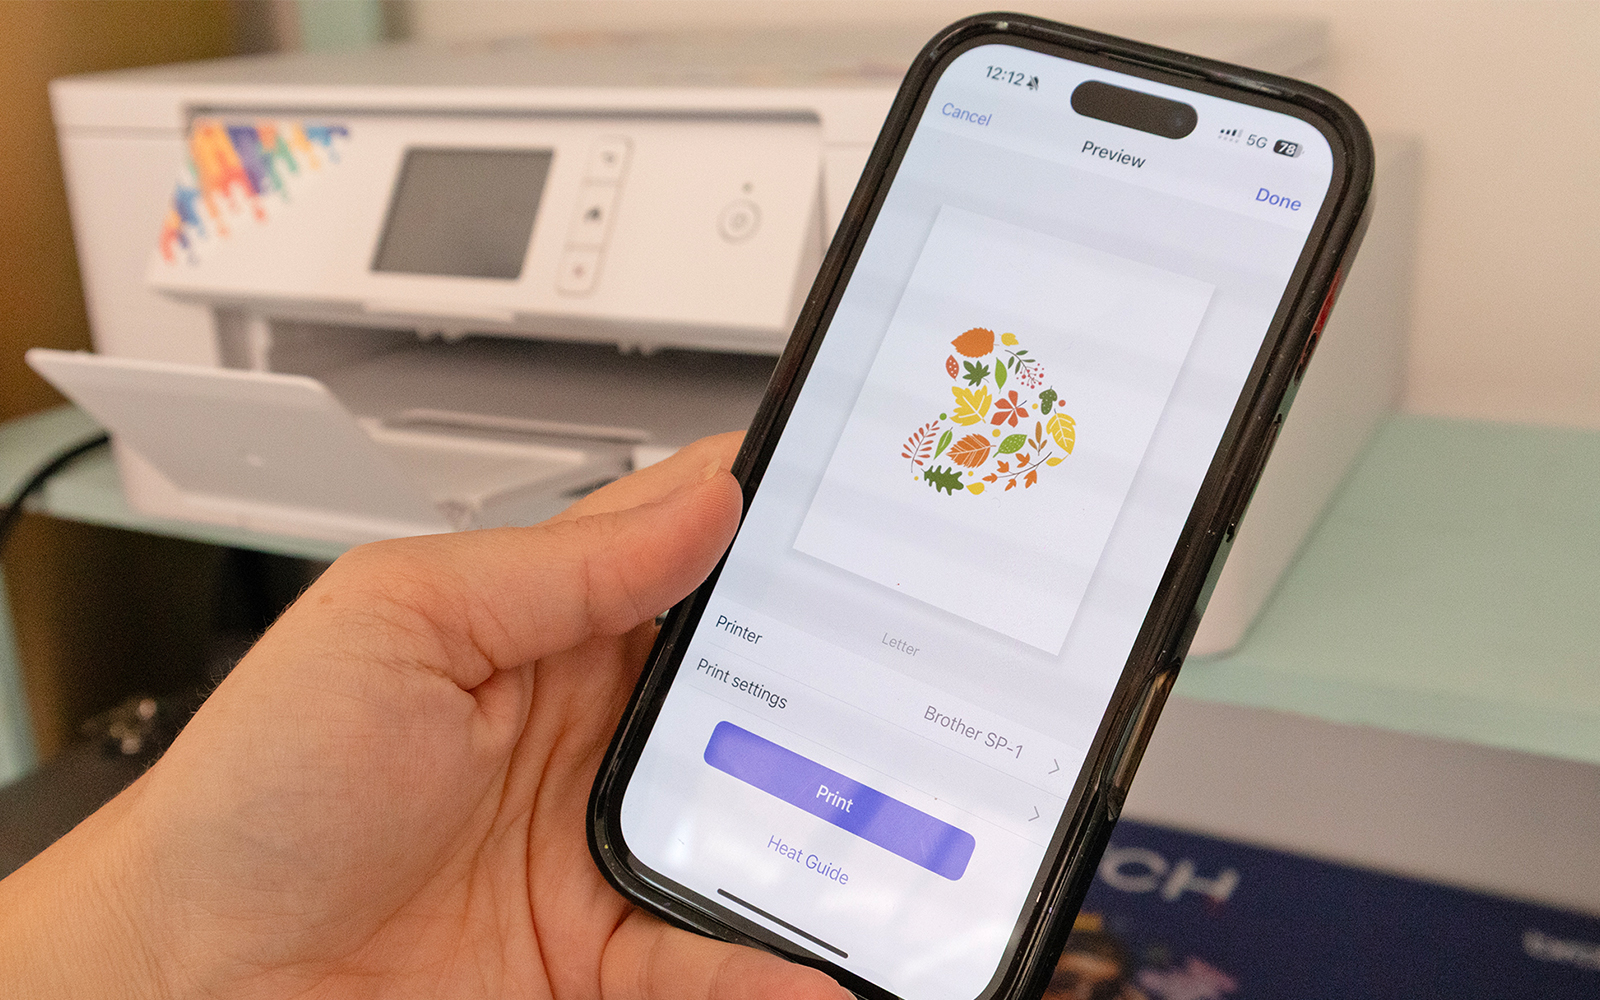
Step 2
Print your design onto the sublimation paper using the Brother Sublimation Printer SP1. You can print from your phone using the Artspira App.Place the sublimation paper with the cut corner on the bottom right and the printing surface facing down in the printer tray and print the design. If you aren’t using Artspira, make sure your print settings have the design flipped (mirrored).
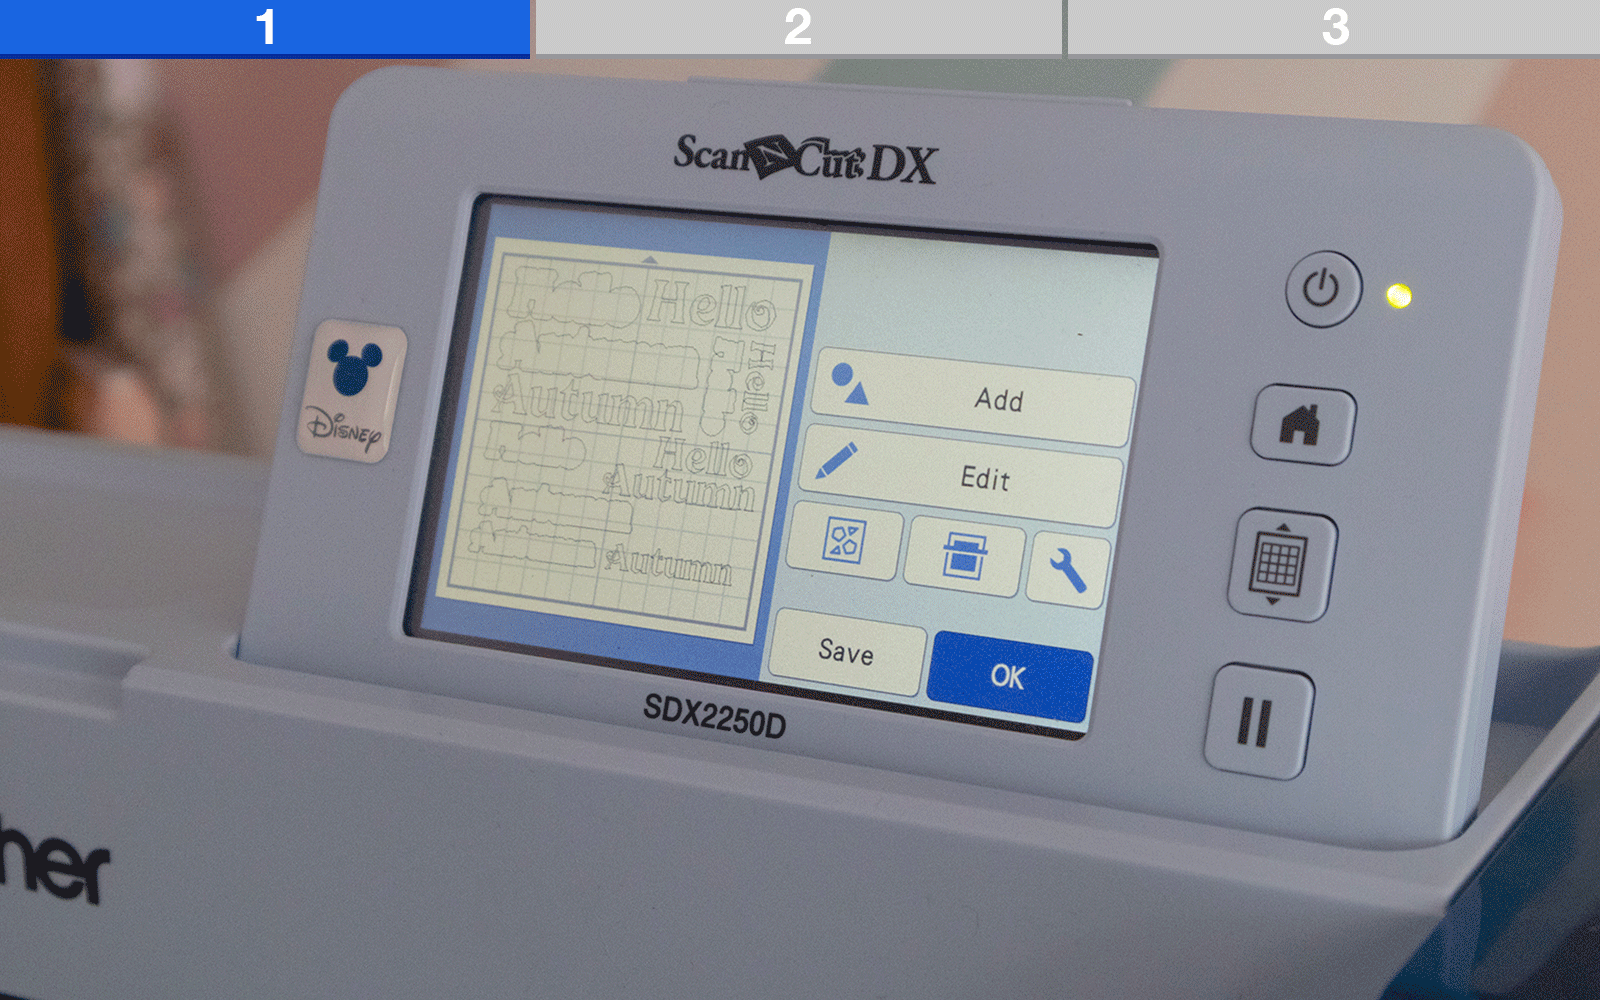
Step 3
Download the text cutting file using the blue button above. There are a few size options to choose from. Choose the one suitable to the size of your plywood sign.You can save cutting the file you have chosen onto a USB drive and then transfer onto your ScanNCut. Or you can open it in CanvasWorkspace (desktop or tablet) and then transfer wirelessly.
Open the file on your ScanNCut, press on it to select the design and then press the ‘mirror’ icon. This flips the text, which is needed when working with HTV.
If you want to add your own text instead, use the ScanNCut or Artspira to create a cutting file – just remember to flip the text before you cut it!
If you don’t have a ScanNCut, add text you your sublimation design and skip on to Step 6.
Step 4
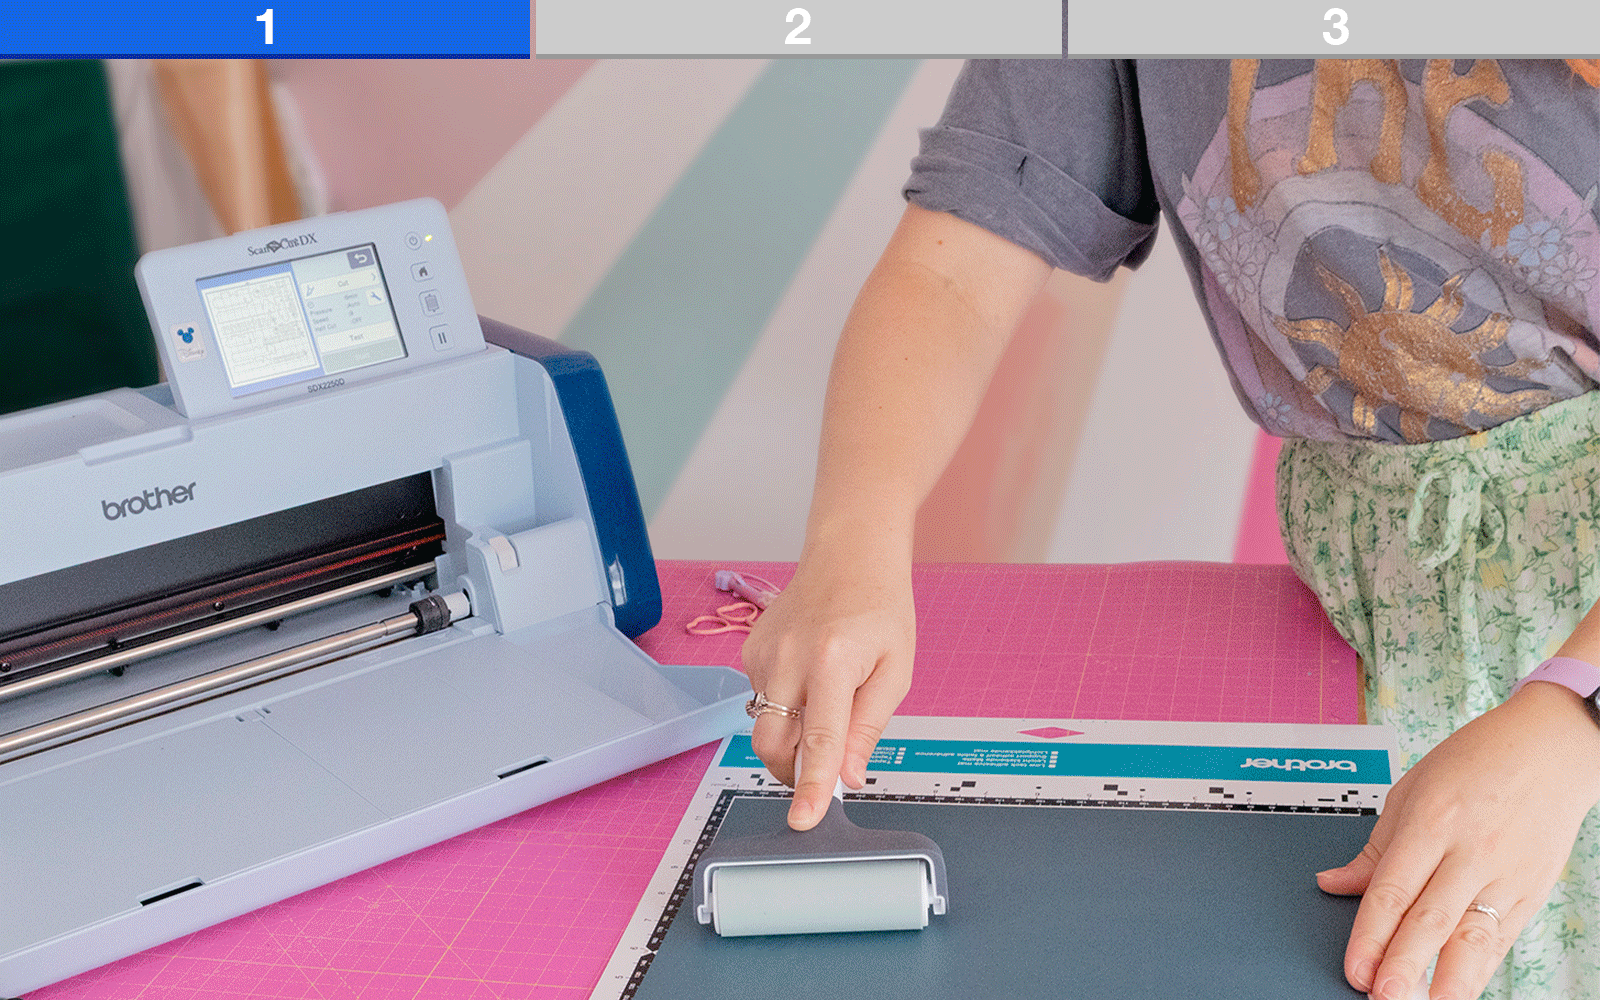
Place your HTV with the shiny side down onto the ScanNCut cutting mat. Use a brayer tool to remove any air bubbles and to make sure the HTV is adhering to the mat.Load the mat into your ScanNCut, select ‘Half Cut’ and do a test cut. I always do a test cut to make sure the cut pressure is correct.
Once you’re happy with the test cut, you can go ahead and cut out the design.
Step 5
Remove the vinyl from the cutting mat. Peel the mat away from the vinyl to prevent the vinyl from creasing and then repeat Step 4 with the gold foil HTV.
Step 6
Preheat the heat press to 190°C or the iron to the three dots or ‘Cotton and Linen’ setting. Lay the plywood on a heatproof mat or ironing board and pre-heat the plywood sign for 5 to 10 seconds.
Cut around your sublimation print and lay it print side down onto the plywood. Use heatproof tape to tape it down onto the wood to stop it from slipping.
Step 7
Lay a piece of heatproof paper over the wood and press for 45 to 50 seconds. Keep the heat press/iron still, or you will smudge your sublimation design.
Allow the sublimation paper to cool before peeling it away to reveal your design.
If you’re unsure, you can perform a small test piece on the back of your wood first.

Step 8
Weed the excess vinyl from the two pieces of HTV to reveal the word design. Then place the green coloured layer onto the sign first with the shiny backing facing up.
Cover with heatproof paper and press for 10 seconds at a heat of 140°C. Allow to cool before peeling the plastic backing sheet off.
Lay the sheet with the gold coloured words over the green words, cover with heatproof paper and then press for a further 10 seconds.
Allow to cool again before peeling the backing sheet off.

Step 9
Tie the rope through the holes at the top if your wooden sign is going to be hung, and there you have it.
You now have a beautiful seasonal decoration that combines sublimation and HTV vinyl. Hang it on your wall, display it on a shelf, or even gift it to a friend in a ‘boo basket’ to spread some autumn warmth.
Remember to tag both me and Brother if you make this, we love to share your work to inspire others.


