How to: achieve perfect cushion covers with piping and invisible zippers


An invisible zipper and piping add a touch of class to cushion covers. Let me show you how to get them to look professionally done.
Invisible zippers AND piping together do sound daunting, but read on, and take your cushion game from great to God level.
You might recognise the cushion we’re using in this project as the Little Schoolhouse Cushion. If you’d like to use this pattern to embroider or appliqué your own cushion, you can download it free here.
Materials needed
- Cushion cover front and back (not sewn together)
- Invisible zipper
- Piping to go around cover plus 10cm
- Matching sewing thread
Equipment needed
- Sewing machine
- Piping foot
- Adjustable zipper and piping foot
- Narrow zipper foot or the standard zipper foot that comes with your machine
- Concealed zipper foot
- Overlocker (optional)
- Snips or trimming scissors
- Clips or pins
- Hand sewing needle
How to
Step 1
Apply the decorative stitching or embroidery to the cushion cover front piece as desired. We embroidered ours. If you’d like to do the same have a look at the ‘Little schoolhouse’ blog post here.
Press and cut front and back to size. If the fabric frays, or if you have multiple layers, you could overlock or zigzag the edges.
Tip: I like cushions to have a nice, snug fit. I always cut the fabric to the same size as the cushion inner.

Step 2
On the front of the cushion cover, pin the piping with raw edges aligned to edges of pillowcase. At the corners, snip into the piping’s seam allowance (snip up to 1mm from the seam on the piping) and shape the piping around the corners. Pin or clip in place.
Step 3
Join the piping – unpick about 10cm of the piping at each end, join the fabric (just as you would join a quilt binding) and then trim the cord so the two ends just meet.
You can wrap some tape around the cord ends if they are fraying.
Sew the two ends together with large stitches using a hand sewing needle and thread.
Tip: watch our handy video below to show you how to join the piping.
Step 4
With a piping foot or adjustable zipper foot, sew all around the piping to secure it to the cushion cover front.
Try to sew right next to the cord, but without sewing into the cord – a piping foot makes this much easier!
Step 5
Along the bottom edge of both the front and back cushion cover pieces, make a mark 3cm from the corners on the right side of the fabric. Open the invisible zipper and lay it along this bottom edge of the back of the cushion cover, right sides facing and the edge of the zipper tape aligned with the edge of the cushion cover (the teeth should be facing up, and away from the bottom edge.)

Step 6
With your normal zipper foot or a narrow zipper foot, baste the zipper tape in place – sewing between the marks made in Step 5.Tip: this step is not mandatory, but it does make the construction much easier. If you are a beginner, we highly recommend this step.

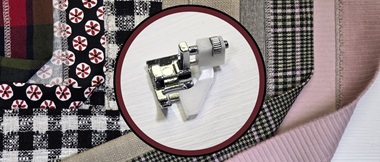
Step 7
Change to the concealed zipper foot and sew between the marks you made in Step 5, making sure your placement is correct for the foot to roll the zipper open while sewing. Tie off securely at start and end of this seam.Repeat with the other side of the zipper on the side with the piping, flattening the piping as you go. Close the zipper to check that your alignment is correct.
Tip: if you see any zipper showing on the right side, you did not sew close enough to the zipper teeth. If the zipper is laying straight, you can resew without unpicking.

Step 8
Close the zipper and place front and back of the cushion cover facing each other.
At each end of the inserted zipper, push the seam allowances up to face each other, and match the sides of the zipper tape to each other. Using your adjustable zipper foot, sew from the mark you made in Step 5 to the side of the cushion cover, tying off securely. The stitching should sit between the zipper and the piping.
Test to see that your zipper sits nice and flat, and the ends are concealed at the corners. When the zipper is closed, you should only see the puller.
Step 9
Open the zipper and with the piping foot or adjustable zipper foot sew all around the remaining three sides. Start and end on the short little seams made at the start and end of the zipper in Step 8. This way you will sew around all four corners.Sew as close to the piping as possible. Stop two stitches short of the corners with the needle down. Raise the presser foot and rotate your work 45 degrees. Lower the presser foot, sew three stitches across the corner, stopping with the needle down, raise the presser foot and rotate 45 degrees again. Lower the presser foot and sew to the next corner.
Tip: when sewing the three stitches across the corner, aim to sew into the piping tape but not the cord. You can sew backward and forward over the three stitches to reinforce the corner. This will prevent a hole in the corner of the cushion cover.

Step 10
Finish the raw edges with overlocking or zig zag stitch. Turn right side out and insert the cushion inner.