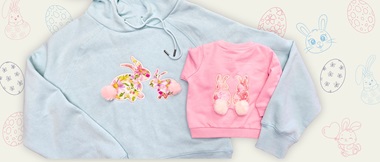
Colourful appliquéd Easter eggs

Add some colour to the season. Hang these in the window or sew them on table linen or clothing.

To make a freestanding egg with a hanging loop:
Materials needed
- Water-soluble fabric – 20 x 40 cm (for larger eggs 35 x 60 cm)
- Fabric for appliqués – 12 x 12 cm (for larger eggs 20 x 25 cm) for main colour and accent colour each (recommendations
- Medium weight fusible interfacing: two pieces of 12 x 12 cm (for larger eggs 20 x 25 cm)
- Brother machine embroidery thread in colours as per designs
- Backing fabric: 12 x 12 cm (for larger eggs 20 x 25 cm)
- Hanging loop: 10 cm of narrow ribbon per egg
Equipment needed
- Brother embroidery machine
- Embroidery frame
- Fine tipped curved scissors
How to
If you're new to appliqué and would like a little more explanation of how to approach your first piece (or just need to brush up if it's been some time!), then check out our handy How To here.For this project, we will not appliqué onto a garment, but make a freestanding egg with a hanging loop. The basic sequence will be the same, except you will use water-soluble fabric as your base fabric instead of a garment.
Preparation
Prepare all your fabrics. We recommend you press all fabric pieces so they are smooth and crease-free.
Fuse the interfacing to the wrong side of the background piece as well as the backing so they are ready to use.
Step 1
Download the designs and transfer to your embroidery machine.
Step 2
Hoop a double layer of water-soluble fabric. Insert the frame and sew the first step – the outline of the egg.
Step 3
Place the background fabric piece over the sewn outline, making sure it covers the full egg shape. Tape it down so the fabric does not move and sew the next step.
Step 4
Remove the frame from the machine but do not remove the fabric from the frame!
Trim close to the stitching without cutting through the stitching line. Place frame back into the machine.
Note: there is no edge stitch at this stage.
Step 5
Sew the next step, which is the placement line for the accent colour fabric.
Place the second fabric so it covers the outline area, tape it and sew the next step.
Trim as per previous step. The accents are left with raw edges, so there is no edge stitching around them..
Keep repeating this sequence for all the applique steps and embroidery steps until you reach the second last step.
Step 6 – final sewing steps
The last two colour changes are a straight stitch outline of the egg and then a satin stitch to cover the outside edges of the egg.
To create the freestanding pieces, turn the frame with the wrong side facing up.
Fold the ribbon double, tape in place at the top of the egg, then cover the entire egg outline with the second piece of stabilised backing fabric. Tape in place.
Carefully turn the frame over to the right side and insert into the machine, making sure the fabric does not move.
Sew the second last step (the egg outline) and trim the backing fabric away, taking care not to cut through the ribbon!
Sew the last step, the outline satin stitch.
Step 7
Remove the finished piece from the frame and trim the water-soluble fabric close to the edge.
Use an earbud dipped in water to dissolve the excess water-soluble fabric until it is not visible any longer.
Note: to make appliqués on garments or tableware, stabilise the item with an appropriate stabiliser. Sew the last two steps without placing fabric or a hanging loop at the back, and of course you will not cut around the egg!

Embroidery data
Swirly egg – small
Size: 64.4 x 85.2 mm
Stitches: 40 912
Colours: 4
Appliqué fabric needed: medium blue (background), very pale blue (highlight), bright pink (swirls)
Swirly egg – large
Size: 120.2 x 159.40 mm
Stitches: 7 985
Colours: 4
Appliqué fabric needed: medium blue (background), very pale blue (highlight), bright pink (swirls)
Spotty egg – small
Size: 61.4 x 83.6 mm
Stitches: 6 800
Colours: 5
Appliqué fabric needed: Bright orange (background), pale peach (highlight)
Spotty egg – large
Size: 114 x 155.6 mm
Stitches: 14 708
Colours: 5
Appliqué fabric needed: Bright orange (background), pale peach (highlight)
Wavy egg – small
Size: 62.8 x 86.2 mm
Stitches: 5 605
Colours: 5
Appliqué fabric needed: medium blue (background), pale blue (waves)
Wavy egg – large
Size:116.2 x 158.6 mm
Stitches: 14 250
Colours: 6
Appliqué fabric needed: medium blue (background), pale blue (waves)
Stripy egg – small
Size: 61.2 x 83.6 mm
Stitches: 30 519
Colours: 3
Appliqué fabric needed: Deep purple (background), pale purple or pink (highlight)
Stripy egg – large
Size:114.6 x 156.4 mm
Stitches: 8 150
Colours: 3
Appliqué fabric needed: Deep purple (background), pale purple or pink (highlight)
Fabric suggested
These fun designs can be stitched onto any fabric, bar really light fabrics.
Stabiliser required
Use the right stabiliser for your project. If you need help knowing which stabiliser would be best for which fabric, read our helpful blog post.
General design note
The colour codes in our designs are an indication only – get wild and creative with whatever colour variations you fancy! For a pleasing effect, choose thread colours to match your fabric choices.