Easy ScanNCut wall sign using built-in features


This wall sign is a simple project designed to be perfect for beginners.
You don’t need any additional hardware, cutting dies or design programs to use the ScanNCut; you can create lovely projects using built-in features on your machine.In this tutorial, I will show you how to utilize the built-in features of the ScanNCut machine to create a simple, beginner-friendly wall art project.
Materials needed
- Heat Transfer Vinyl (HTV) - scrap pieces would work well
- Wooden wall sign blank
- Ribbons or other notions (optional)
Equipment needed
ScanNCut hardware
- Brother ScanNCut – any CM Model
- Standard mat [CAMATSTD12]
- Standard blade [CABLDP1] and blade holder [CAHLP1]
OR
- Brother ScanNCut – any SDX model
- Standard mat [CADXMATSTD12]
- Standard auto-blade [CADXBLD1] and holder [CADXHLD1]
General tools
- Ruler
- Weeding tool
- Scissors
- Heat press or iron
- Heat proof mat, or ironing board
- Baking paper or silicone ironing sheet
Built-in ScanNCut designs
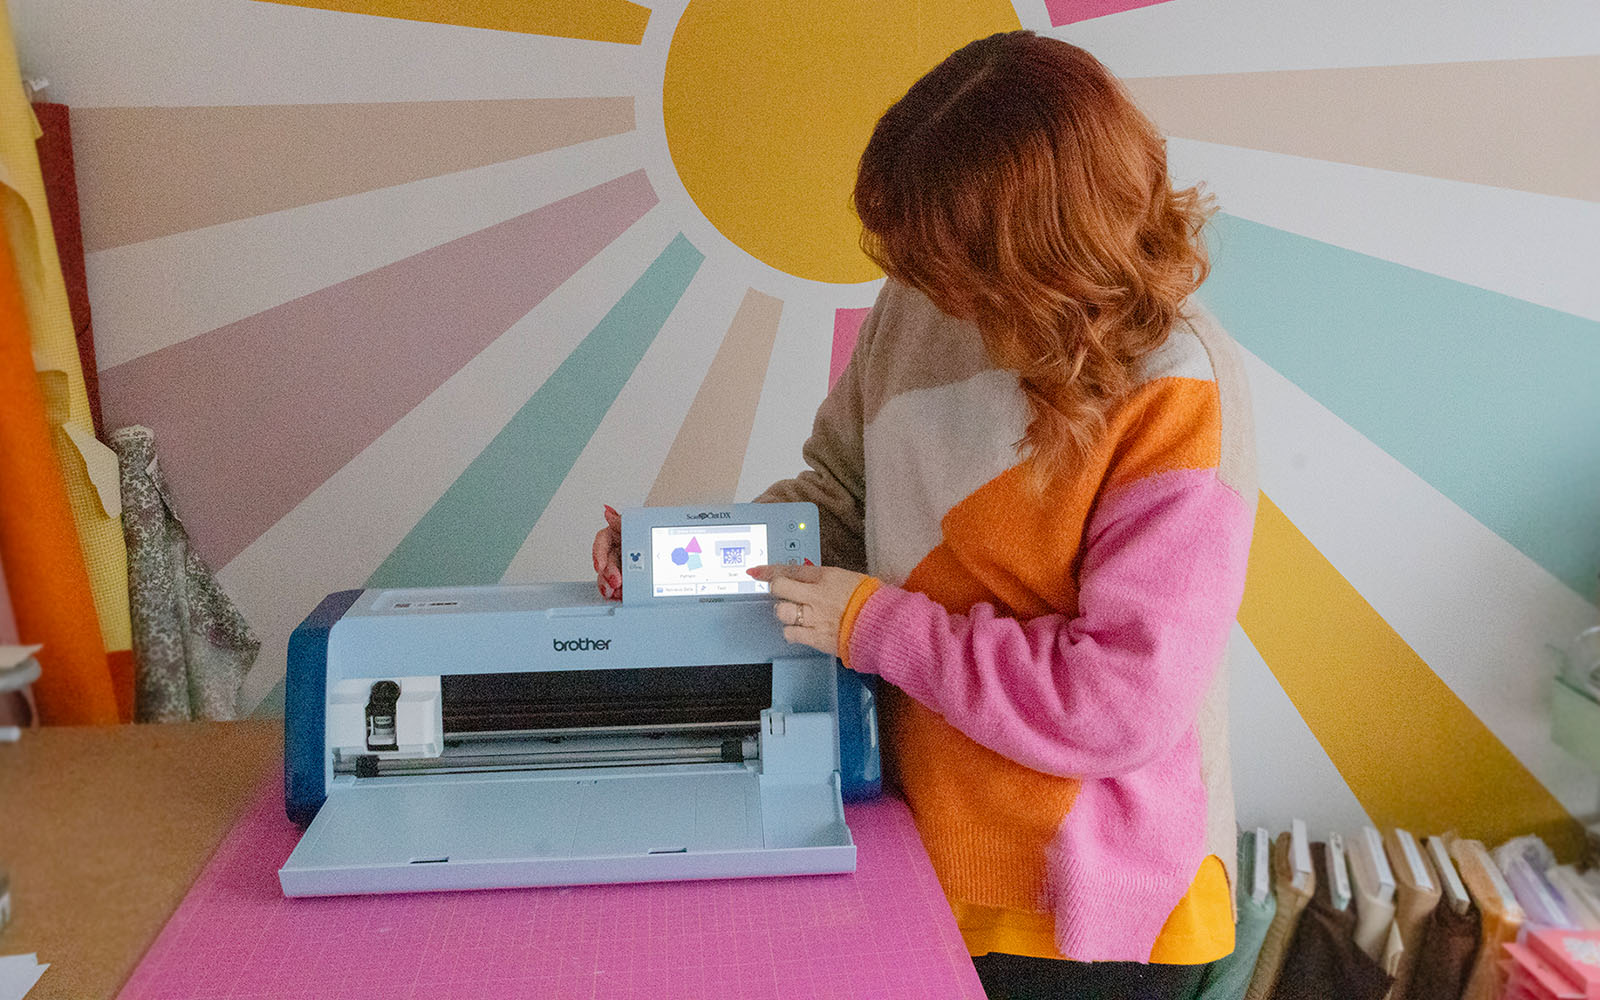
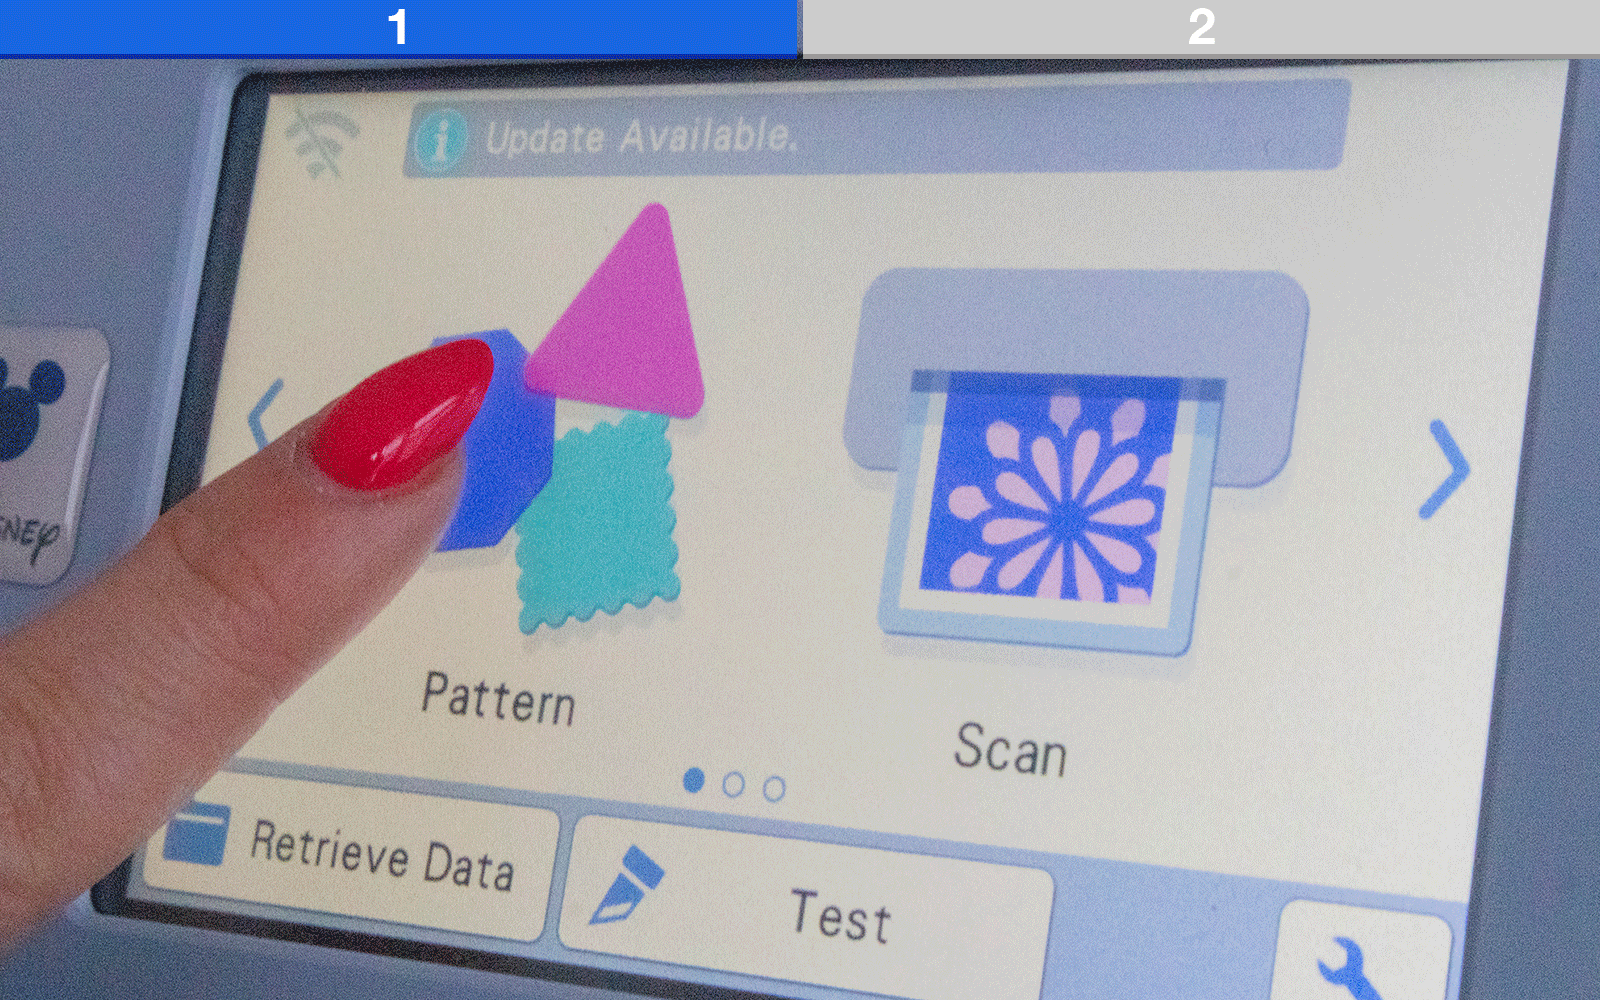
From the ScanNCut’s touchscreen, click on ‘patterns’ and you will see a great list of cutting patterns that you can use. Depending on which model of ScanNCut you have, the machine will be preloaded with basic shapes, nature-themed designs, Disney, slogans, animals, lace, borders, and a text function to insert words in a selection of different fonts.
How to
Step 1
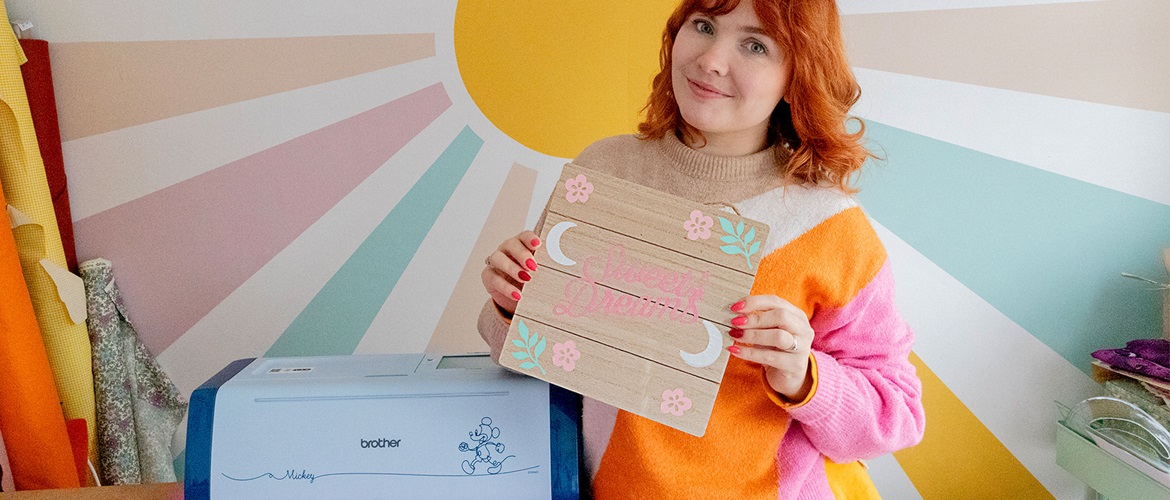
Once I had a good look through my Brother ScanNCut’s built-in cutting patterns, I decided on a feel for the wall sign, and wanted to mix some cute flower shapes, moons, a border, and then a slogan in the middle – which I thought would go well in my daughter's bedroom.
Step 2
Follow the process below for creating the design and adding elements to the mat/grid:
- Make sure to measure your base product, in this case the wall sign.
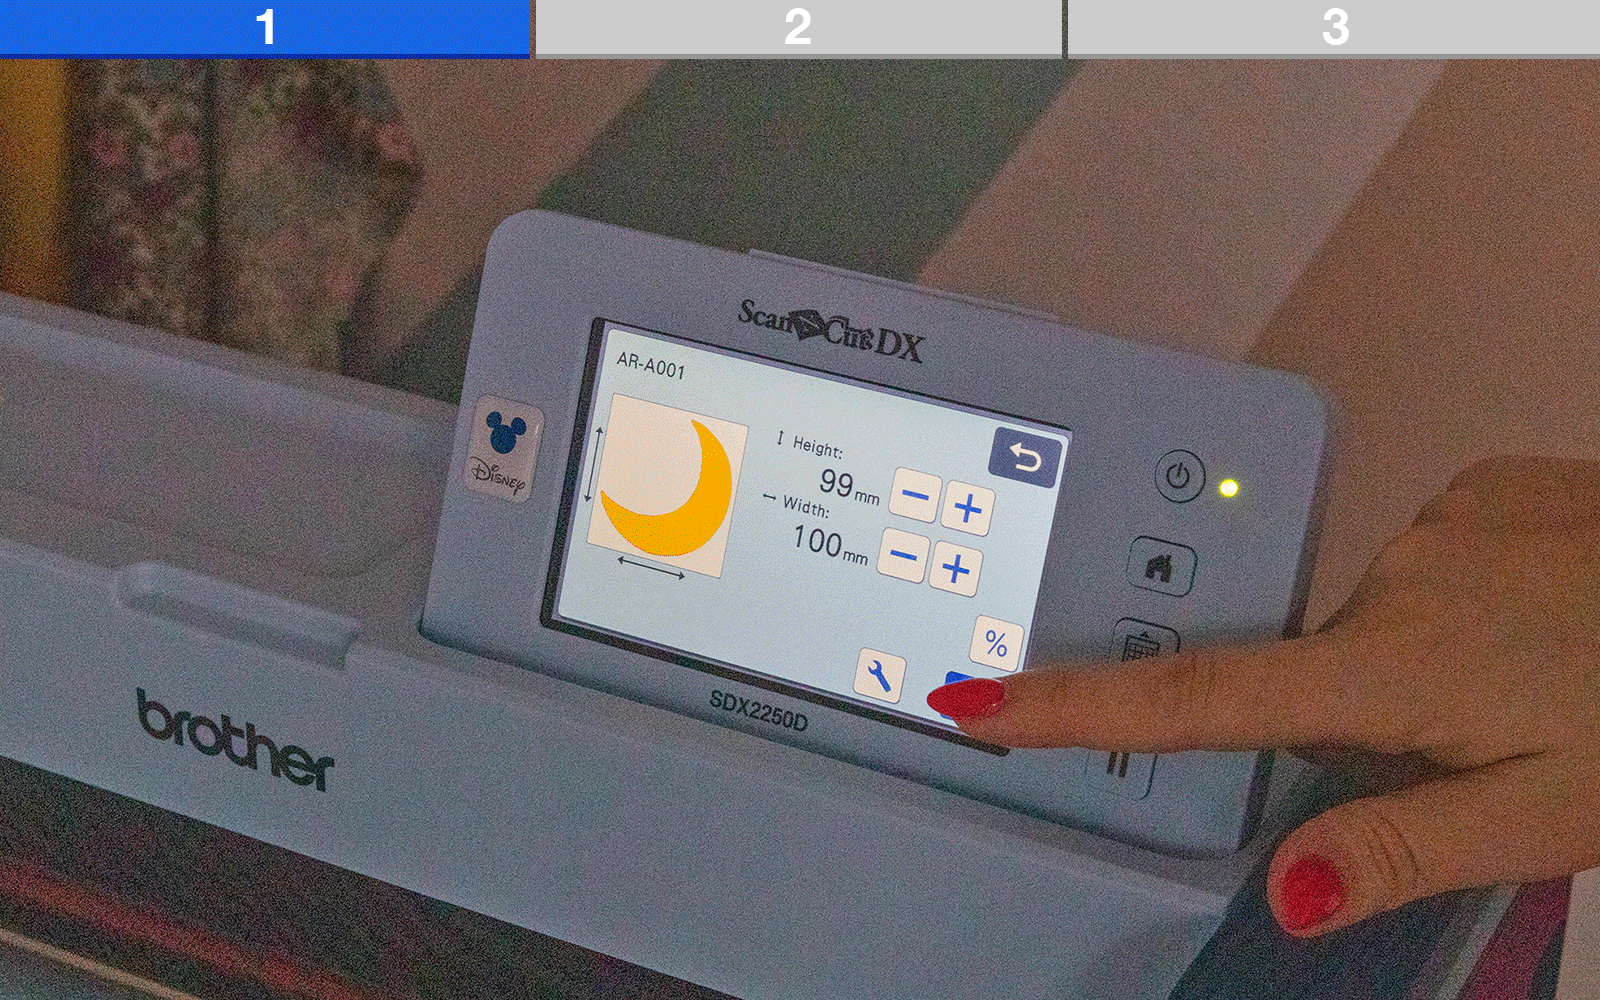
- Choose the shape you want using the ScanNCut’s touchscreen.
- Resize the shape to fit where you want it on the sign, use a ruler to check.
- Insert to the mat, if it is text, make sure to mirror it if you’re using HTV (the two arrows facing each other symbol will mirror the shape).
- Move the shapes around to fit as much as you can on your mat, and place them where you know you will cut them. I chose what shapes I wanted in specific colours and moved them around on the screen knowing that they would be cut in one colour.
Step 3
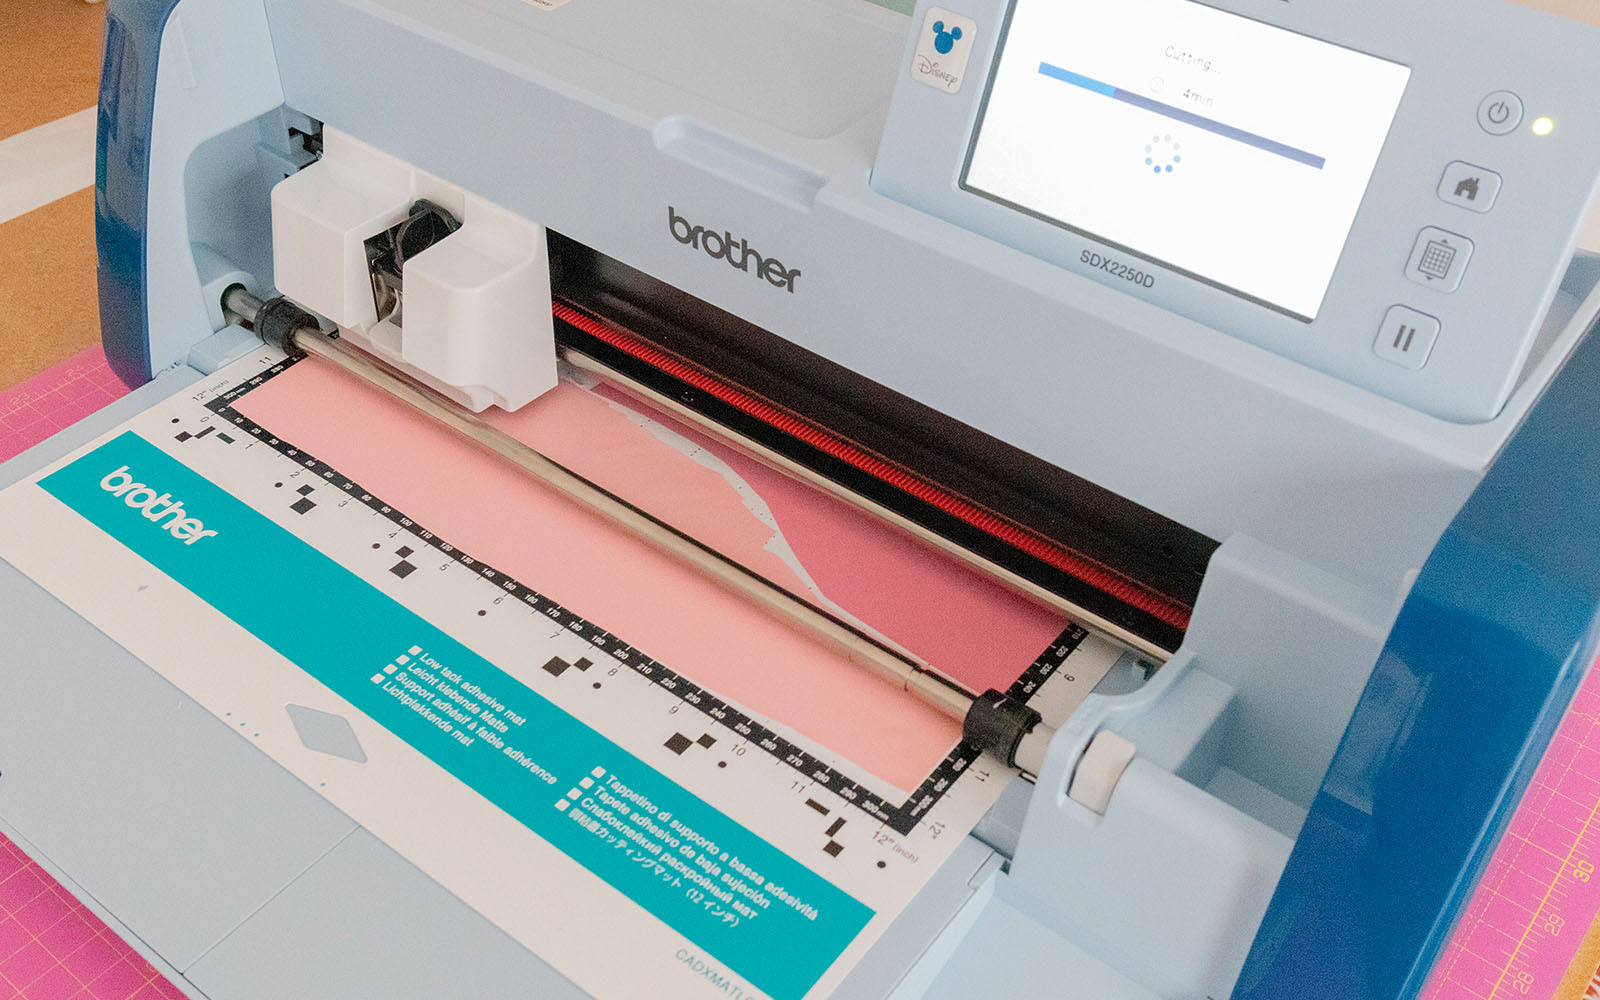
Using the mat reference on the screen, place your heat transfer vinyl on the mat, shiny side facing down. Load the mat into the ScanNCut and use the built-in scanning function to background scan the mat. You will then be able to see where your design pieces and the colours line up. Use the stylus to move your designs on the touchscreen so they fit on top of the right colours to be cut from.
Select the ‘half cut’ option on the screen when cutting HTV or stickers, so you don’t cut through the carrier sheet. Perform a test cut, and then cut your pieces out.
Tip: you can see from the photos (below) that I cut out the vinyl to fit specific areas on the mat. Initially, I used the grid to help me work out what size they should be, did a background scan and then placed them where I knew the shapes on that specific colour.
Step 4
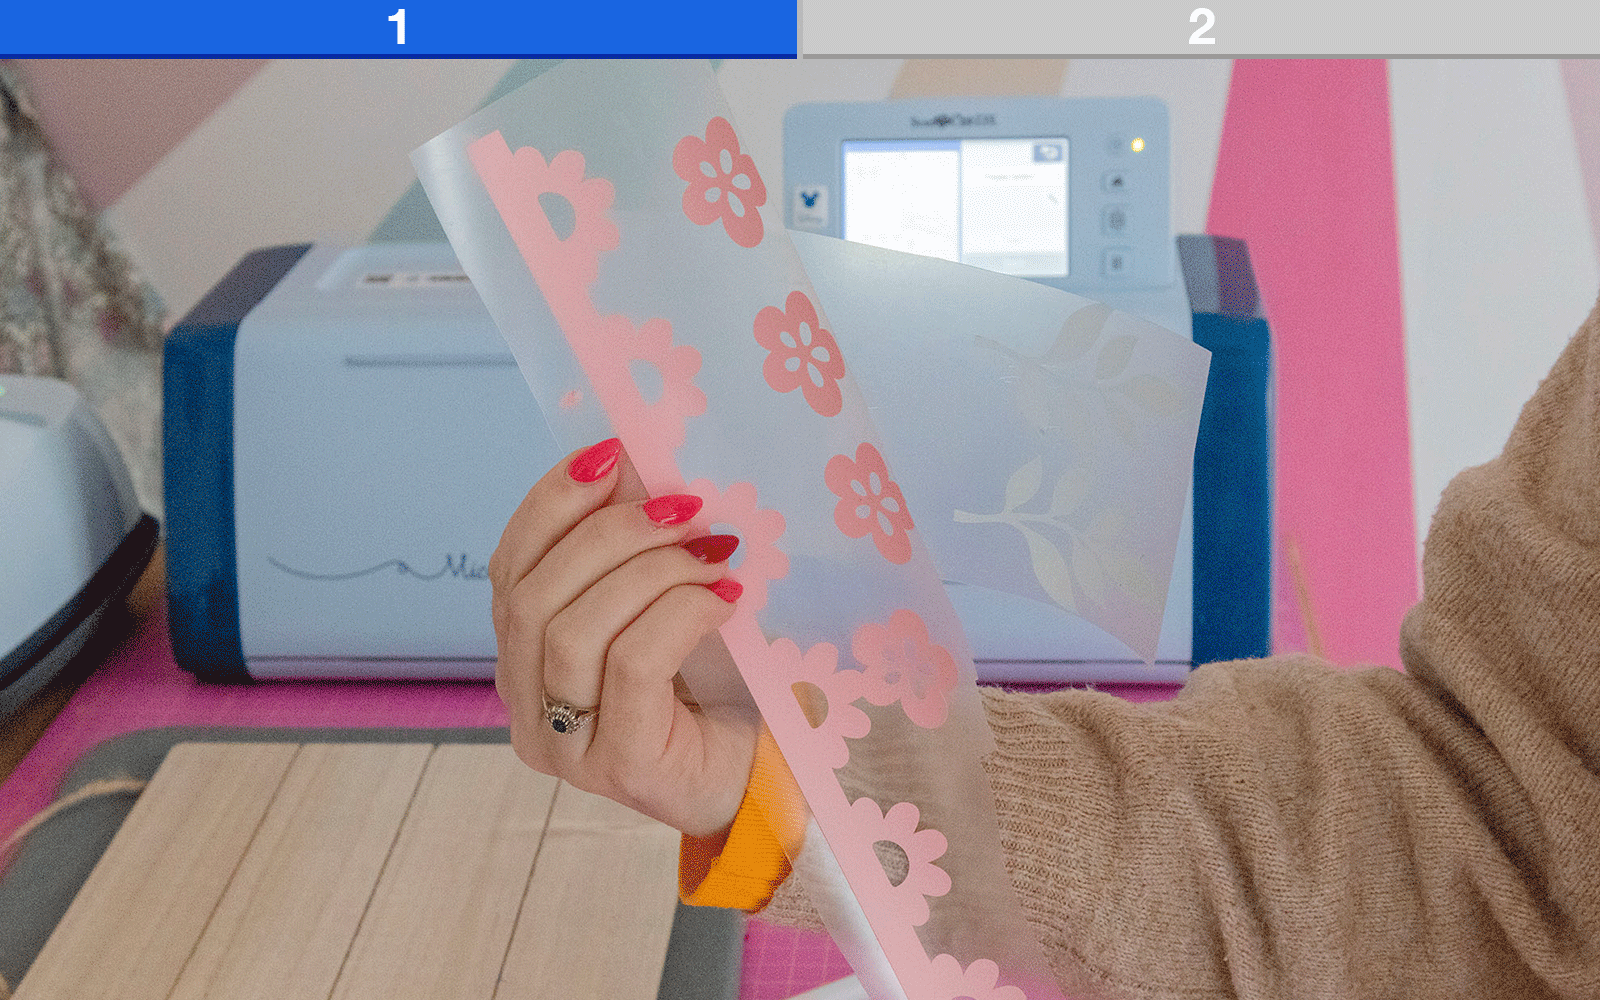
Once the shapes are cut, unfeed the mat from the machine, and carefully peel the vinyl off the mat (folding the mat away from the vinyl prevents any bends in the vinyl).
Weed off the excess vinyl around your cut shapes; this is the process of removing the vinyl around the shapes and in between letters etc, with a pointed tool. If you don’t have a weeding tool, you can use a sewing un-picker, or scissors but be really careful.
Lay the sign down on your heatproof mat or ironing board and place your vinyl shapes sticky side down onto the sign. Make sure not to overlap pieces.
Step 5
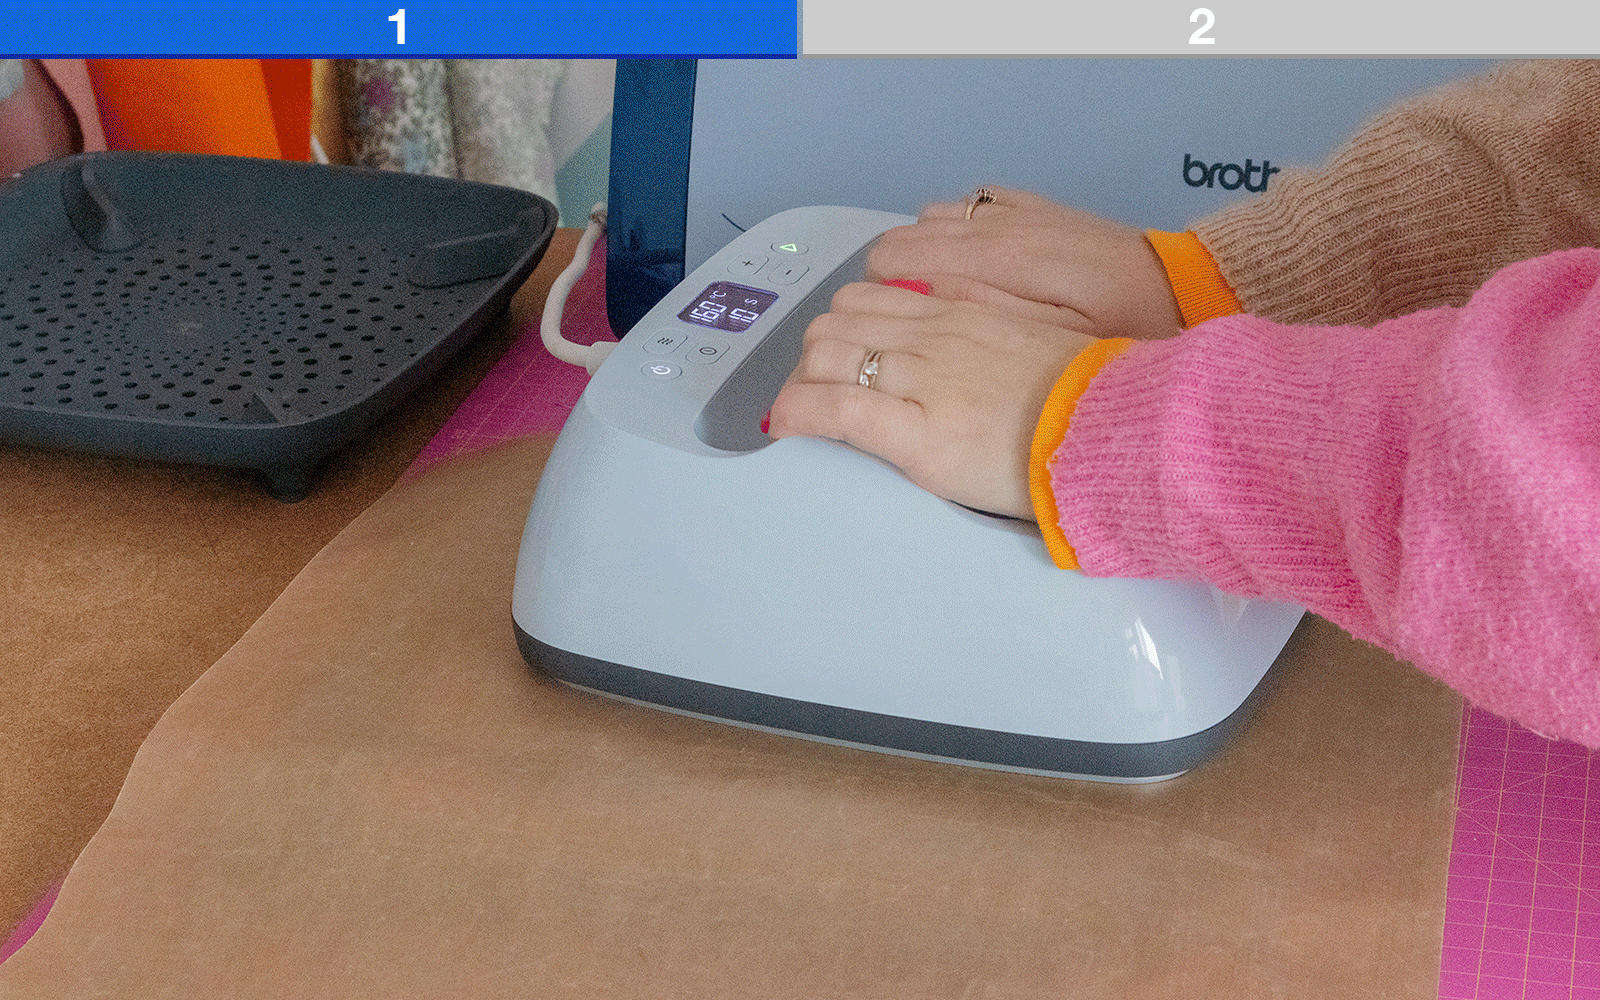
Use a heat press (if you have one) with the settings at 150 degrees for 40 seconds. This may change depending on the vinyl you use, and the sign, so check manufacturer’s settings first.
If using an iron, a medium to high heat without steam is best. Press for 10-20 seconds at a time, testing the peel of the vinyl and keep pressing until it’s done.
Tip: be careful, the backing plastic will be hot to touch!
Step 6
Lastly, add some ribbon to the handle of the sign to add a finishing touch. This is optional but I think it brings all the colours together and makes it feel a bit more elevated.
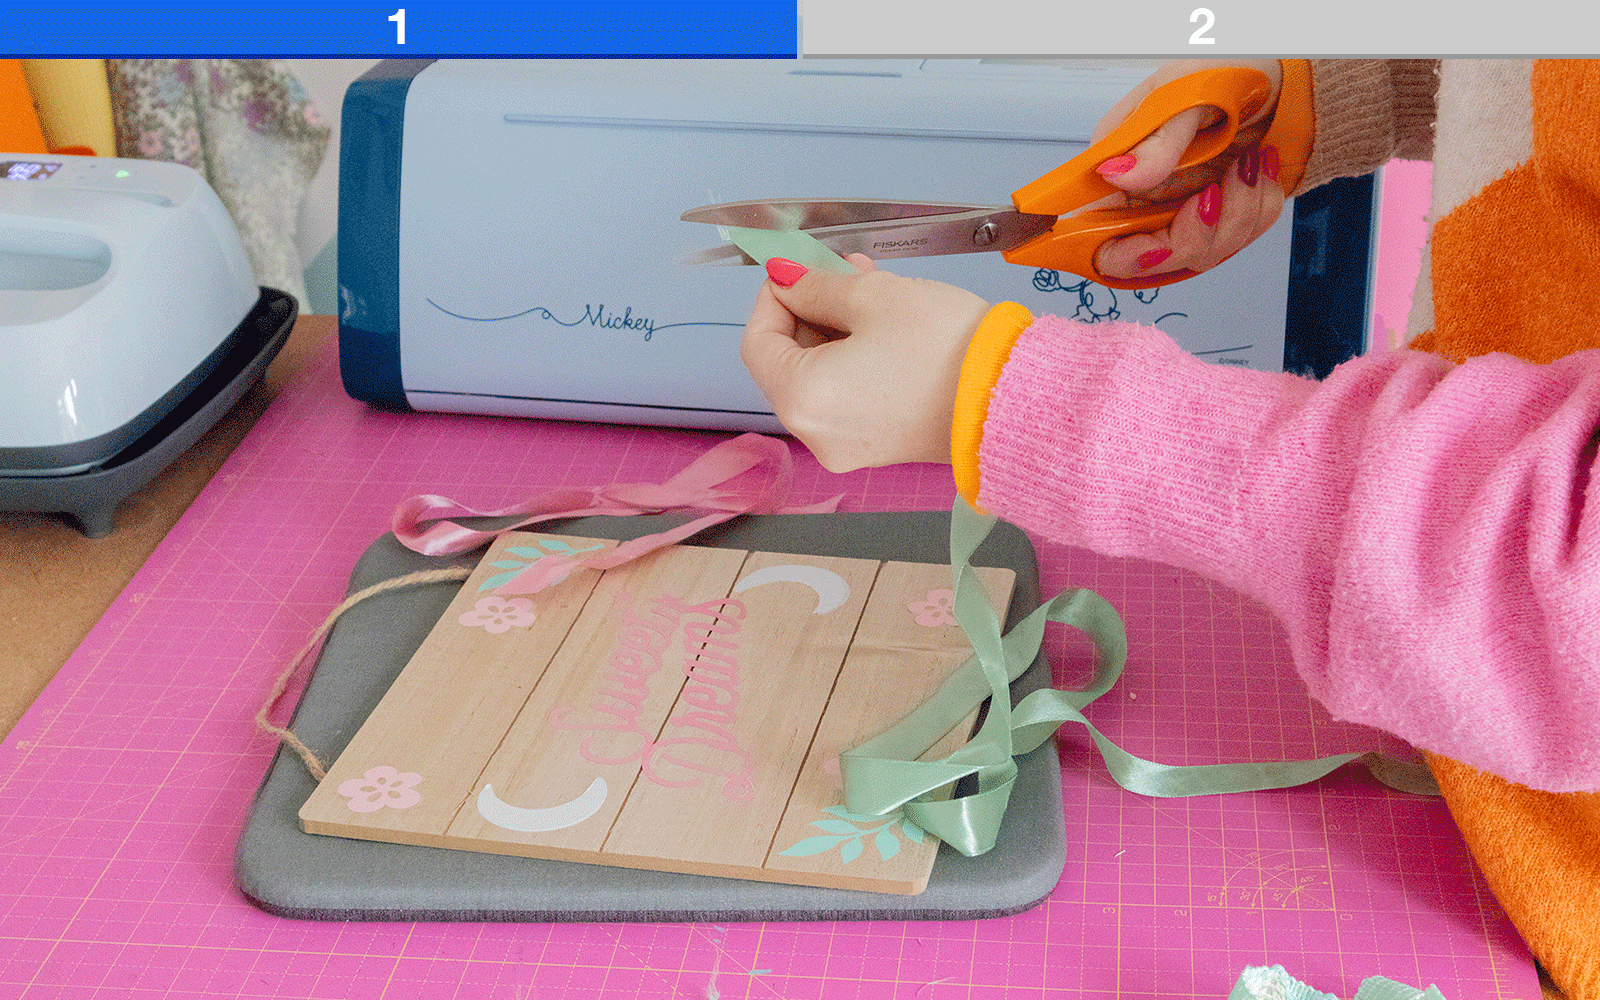
That’s it! It’s a simple project but great project beginners, and shows how simple it is to use the Brother ScanNCut to create lovely things for your home.
Remember to tag both me and Brother if you make this, we love to share your work to inspire others.