Sarah’s diary - how to free motion embroidery


Traditional embroidery requires an embroidery capable machine preloaded with patterns. Not everyone has an embroidery or combination machine, or if you do, you might want to try something a little different.
Free motion embroidery can be achieved on any sewing machine on which you can drop the feed dogs. This form of embroidery is quite liberating as you don’t stitch out a set pattern, but create your own – using your sewing machine to ‘draw’ a design.
I’m not a very good artist, so I found the concept of freehand drawing very daunting. After a few (very messy) failed attempts, I decided it was best to sketch out the design I wanted to stitch with tailor’s chalk on the T-shirt, rather than doing it from memory.
In addition to struggling with the design at the beginning, my first few goes were really messy and I got quite frustrated. The bobbin thread kept pulling through the T-shirt and making loops everywhere. I soon realised that you need to experiment A LOT with the tension and stitch length when you’re embroidering free motion. In the end I stopped trying to work it out whilst working on my project and took time to practise on an old T-shirt.
Usually you don’t touch the tension settings on a Brother sewing machine – but for this project you will need to – just remember to put it back to where it was

The other realisation was that I needed to change my needle to a ballpoint jersey needle as I was embroidering a stretch fabric. After that it was a lot easier and something I really enjoyed. I’m now practising with different stitches and more detailed, intricate patterns. Check out our Instagram feed to see how I get on!

You will need
- One T-shirt
- Iron-on backing material/interfacing
- Iron
- One hand embroidery hoop
- Tailor’s chalk
- Scissors
- Thread and matching bobbins – you can use standard thread or embroidery thread
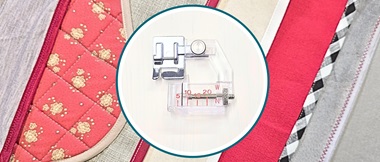
- Open toe quilting foot – ‘O’ foot
- Ballpoint needle
- Brother Sewing machine – we used the Innov-is NV2600

Step 1
Drop the feed dogs (consult the manual of your machine). Usually there will be a little lever at the back of your machine.Tip: Dropping the feed dogs means that you will be able to move the material around in all directions when sewing, instead of just forwards and backwards.
Step 2
Turn your T-shirt inside out. On the inside of the front side of the T-shirt iron on the iron-on interfacing.Step 3
Turn your T-shirt the right way around and with chalk, mark the centre of where your pattern will go.Step 4
Separate the two hoops of your hand embroidery hoop and put the larger outer hoop inside the t-shirt, and the smaller inner hoop on the outside. Line up so that the centre of the hoop is the centre of where your pattern will go. Carefully pull the t-shirt material taught, keeping your centre mark in the centre of the hoop. Tighten the hand embroidery hoop.Step 5
Replace your needle to a ballpoint needle and your presser foot to the open toe quilting foot ‘O’.Step 6
Use chalk draw your design onto the hooped area of your T-shirt. This will be your sewing guide.Tip: If you haven’t tried free machine embroidery before, keep your design simple. It takes a bit of practise to ‘draw’ intricate designs.
Step 7
Thread your needle with a contrasting thread to your T-shirt and insert a matching bobbin.Step 8
Make some anchoring stitches, including a few backstitches in straight stitch. Keeping in straight stitch, drop your stitch length to as close to zero as it will go. Increase the tension to 9 (but make sure you test these settings first!).Step 9
Start stitching your pattern. You can control the length of the stitch by how slow or fast you move the hoop and how much pressure you put on your sewing machine foot.
Step 10
Change your thread/bobbin as required for the pattern, until your pattern is completed.Step 11
Trim your threads and un-hoop your T-shirt. Turn the T-shirt inside out and carefully remove the iron-on interfacing. You can use water-soluble interfacing if your T-shirt can be washed.
So, what did I learn?
- Keep it simple when you start out (like I have). Free motion embroidery may be more freeform, but it can take some getting used to.
- If you want some inspiration of what can be achieved when you have (lots of) practise, have a look at Pinterest and Instagram, there are lots of amazing free motion embroiderers on there. You can pick up some great tips from reading their posts.
- You still need to hoop your material and use a backing stabiliser, just like you would on a standard embroidery machine.
- Before you start your project, check that you can drop the feed dogs on your machine. My (very old) home machine doesn’t do this, so I needed to work on one of our newer machines. You need to be able to drop your feed dogs, as that allows you to move your material anyway you want.
- Draw your design in chalk or water-soluble pen and then use those lines as your guide.
- Go slower than you would usually – it takes some getting used to and going too fast can cause your thread to ‘birdnest’!
- Take a picture of your standard machine tension setting, to make sure you put it back to exactly where it was once you’ve finished your project.
What do you prefer? Standard or free motion embroidery?