Balloon sleeve upcycled shirt


Upcycling is a great way to breathe life into new clothes. It’s a much greener way to update your wardrobe too.
We found this amazing lumberjack blouse in a second-hand shop but don’t hesitate to go through your dad’s, or boyfriend’s, wardrobe!
Materials
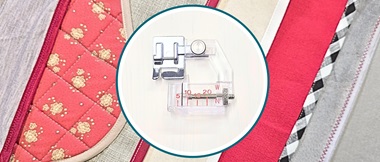
- Sewing machine
- Fabric scissors
- Pins
- Oversized shirt (the bigger the better!)
- Yarn in the same colour of the shirt
- Seam ripper
How to
Step 1
Are there any pockets on your shirt? Remove the pockets with a seam ripper. Be careful, we don’t want holes in our shirt! Take the sleeves off your shirt with a seam ripper. Done? Do the same for the cuffs. Again, be very careful, as we need to use these parts again. Place to one side.
Step 2
If you’re using an oversized shirt, the length of is probably way too long. The good news is that you are the designer today! Choose a length and shape that you like and cut. You can use a blouse from your wardrobe with a fit that you like, using the front and back panels as a template.Tip: keep in mind that the more fabric you cut away, the more fabric you have to use for your balloon sleeves!

Step 3
Time for the sleeves! To create extra volume in the sleeves, we made the shoulder length shorter than normal. Measure your own shoulder width and subtract 2cm.
Lay your sleeve flat on the table with the under-arm seam on the fold. Cut the sleeve open on the other side, the highest side.
Fold open and measure the part that you just cut. Grab all the left-over pieces you cut from the shirt (but not the cuffs). We’ll make the sleeves as big as possible by adding an extra panel sewn from the leftovers you cut from the bottom of your shirt. Remember to keep enough fabric to do this with the other sleeve too.
Step 4
Sew the panel into the sleeve and sew the sleeve back together. Repeat for the other sleeve.
From our leftover fabric we managed to make a panel with a width of 14 cm but don’t hesitate to make it bigger if you can.
Tip: if you don’t have a piece left that is big enough for the panels, sew smaller parts together like we did to create a patchworked panel. You could even use contrast fabric from your stash pile.

Step 5
Grab your sleeves and sewing machine, put your straight stitch length setting on 5.Make sure that the bobbin and upper thread are long, pull them a bit out. Stitch a basting stitch around 20cm of the top part of the sleeve.
Tip: don’t backstitch at the beginning or end.
Pull the upper thread and your gathering will appear! Use pins to keep the gathering in place. Gather the top of the sleeve to be the same size as the armhole opening in your shirt. Once you have done the top end of your shirt, repeat with the cuff end, gathering to the same size as the cuffs you removed earlier.

Step 6
Let’s go back to the body of your shirt. Stitch the side seams together and finish the bottom of the shirt with a rolled hem.Tip: If you like you can remove the collar to give your blouse a new look! You can just cut the collar away, no need for using your seam ripper. Finish with a rolled hem (leave 2cm of fabric to do this).

We’d love to see what you upcycle. Why not tag us into your upcycling projects on Instagram. Make sure you tag Brother on Instagram and Facebook too.