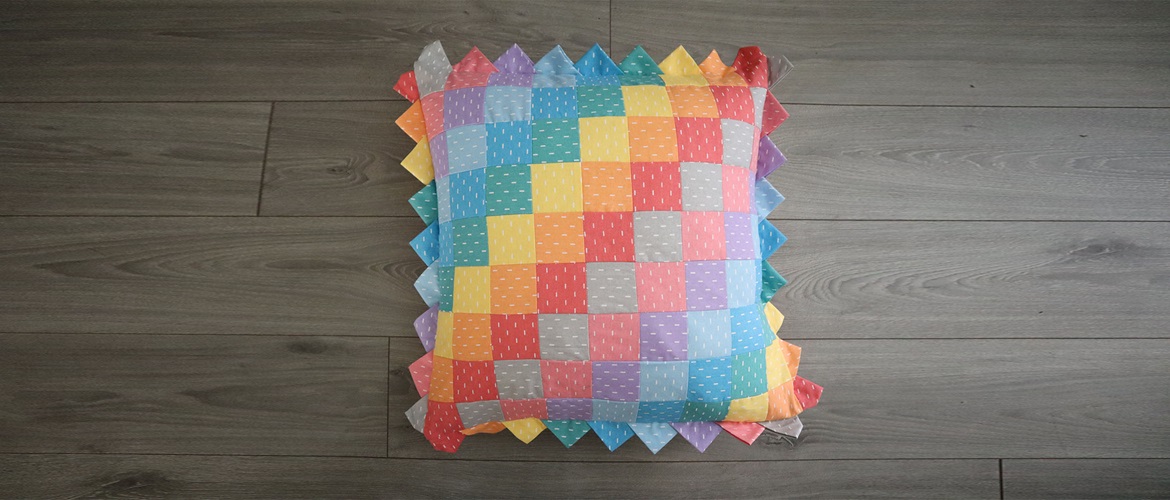
Prairie Point edge patchwork cushion


Bring together coordinating fabrics in a diagonal patchwork design. Match, or contrast with additional Prairie Point edging for a lovely decorative finish.
Materials needed
• Sewing machine – I used the Brother NV1800Q
• Fabrics (see Step 2 for amounts needed)
• Coordinating thread
• Pins
• Rotary cutter
• Quilting ruler
• Cutting mat
• Scissors
• Iron
• Cushion inner – I used 21” (53.34cm), but you can amend the pattern to suit.
Note: this pattern was designed in inches. The metric conversion is the closest measurement, but may be difficult to achieve. We recommend using inches, or to round up the metric measurements for ease of cutting.
How to
Step 1
Gather your tools and materials ready to get cutting and sewing.

Step 2
Using your rotary cutter and quilting ruler, cut out your fabric squares for the main cushion. This is a 21” (53.34cm) cushion inner, and I have cut nine 3” (7.62cm) squares in each colourway, so 81 squares in total.Tip: you can adapt how many squares you would like, and how big or small they are based on your own cushion inner size.


Step 3
Cut four 4” (10.16cm) squares in each colourway, so 36 squares in total to use for your Prairie Point edges. I have used the same fabrics around the outside for a coordinated look, but you could do this in something different if you would prefer a contrast finish.

Step 4
Lay out your fabrics to plan your design. I find it helpful to organise them into little column or row groups ready for sewing together.


Step 5
Get ready to sew everything together!
Step 6
Using a straight running stitch, and around ¼” (0.6cm) seam allowance – stitch the squares together into columns. The fabrics I have chosen have a directional pattern, which I have alternated for every other square. Have a think about how you would like your print to be laid out.


Step 7
Repeat until you have sewn all the columns. Give everything a press if required.


Step 8
Now sew the columns together to construct the full cushion front, and give everything a press. Press open the seams at the back to give a neater/flatter finish at the end.


Step 9
Take your 4” squares and fold in half diagonally and press. Fold in half diagonally again and re-press so you have your Prairie Point triangle.


Step 10
Repeat with all of your 4” squares until all of your Prairie Points are made.


Step 11
Now lay out your Prairie Points around the edge of your cushion. Lay them down RST (Right Sides Together) with the raw edges of the triangles at the raw edges of the cushion, and the triangular point facing inwards. Interlock the open triangles together so they overlap and pin into position.


Step 12
Using a straight running stitch, stitch your Prairie Points onto the cushion as close as you can to the edge. Please note the corners step below!

Step 13
At the corners, fold the Prairie Point back on itself before stitching into position. This will that ensure when the cushion is turned out there will be space for the seam edges.


Step 14
Create your cushion back pieces. For this cushion, I have chosen to do a simple ‘envelope’ style back – but you could do something different.For this 21” (53.34cm) cushion, I cut 2 pieces of fabric 21” (53.34cm) x 14” (35.56cm) to create the back, before turning one of the long edges over and stitching into position.

Step 15
Lay your cushion back pieces onto your cushion front RST and pin into position.

Step 16
Using a straight running stitch, sew around the edge using around a ½” (1.27cm) seam allowance to secure the cushion backs, and everything together. Turn out!
Step 17
Insert your cushion inner and et voila, you are done! One Prairie Point Cushion.
I hope you enjoyed making this cushion. I’d love to see what you make, so why not tag myself and Brother into your makes, that way we can share and inspire the rest of the Brother sewing community.
Follow and tag Brother on Instagram and Facebook. Come say hi, tag and follow me on Instagram or you can find my website at https://www.thecraftylass.com/.


