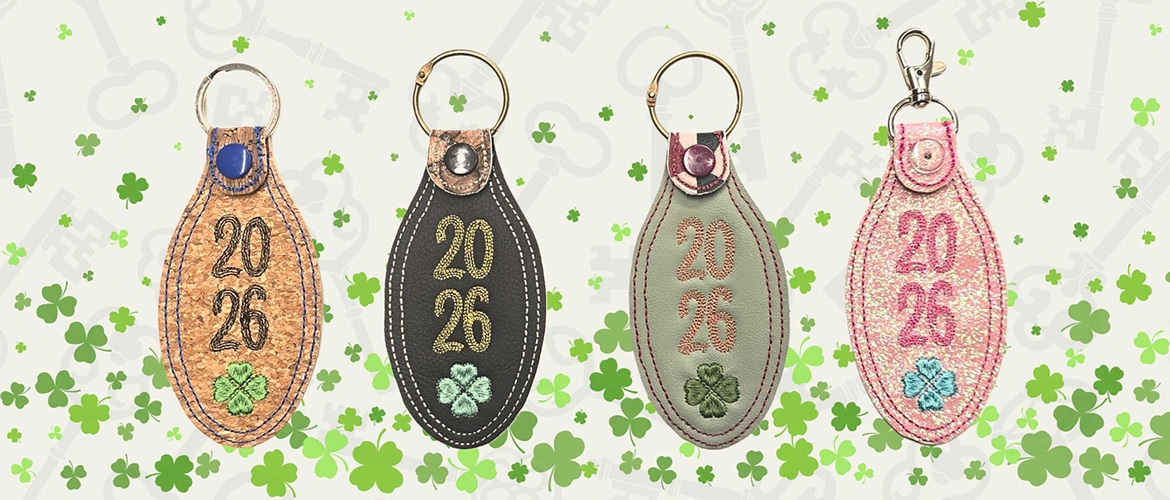
New year, new key fobs!


Start the new year right with new key fobs. Perfect for an organising frenzy!
This new year key fob is made entirely on your Brother embroidery machine, using the in-the-hoop embroidery method.
This free embroidery project is easy and a perfect scrap buster. These New Year keyrings also make a brilliant last-minute gift, or a satisfyingly quick project you can make in an afternoon.
Finished size: 11 x 8cm.
Materials needed
- Sticky-back tearaway stabiliser – a piece large enough to fit the frame you are using
- Vinyl, cork fabric, light oilcloth or felt: two pieces of 20 x 10cm per key fob - one for the front and one for the back
- Embroidery thread
- Plastic press buttons – one pair per key fob
- Key ring or swivel hook – one per key fob
- Fray stopping liquid
Equipment needed
- Brother embroidery machine with a frame larger than 150 x 80mm
- Sharp scissors
- Press button tool
- Awl
- Painter’s tape
How to
Step 1
Hoop the sticky-back tearaway stabiliser with the paper side facing up. Running along the frame edges, score lines with a pin at all sides. Peel the paper away to reveal the sticky stabiliser.

Step 2
Lay the key fob’s front material with right side up over the exposed sticky part of the stabiliser and press down.

Step 3
Load the frame into your Brother embroidery machine and sew the first two colours of the New Year key fob.
Then, change the colours and kind of thread to suit the material you’re using, or the personality of the person you’re making it for!
Remove the embroidery frame from the machine, but do not remove the material or stabiliser from the frame.

Step 4
Turn the embroidery frame over, so that the underneath of the frame is showing. Lay the second piece of material over the embroidery area and adhere with painter’s tape.

Step 5
Load the frame back into the machine and proceed to sew out the last step of the New Year in-the-hoop embroidery key fob.
Once complete, remove the embroidery frame from the machine. Take the embroidered key fob out of the frame.
Using scissors, cut to about 2cm around the outside edge of the embroidery. Then, carefully trim all the excess up to 1mm from the outline stitching.

Step 6
Apply anti-fray liquid to the embroidered key fob’s thread ends.

Step 7
Poke a hole with the awl in the centre of the two embroidered circles at the top of your New Year key fob. Insert the press buttons.

Step 8
Add a ring or a hook and your in-the-hoop embroidered New Year key fob is ready for your keys!