My Design Center 01: combining background fills with a built-in design

If you have an embroidery machine with My Design Center (XP3, XP1, XE1, XJ1, PR1055X, PR560W), you have a huge selection of editing options available at your fingertips.
These in-built tools allow you to create your own embroidery designs without needing to download new designs or have embroidery digitising software on your computer. You can create completely bespoke designs directly on your machine without even touching your computer.
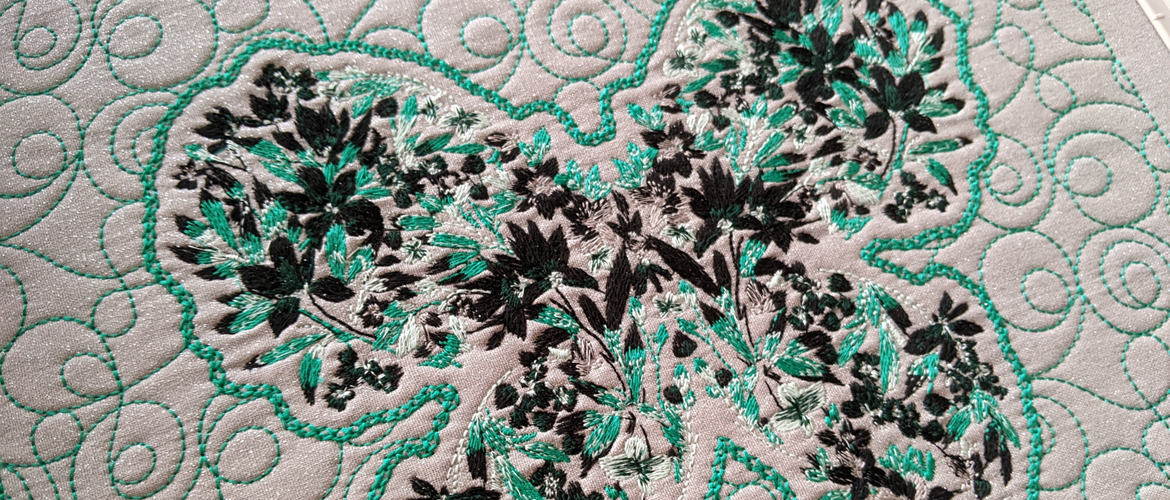
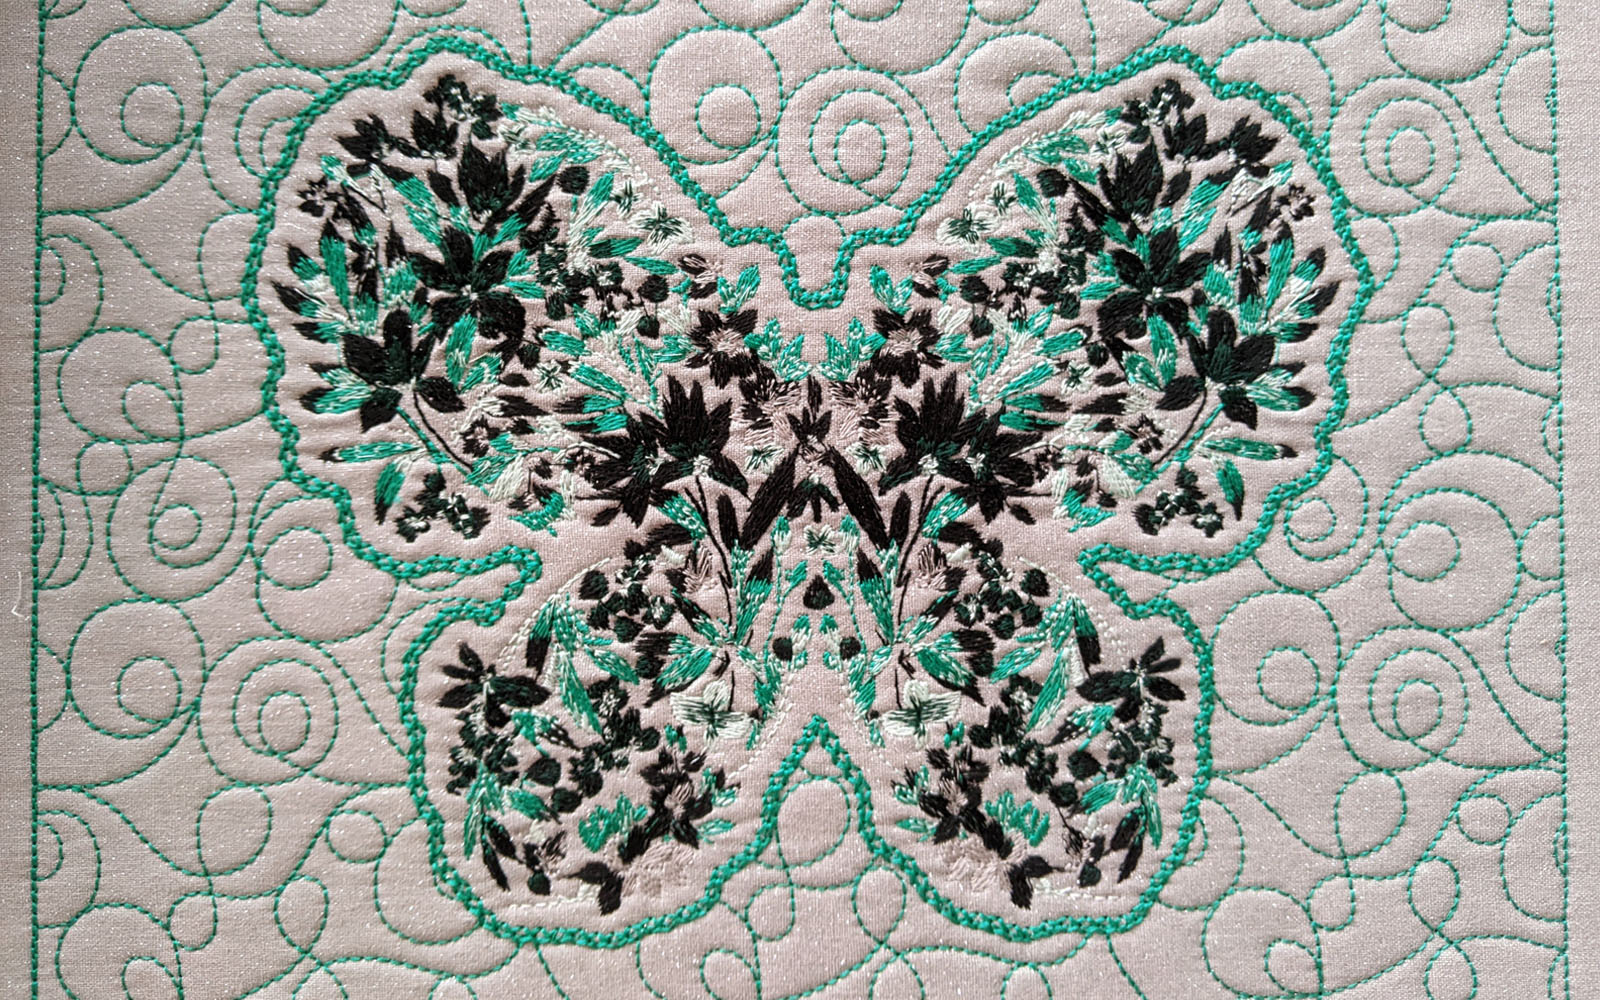
Follow the steps below to create your own bespoke design! This quilted butterfly embroidery design has been created on the XP3. Other machines with My Design Center may have slightly different options and features.
Step 1
Select an embroidery design. This can be a built-in design as we’re going to change it to make it bespoke.
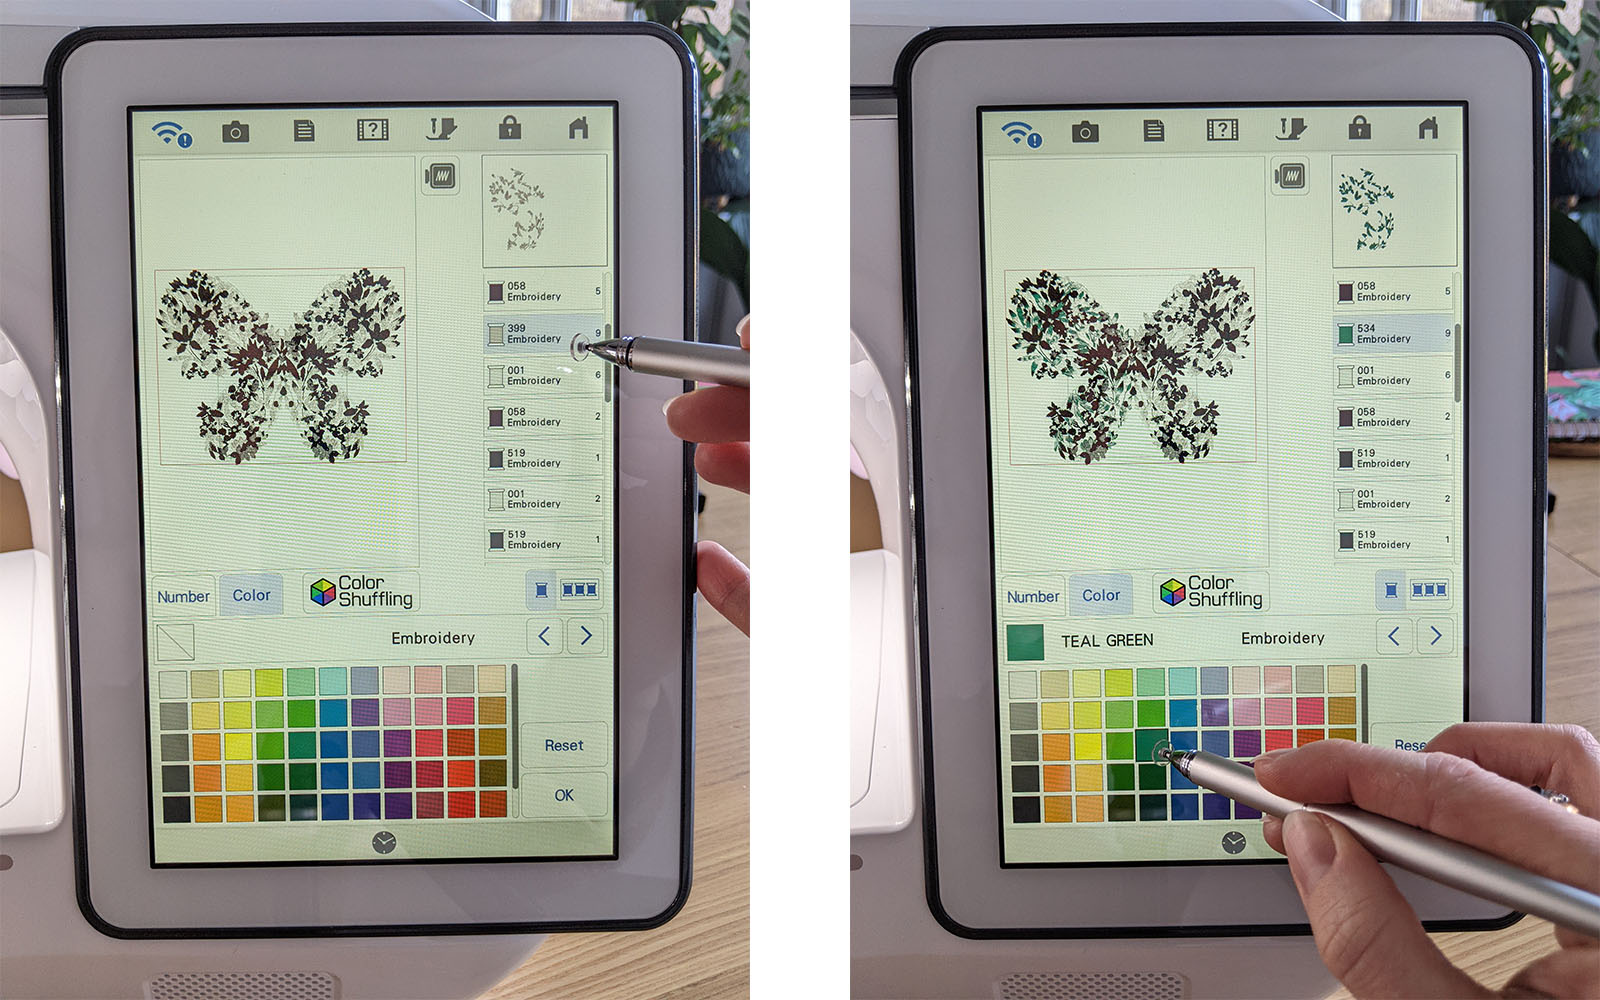
Step 2
Go to Edit → Colour Pallette → Colour Shuffle.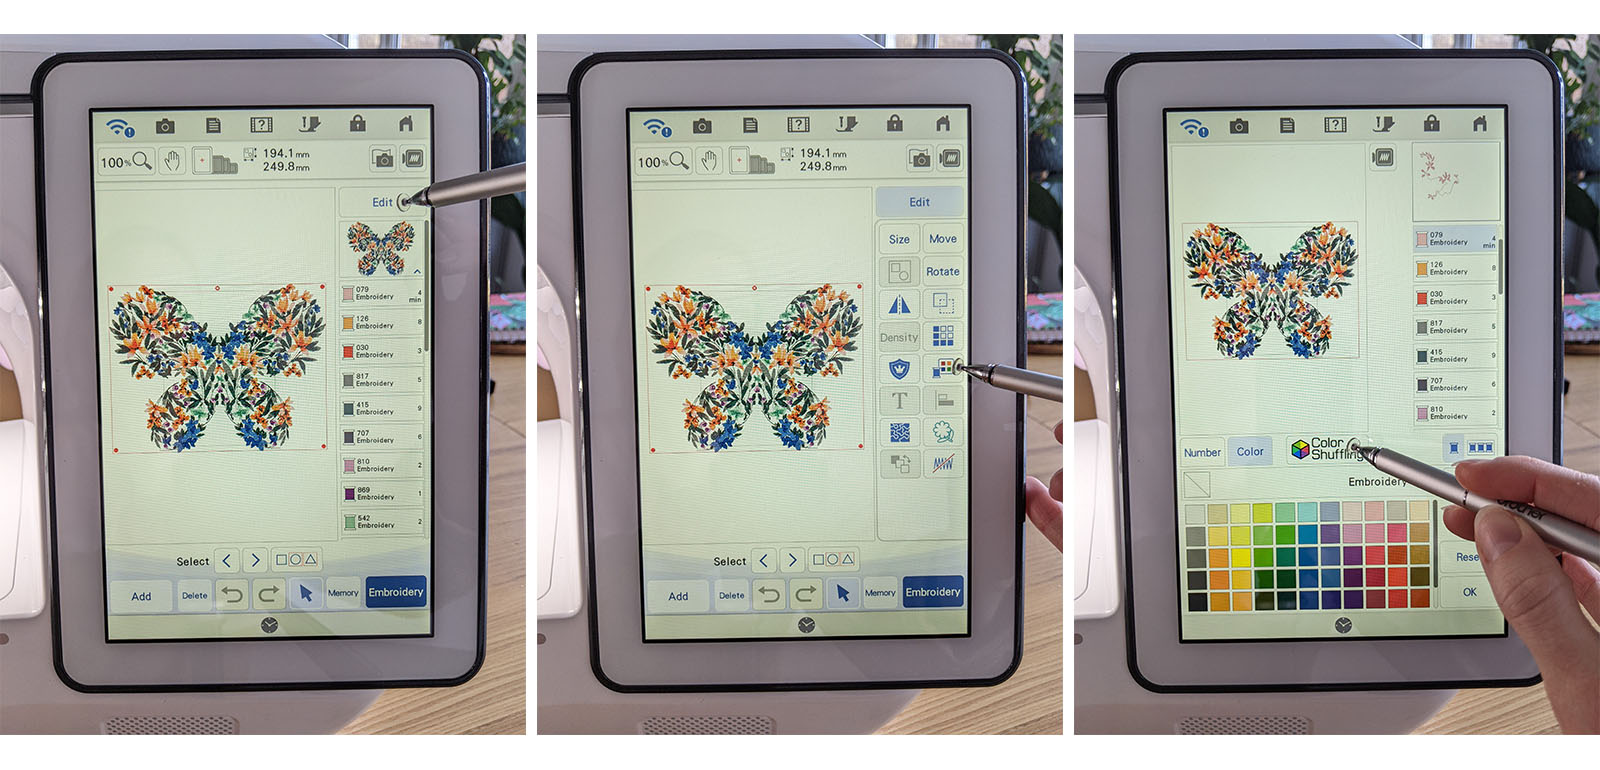
Step 3
Reduce number of colours if preferred → Select shuffle type – Random, Vivid, Gradient or Soft → Pick either Auto or Manual. If Manual is selected, choose a colour(s).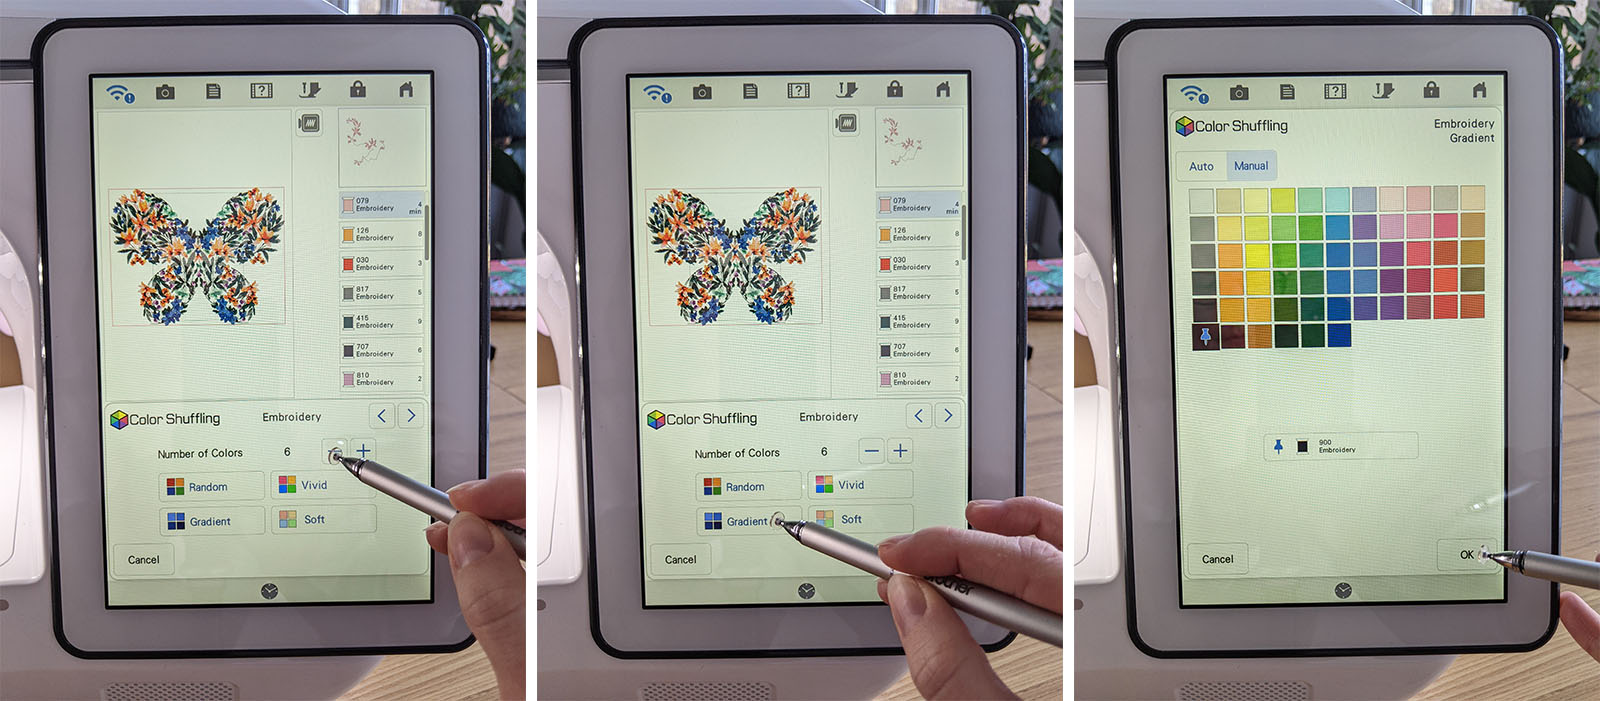
Step 4
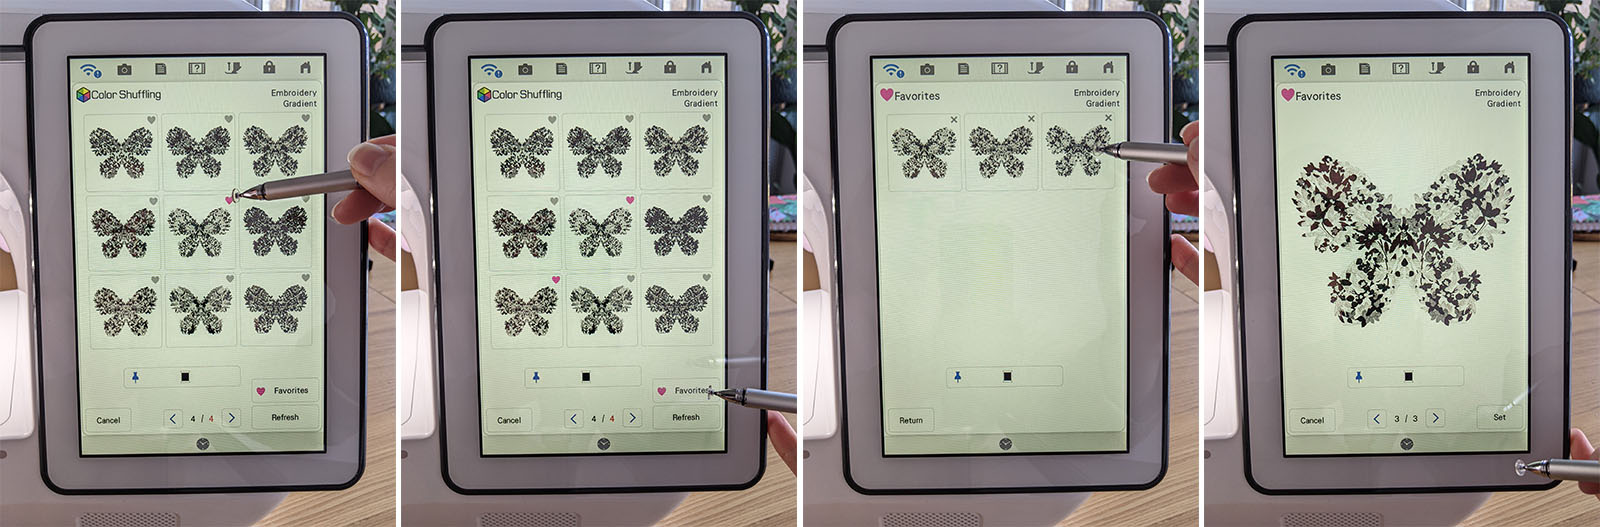
Press the ‘Refresh’ button to see more colour choices → Press the heart on the designs you like while scrolling through the options → Press the ‘Favourites’ button to compare these designs → When you’ve found your favourite, press ‘Set’.
Step 5
Back on the colour pallette screen, select any colours from the stitch list that you’d like to change → Select one colour at a time and then select the new colour.
Step 6
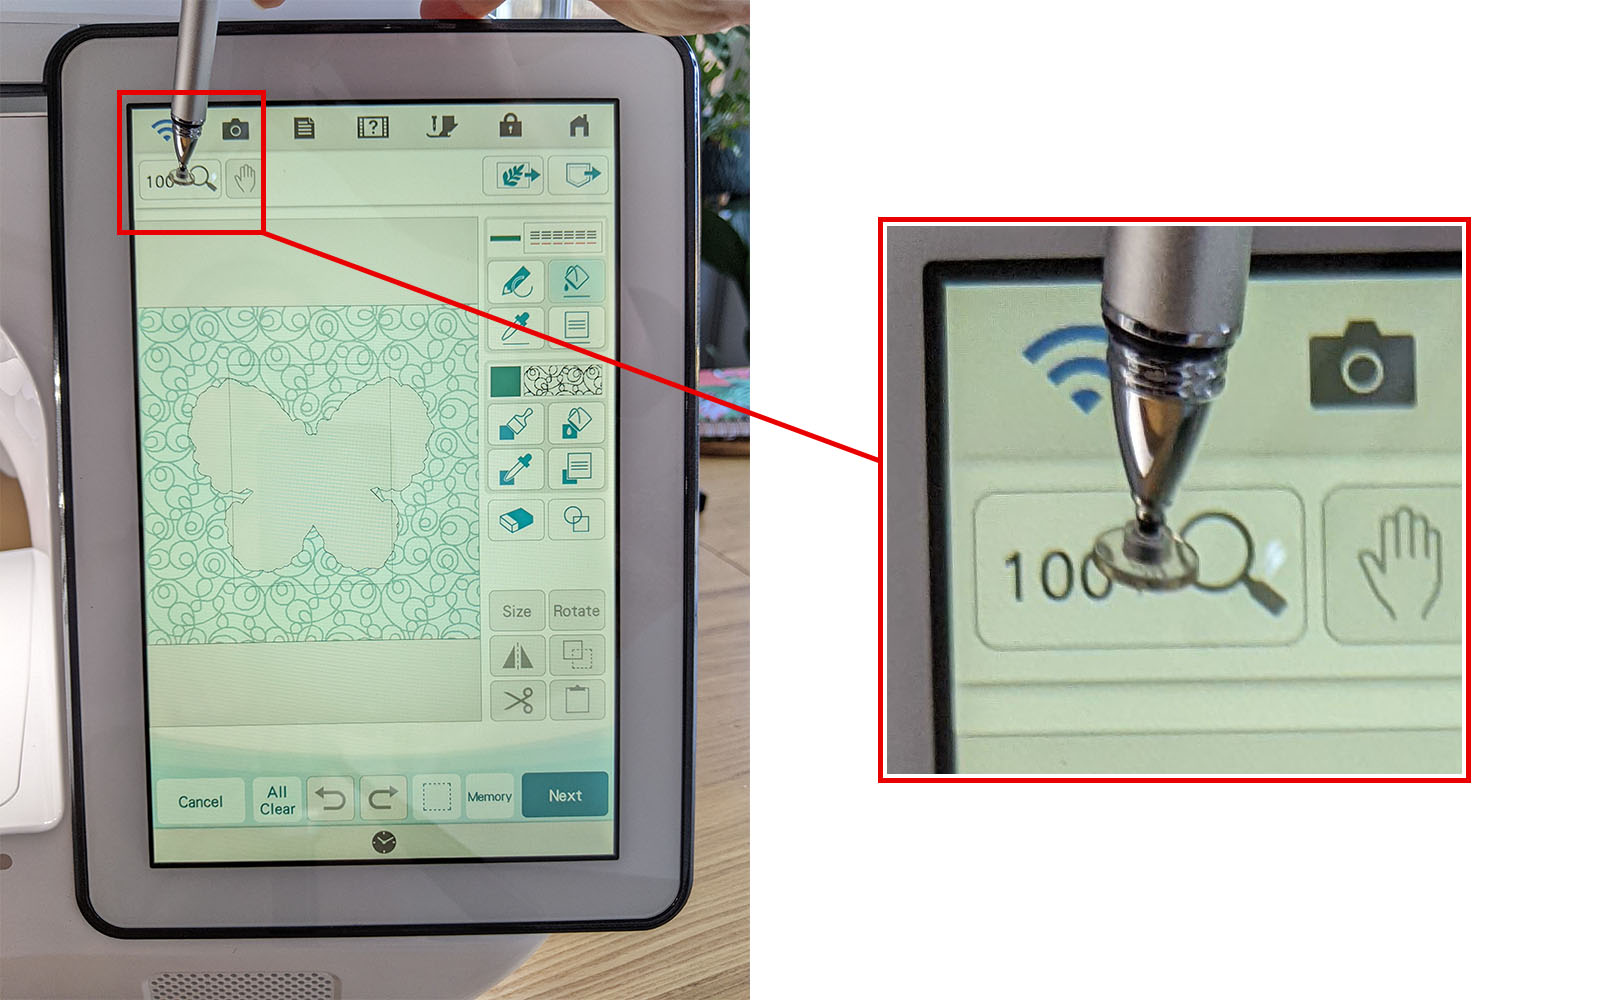
Zoom in to see your design more closely → press the hoop icon button → Then press the + magnifying glass → Then press ‘Close’.
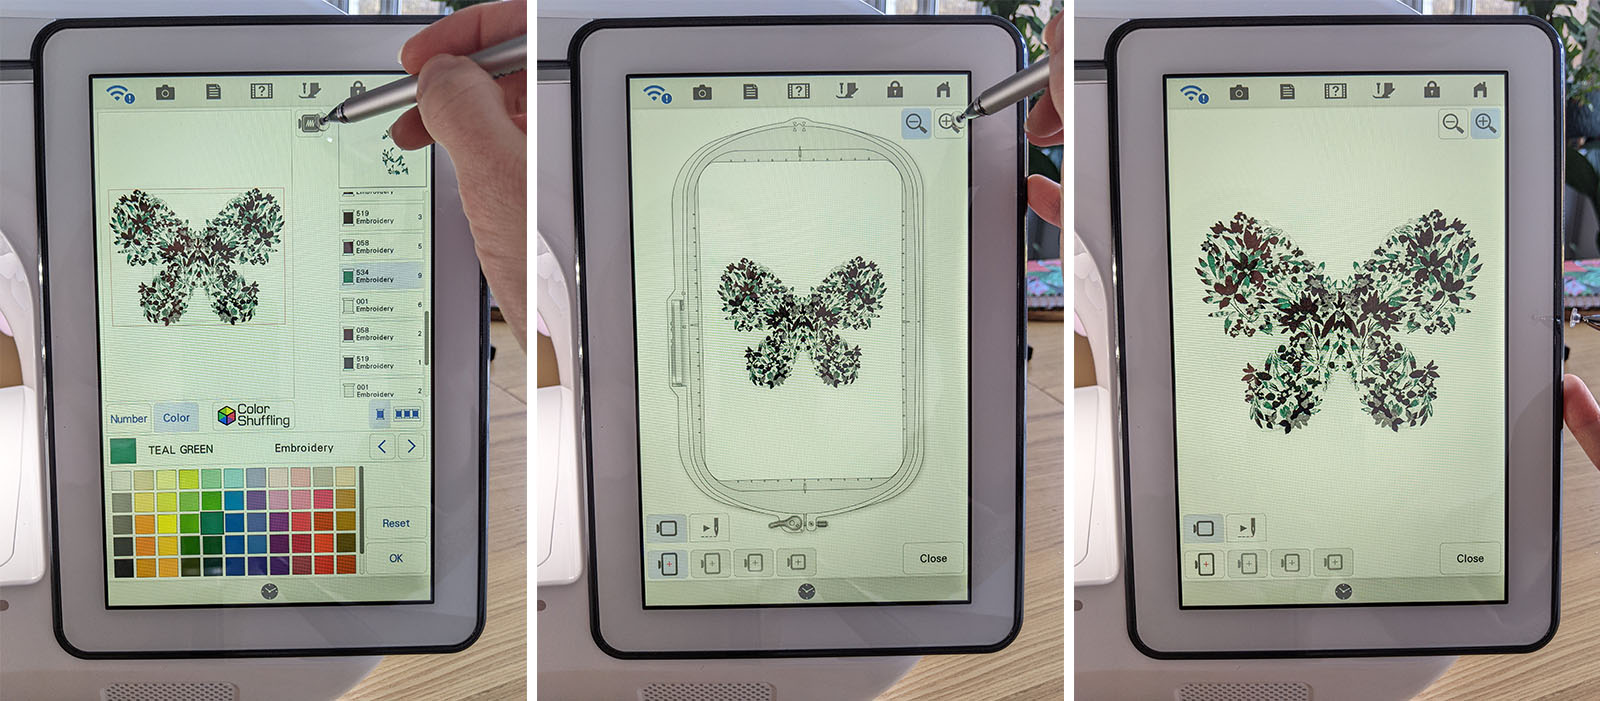
Step 7
When you’re happy with your colour choices press ‘Ok’ to return to the main edit screen.
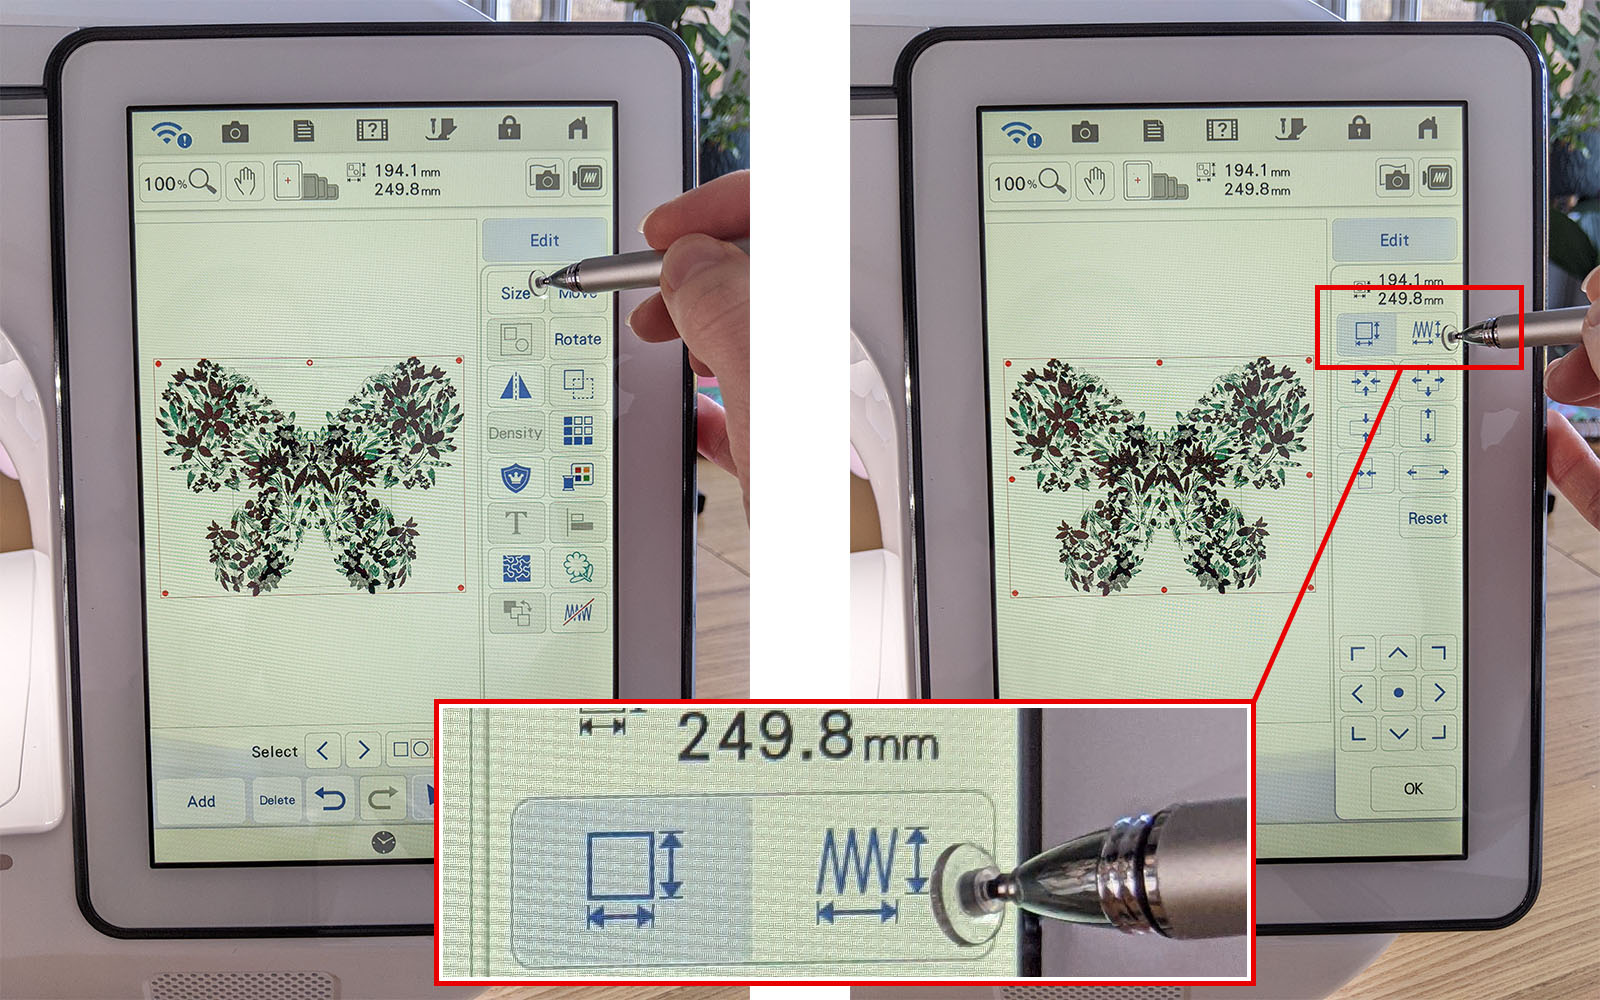
If you want to resize your design, press ‘Edit’, and then ‘Size’.
In the size menu, you have two main options:
- Standard resize (left button with the square), and
- Stitch to block (right button with the zig-zag).
Stitch to block will allow you to resize your design with less restriction compared to standard resizing. This is because the stitch to block option will recalculate the stitches in the design rather than stretching them or squashing them.
Step 8
Back in the ‘Edit’ menu press the flower icon. This gives you an outline shape of your design → Alter the distance from the design using the + and - buttons → When you’re happy, press ‘Memory’. This will save your outline in My Design Center → Press ‘Ok’.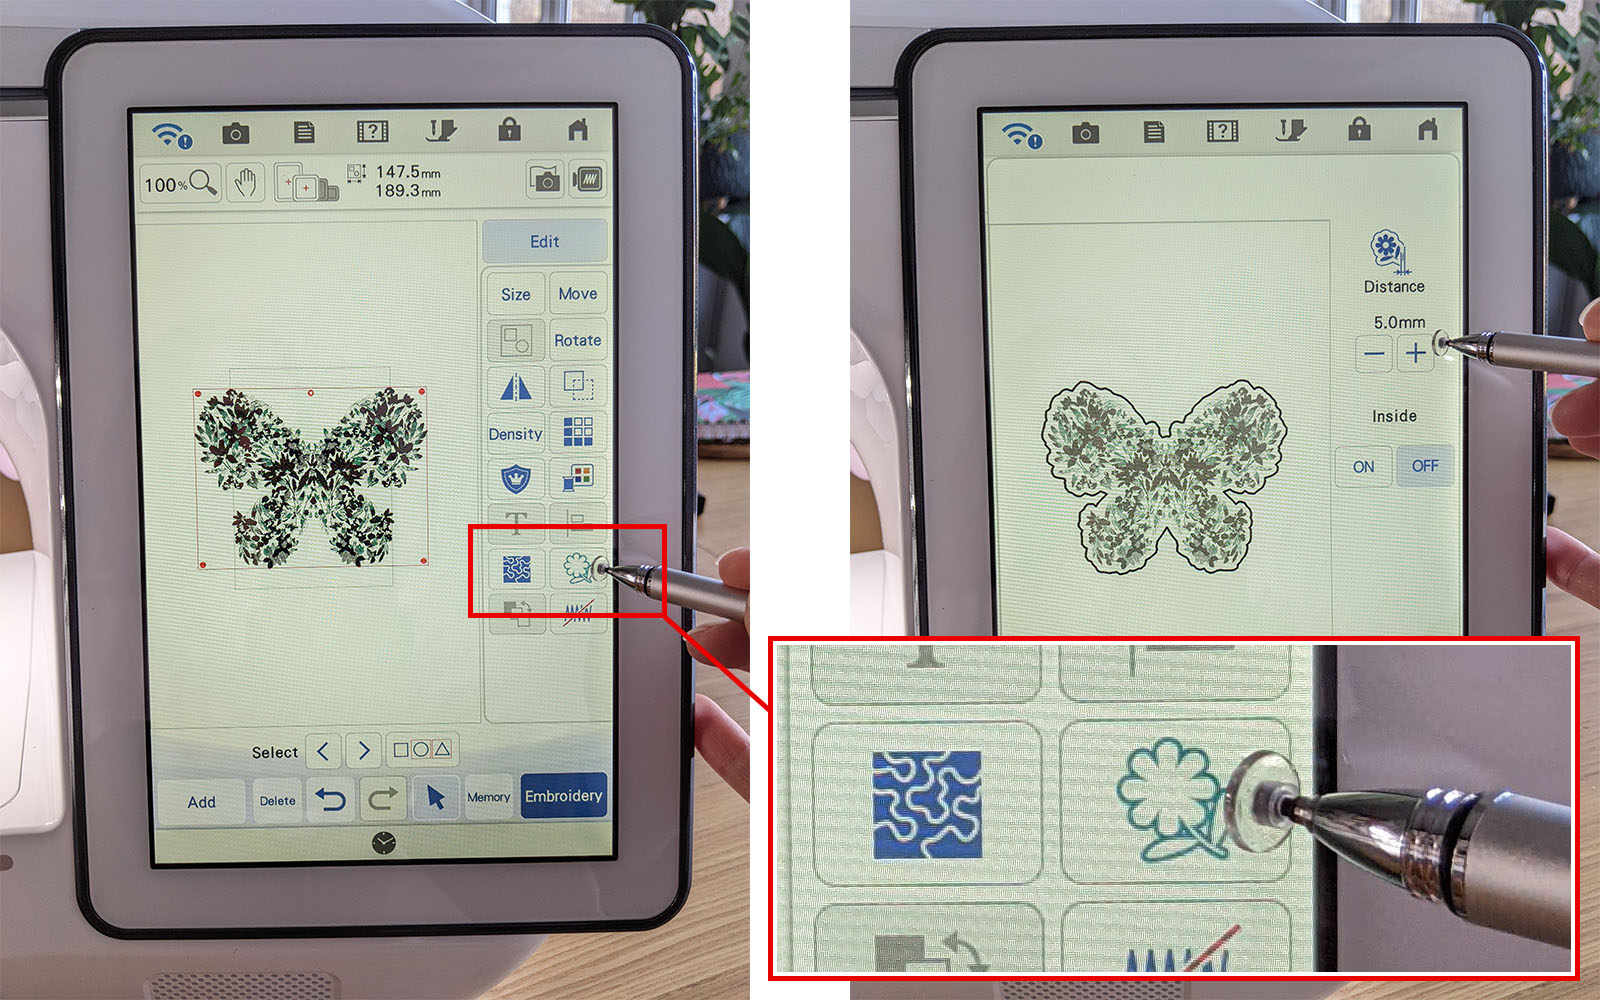
Step 9
Press the ‘Add’ button → Then press the ‘My Design Center’ button.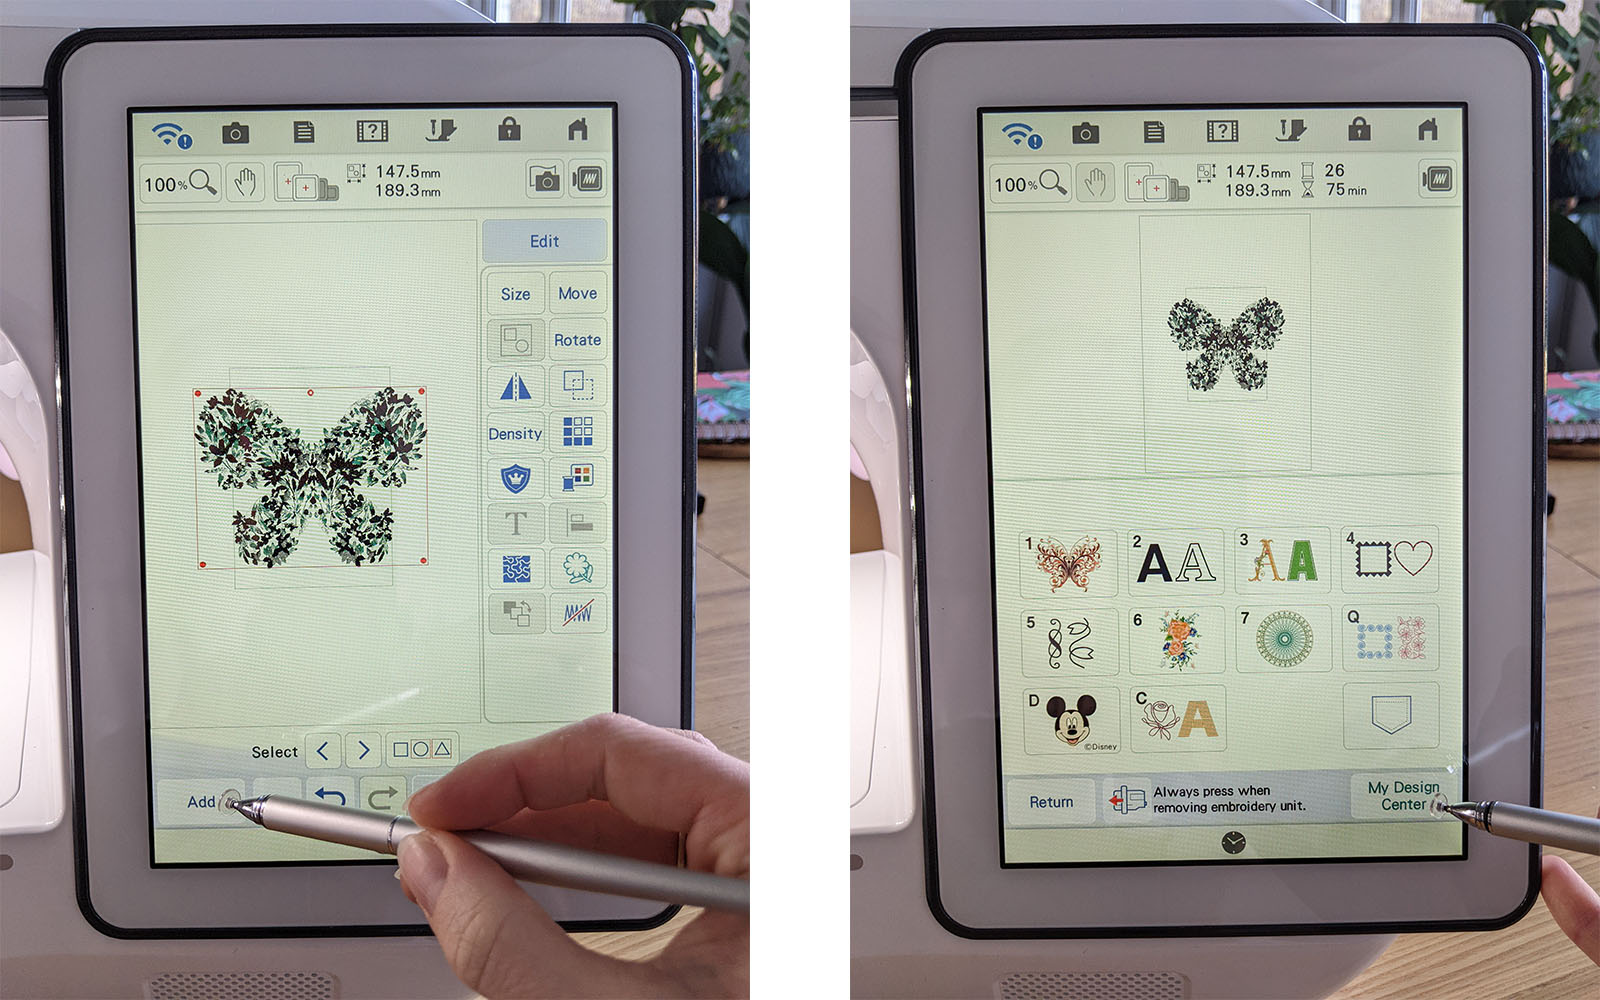
Step 10
In My Design Center, press the ‘Shapes’ button.

Step 11
Press the ‘Flower’ button (the same symbol as on the edit page) → Then press the outline of your design.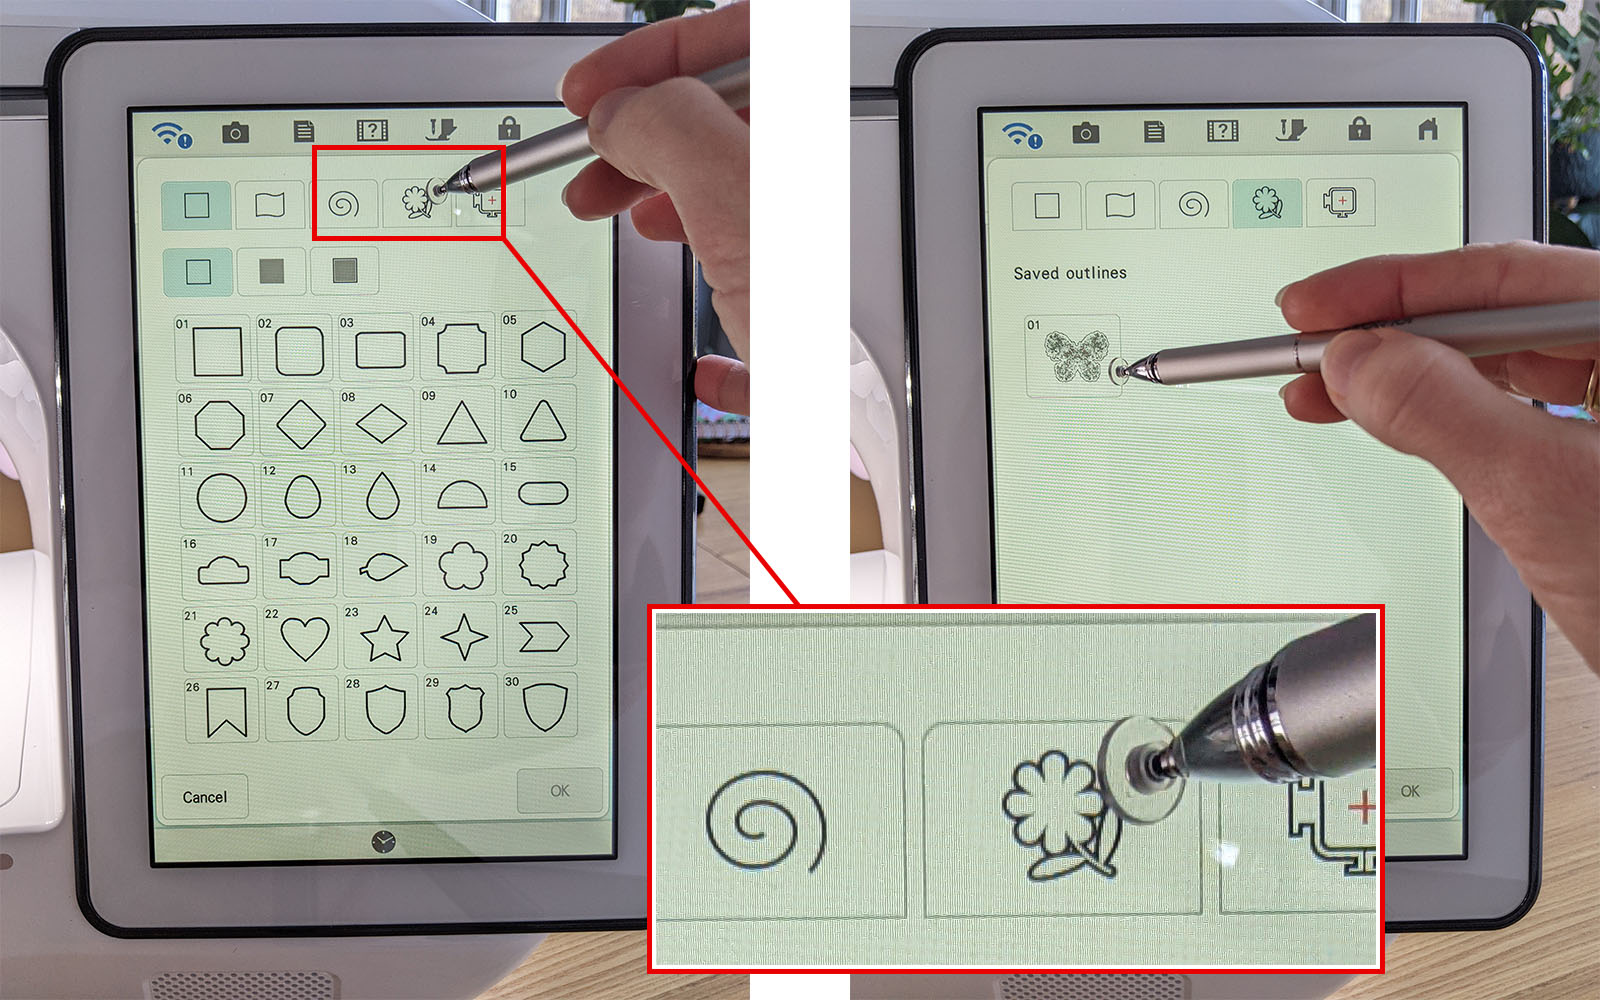
Step 12
Repeat these steps but this time add a square outline to the design page.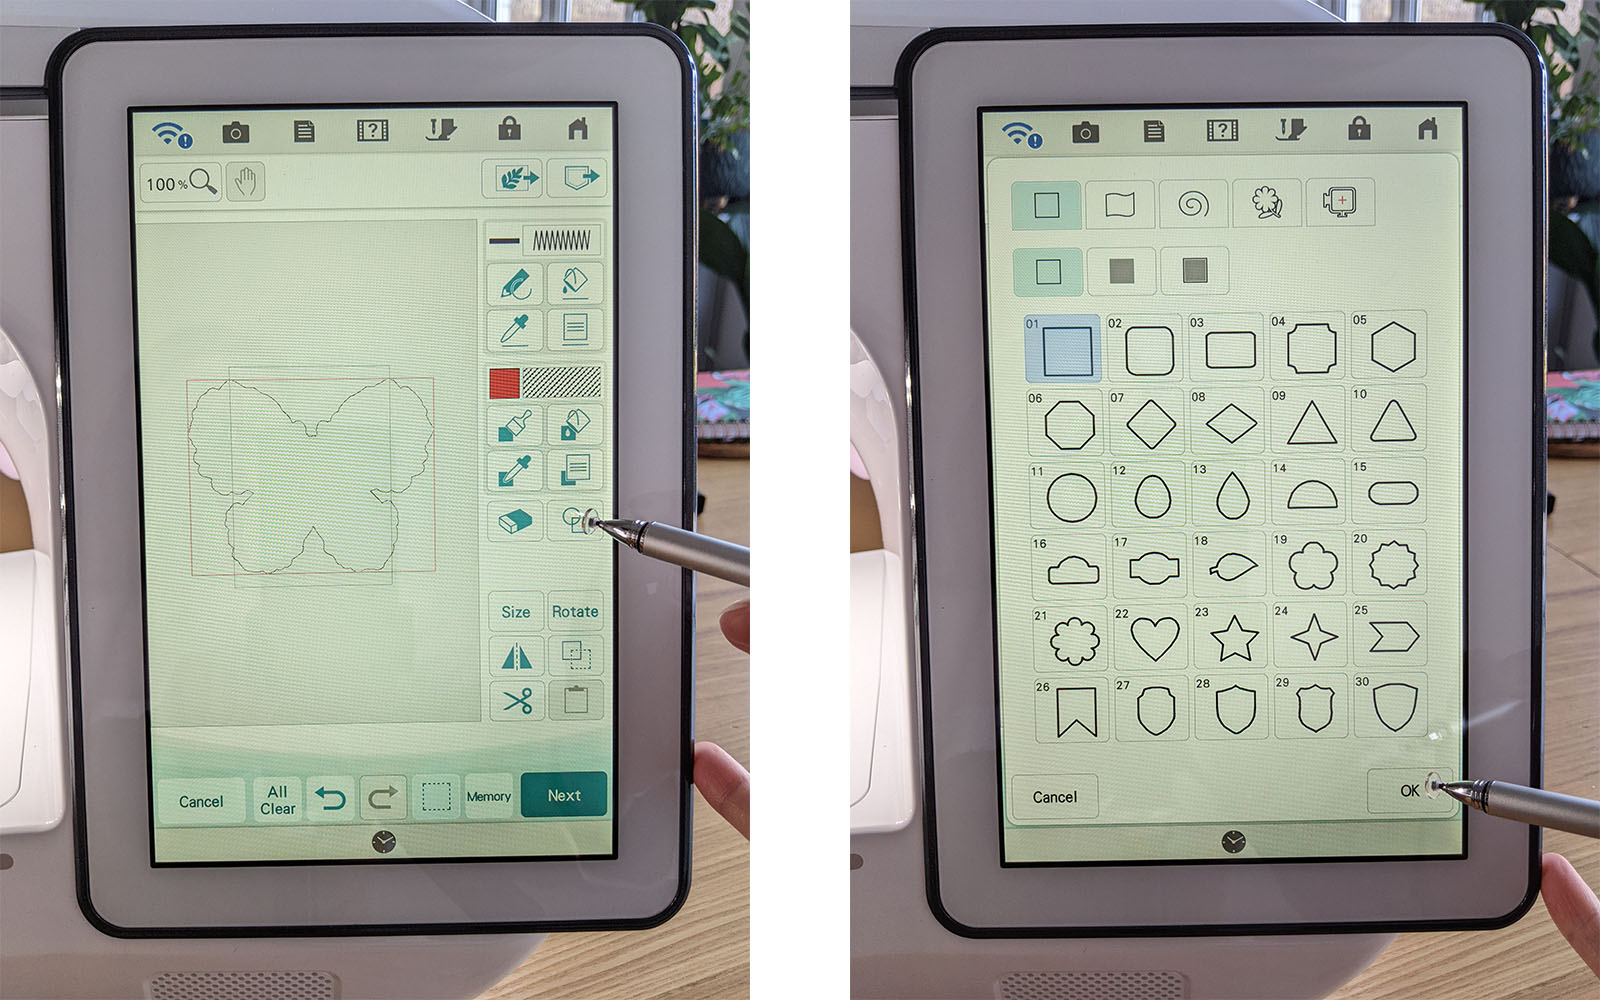
Step 13
Press the ‘Size’ button → Then press the keypad button → Type in the width and height that you’d like your square to be, making sure it fits around your original design - I did 272 x 272mm for mine → Press ‘Ok’.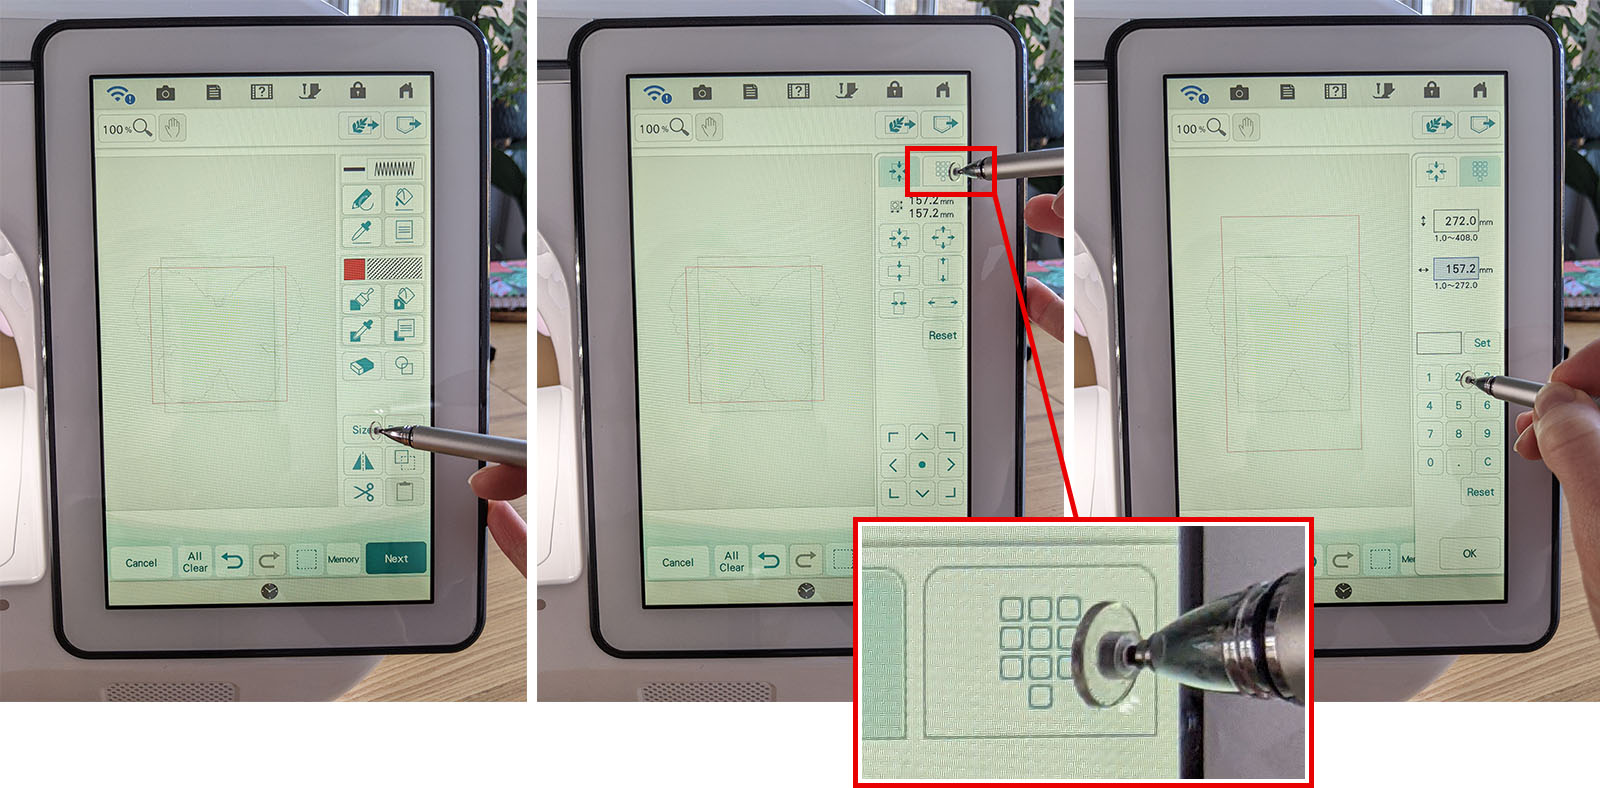
Step 14
Press the fill/region settings button → Then press the decorative fill button → Select a decorative fill pattern, choose a colour and press ‘Ok’.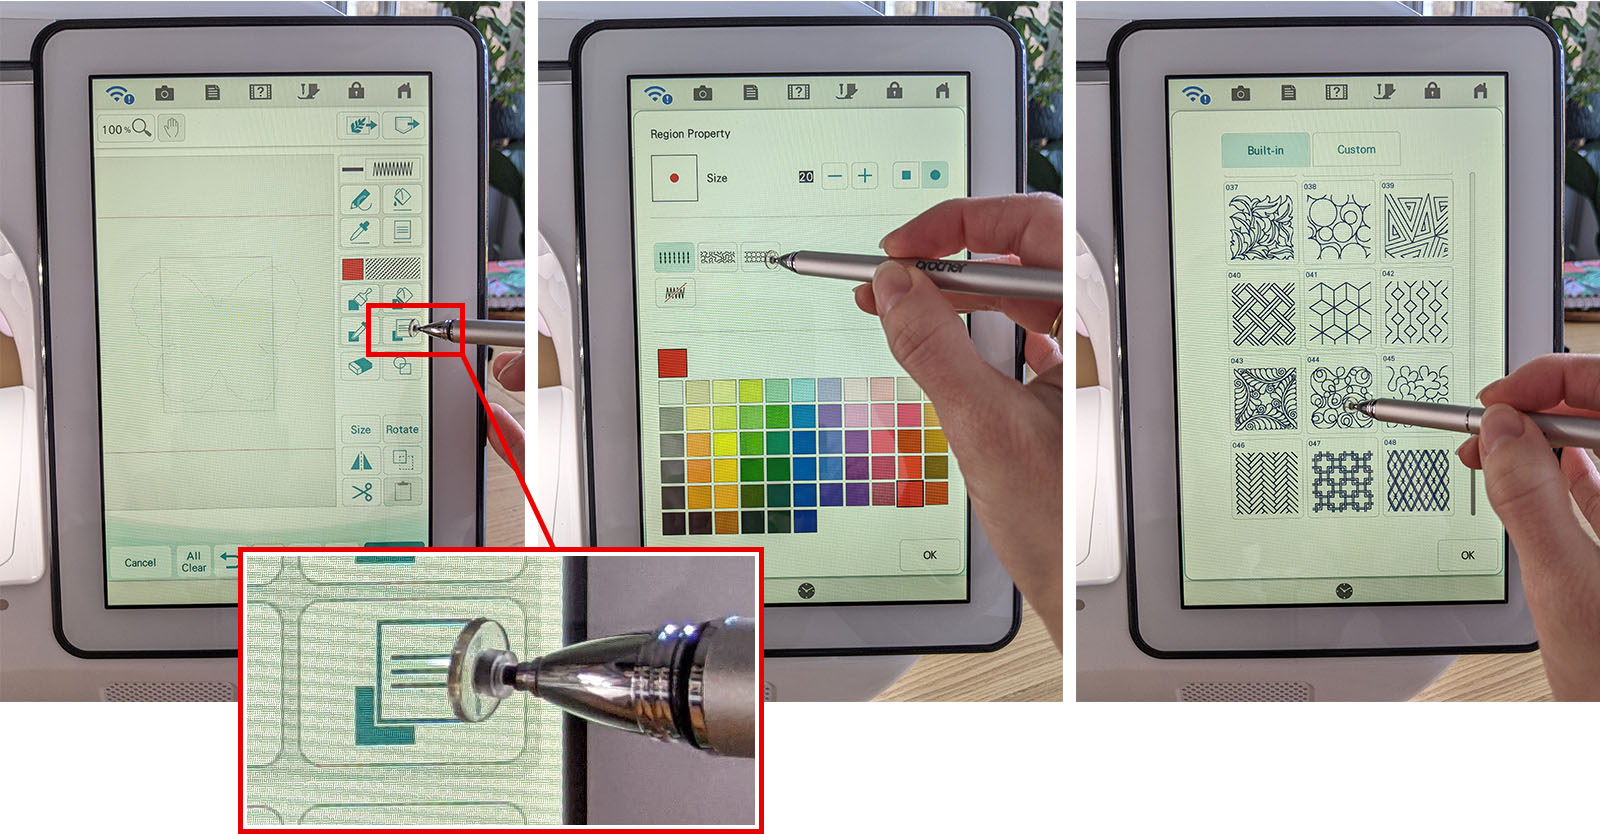
Step 15
Make sure your fill/region paint pot is selected → Then tap anywhere within the area between your outer square and your original design to fill this area with the decorative fill pattern.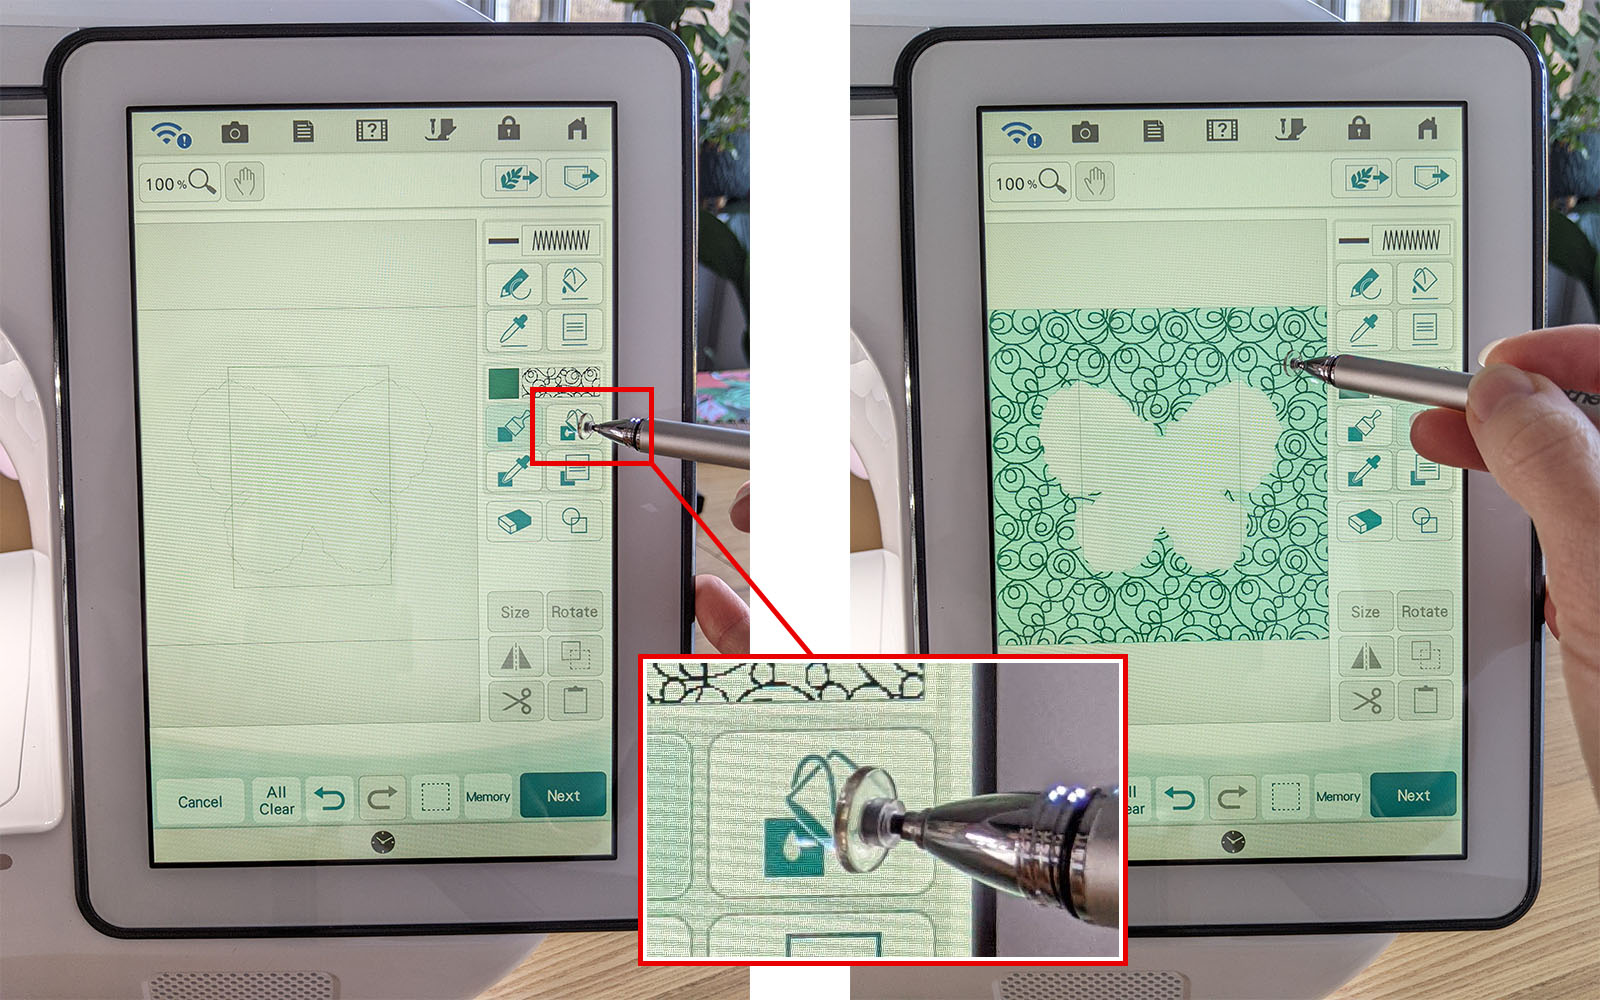
Step 16
Press the outline settings button → Then select a different outline → Choose a colour and press ‘Ok’.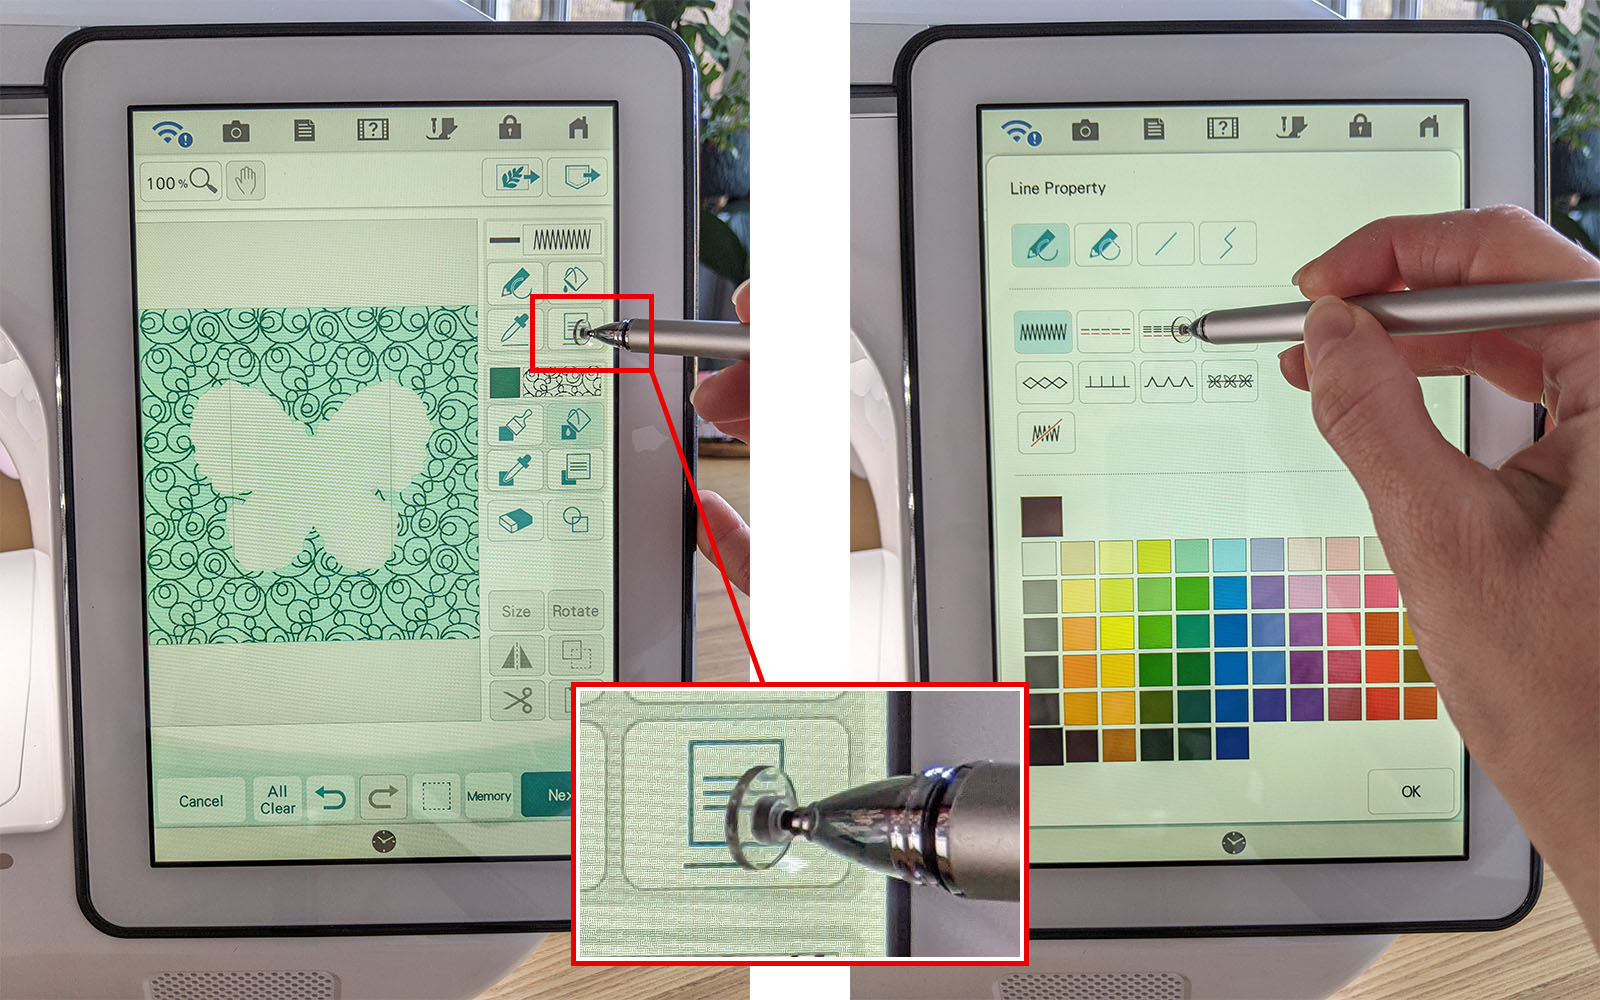
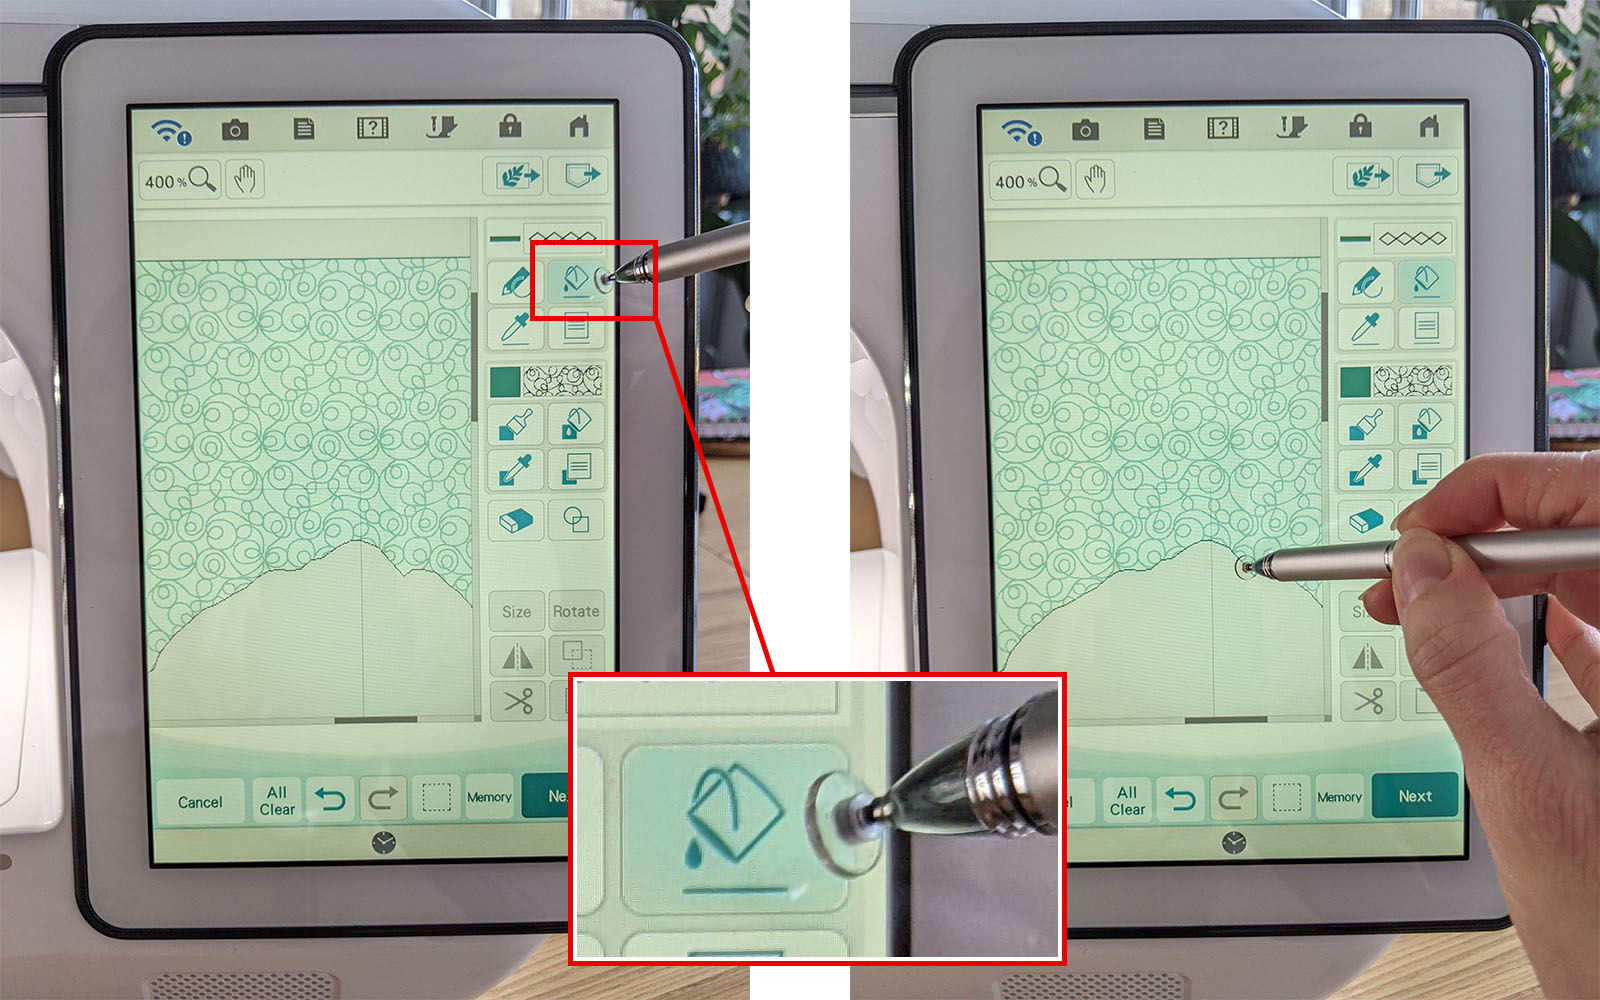
Step 17
Make sure your outline paint pot is selected → Then tap on the outline that you’d like to apply this stitch and colour to → Repeat this for the square outline too if desired.
Step 18
When you’ve finished creating your design press ‘Next’ → Use the arrows to view each element of your design → Change the settings for each element if desired - I changed the chain stitch size from 4.0mm to 5.0mm → Press ‘Ok’ after changing any settings.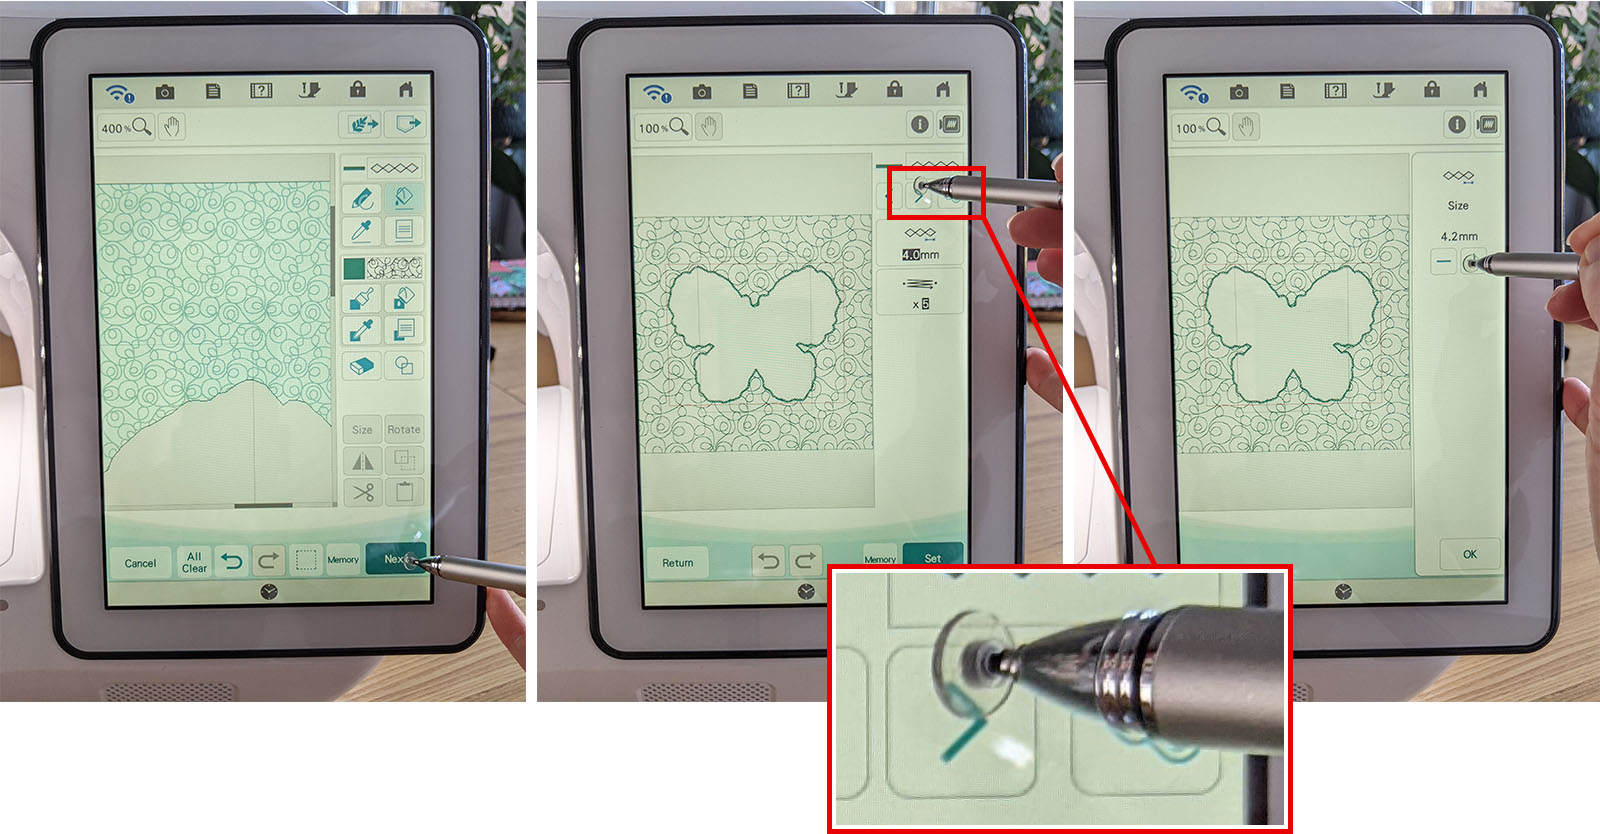
Step 19
It’s a good idea to save your design at this stage, so you can make additional changes to it another time - press ‘Memory’ → Then press ‘Set’ → Then ‘Ok’.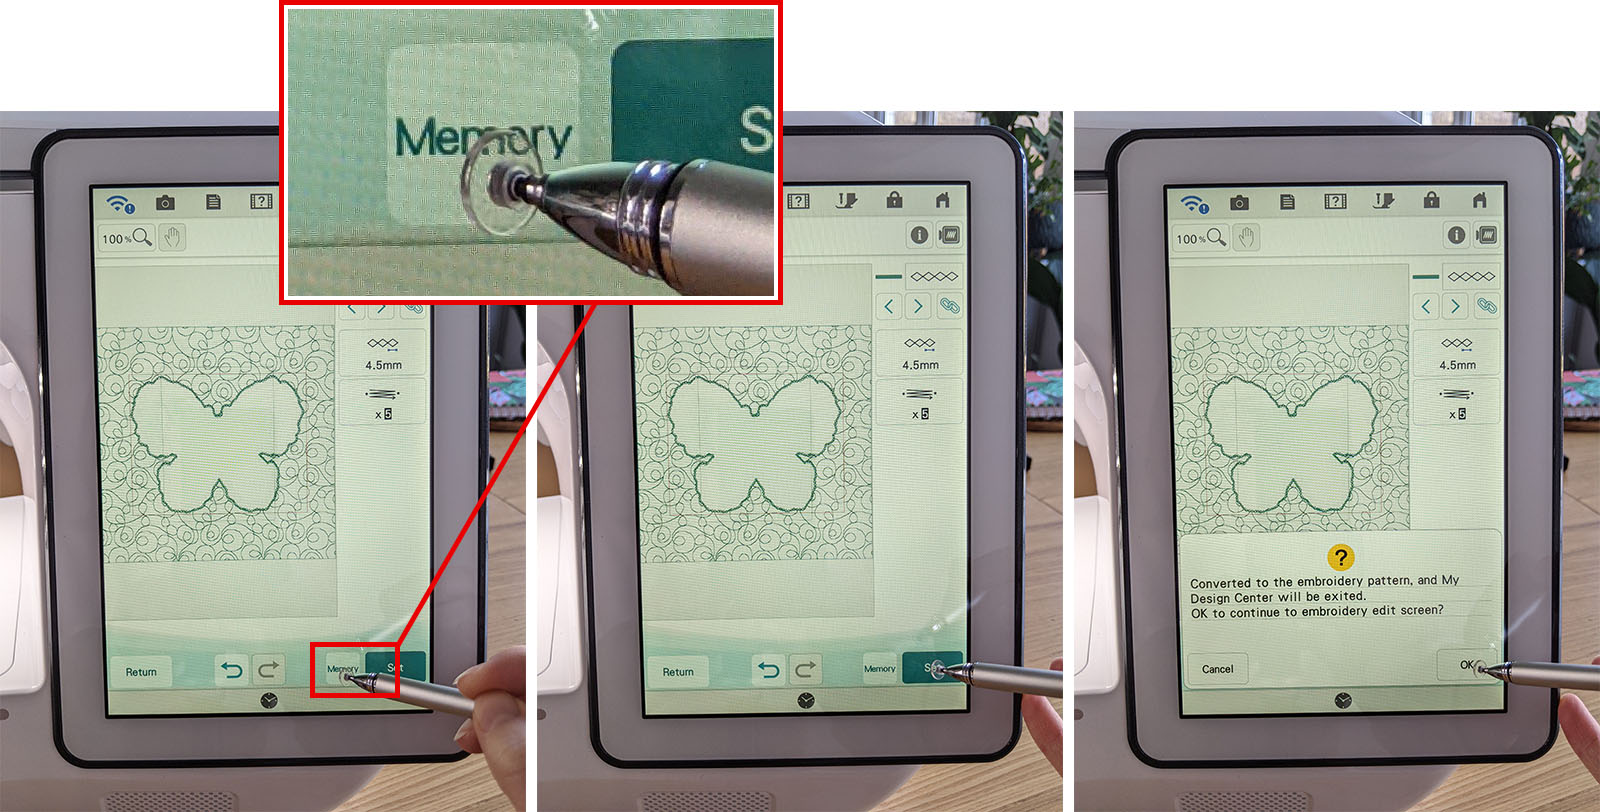
Step 20
You’ll see that your decorative fill pattern has been placed perfectly around your original design! → Press ‘Embroidery’ → Then ‘Memory’ if you want to save the design.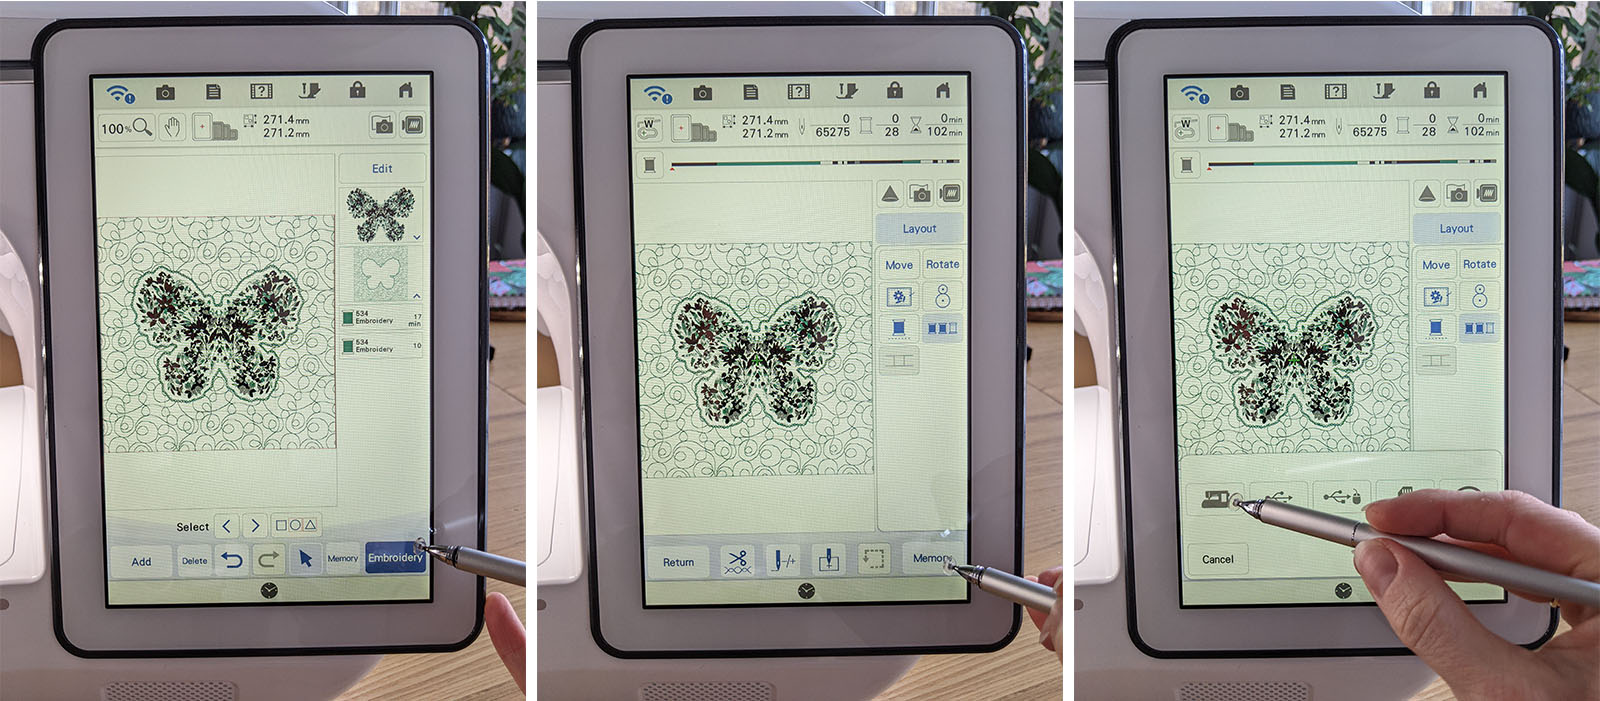
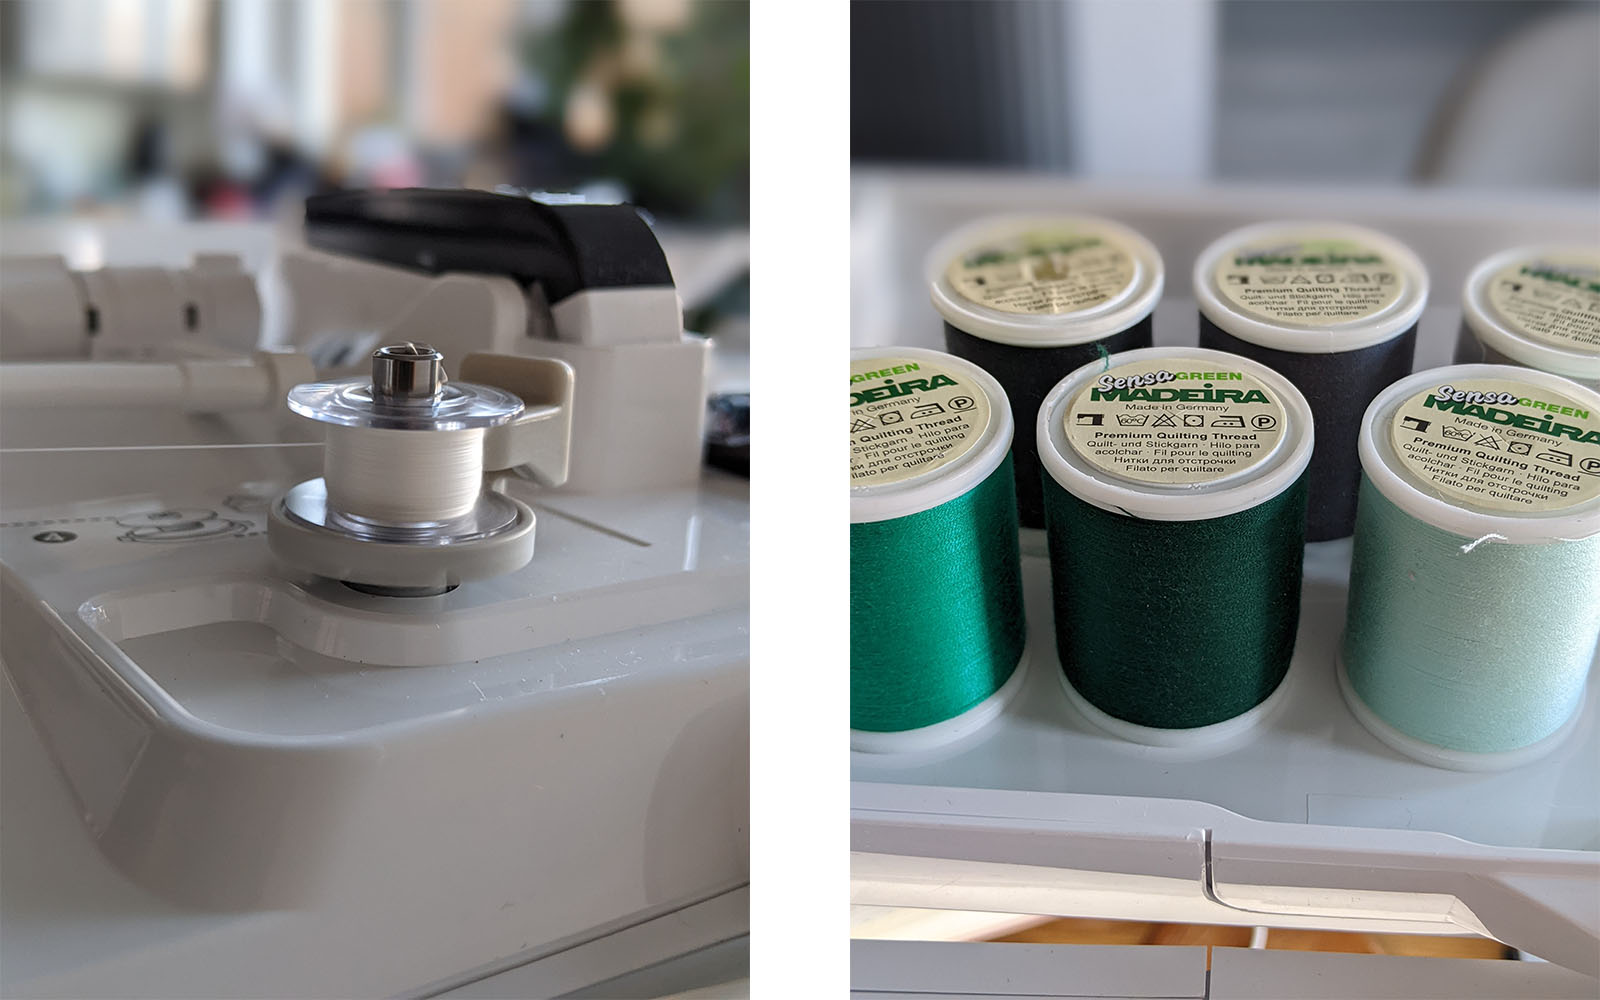
Step 21
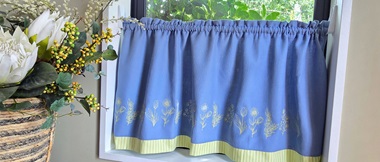
Stitching time! → Hoop up your fabric and stitch and tear stabiliser → You can use a thin wadding/batting to give the design more of a quilted effect → Wind your bobbin and get your top thread colours ready. I’ve used some Madeira Sensa Thread for my design.