How To: use the Brother Blind Stitch Foot

A neat hem adds the finishing touch to trousers, skirts and even curtains.
In this post we show you how to use the Brother blind stitch presser foot to achieve a perfect finish easily and quickly with your sewing machine. No need for tedious hand sewing! Brother’s blind stitch presser foot enables you to sew right next to the fold of the hem, creating a perfect invisible hem.
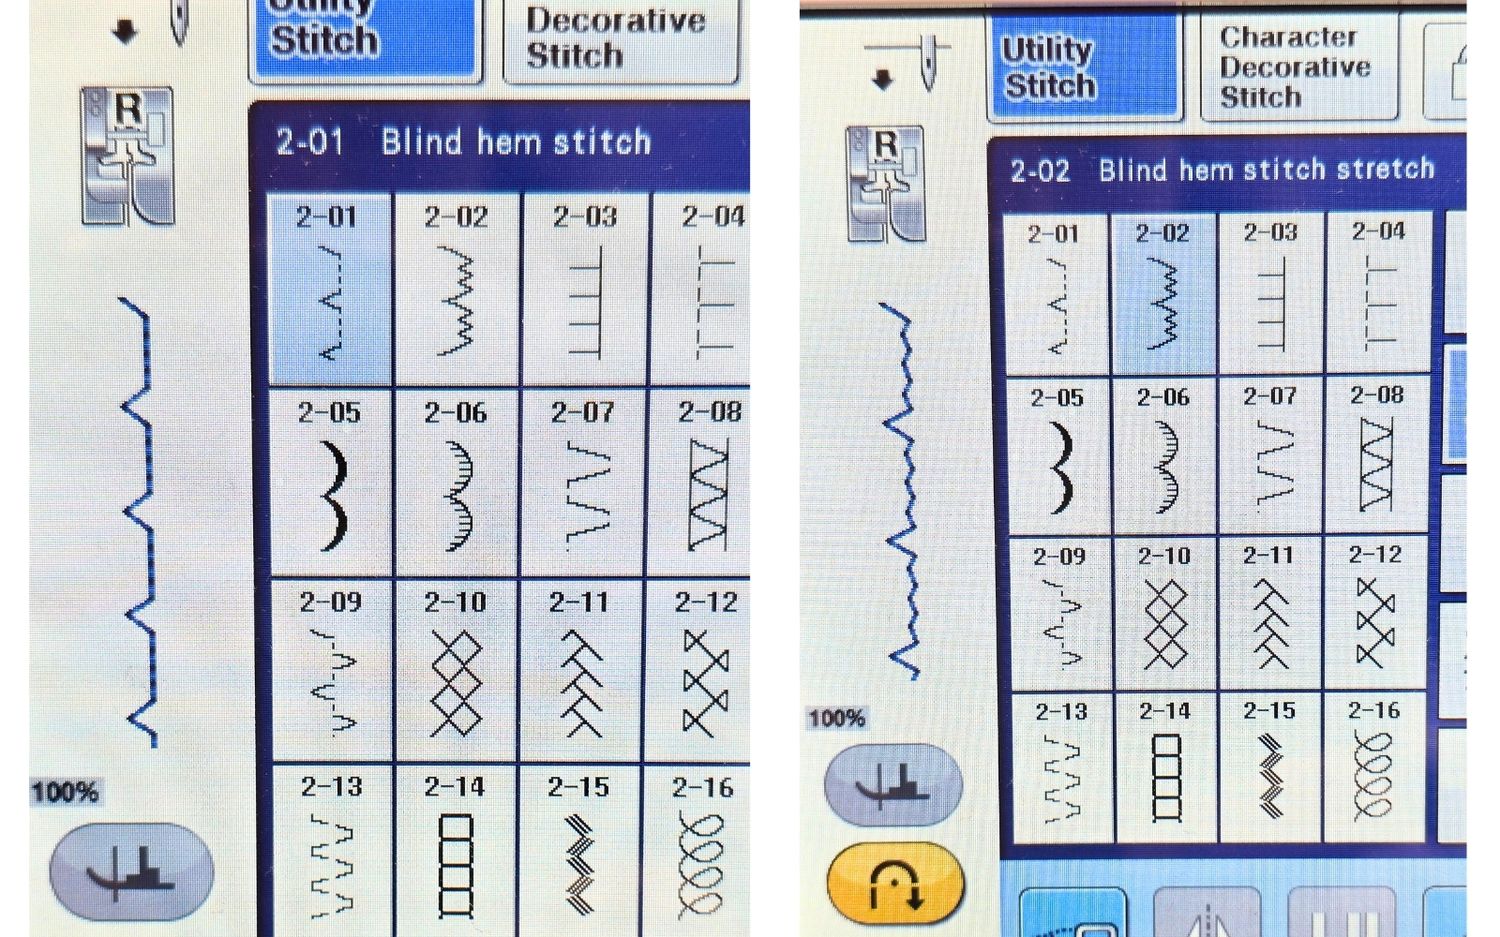
The blind hem sewing stitch has a number of straight or small zig-zag stitches followed by a single large zig-zag stitch. To make this stitch invisible, the large stitch catches a small part of the fabric as you sew, securing the hem in place.
This method of hemming is suitable for textured or heavier fabrics which require a wider hem. It is less suitable for hemming thinner and smooth surfaced fabrics, as it is difficult to catch enough of the fabric to secure the hem without a stitch showing on the right side.
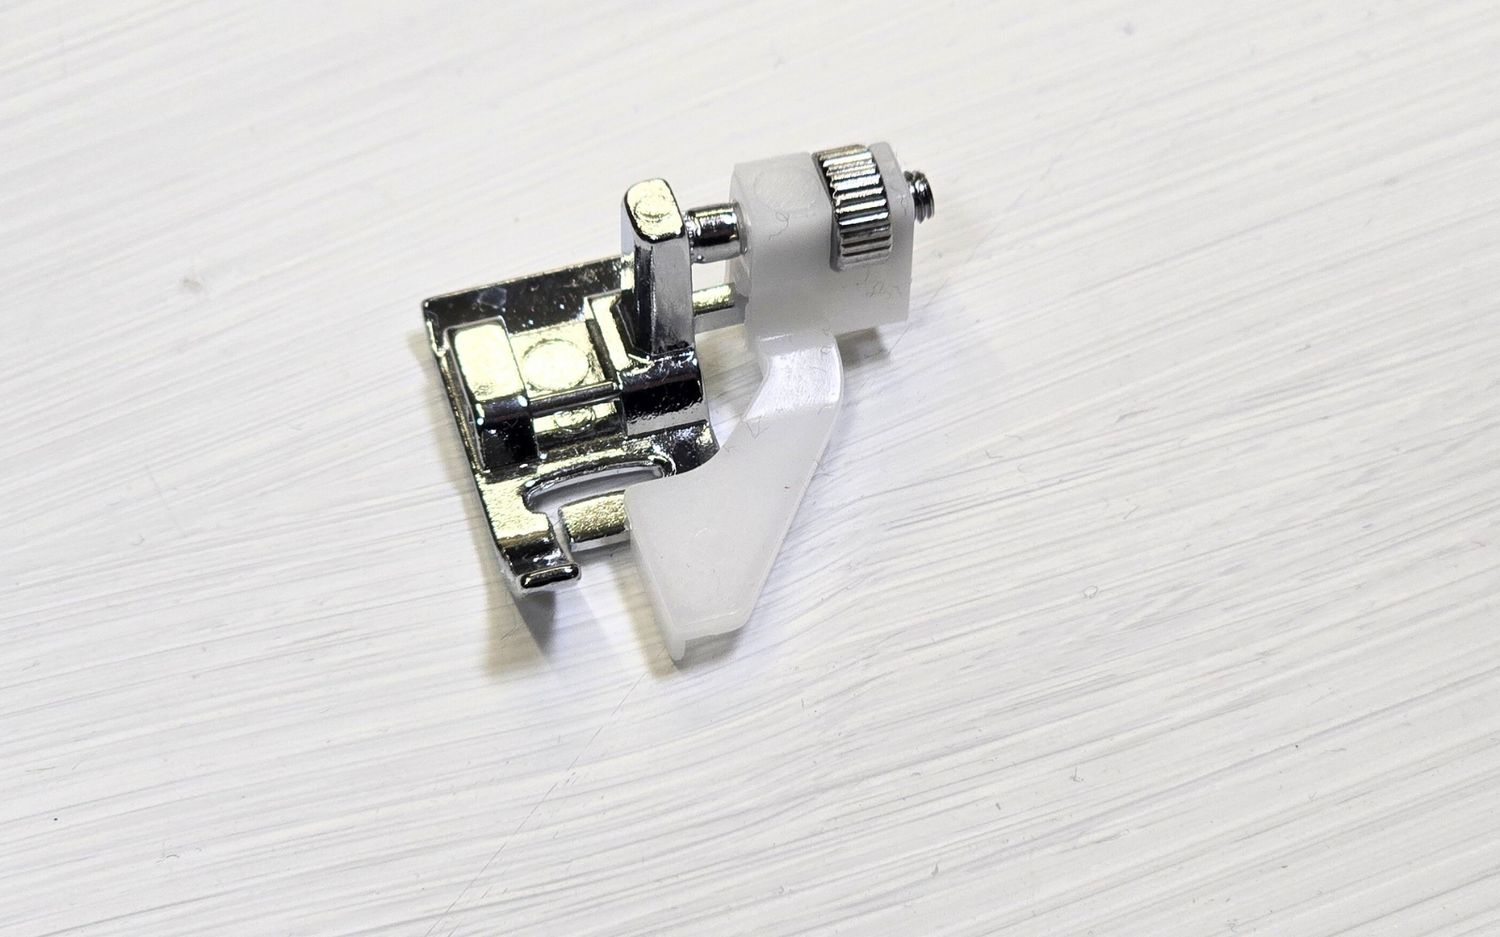
With most Brother sewing machines, the standard blind stitch foot (foot R) is included. The adjustable version, which is an optional accessory to be purchased separately, is slightly easier to use. The adjustable guide simplifies the process of getting the settings right.
Note: in the images we have used contrasting thread colours to show the stitching. Carefully match the thread colour to your project when sewing blind hems.
Accessory snapshot
Brother Blind Stitch Foot F017N
How do you use the Brother Blind Stitch Foot to sew an invisible hem?
Step 1
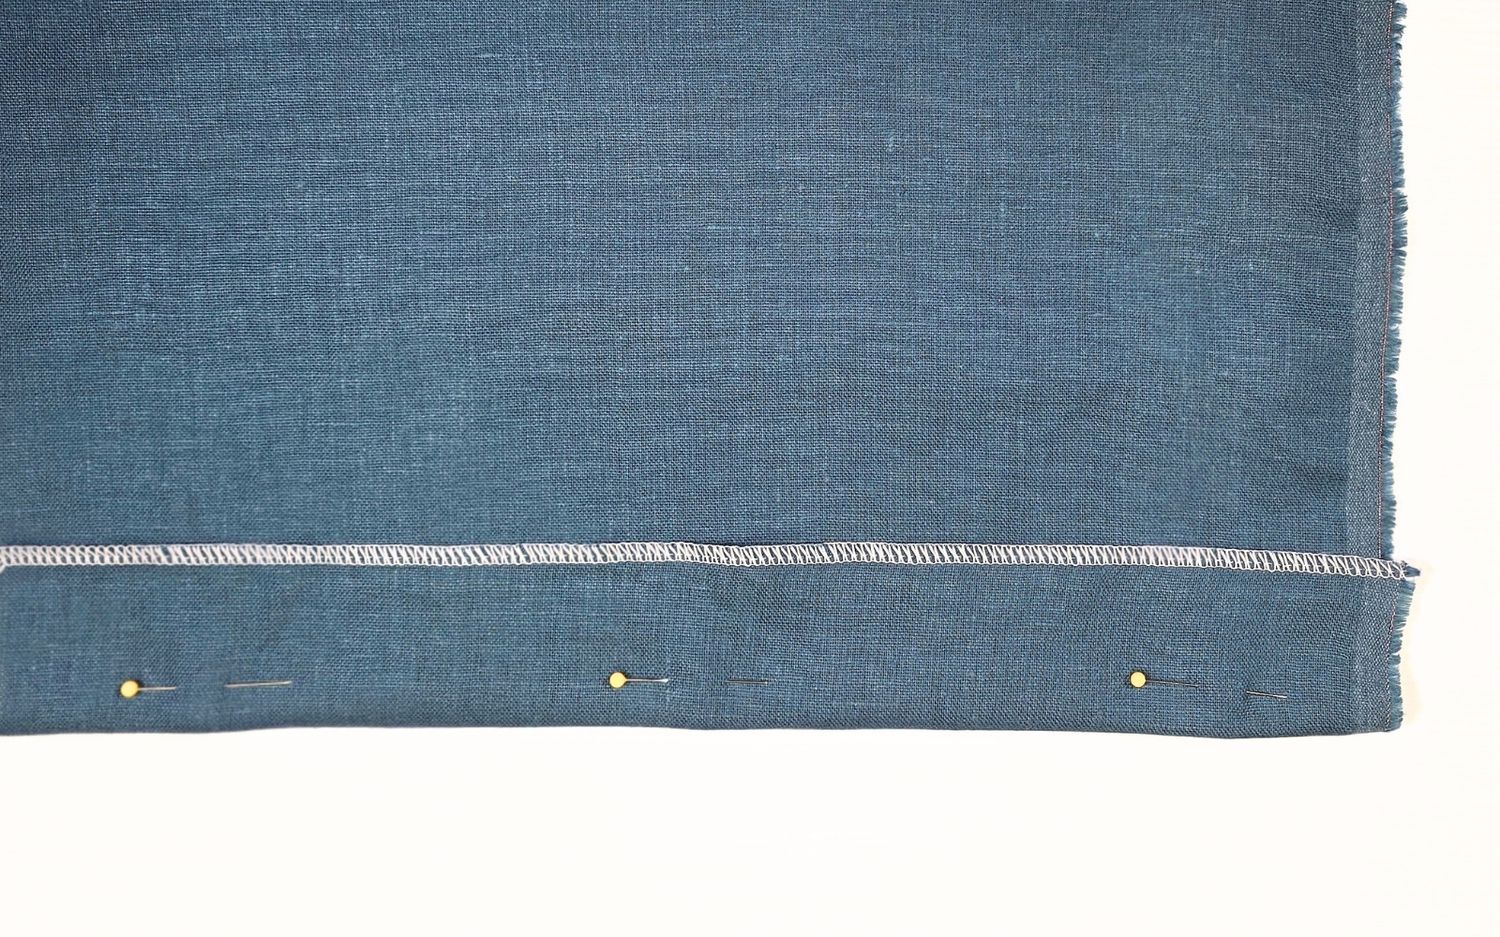
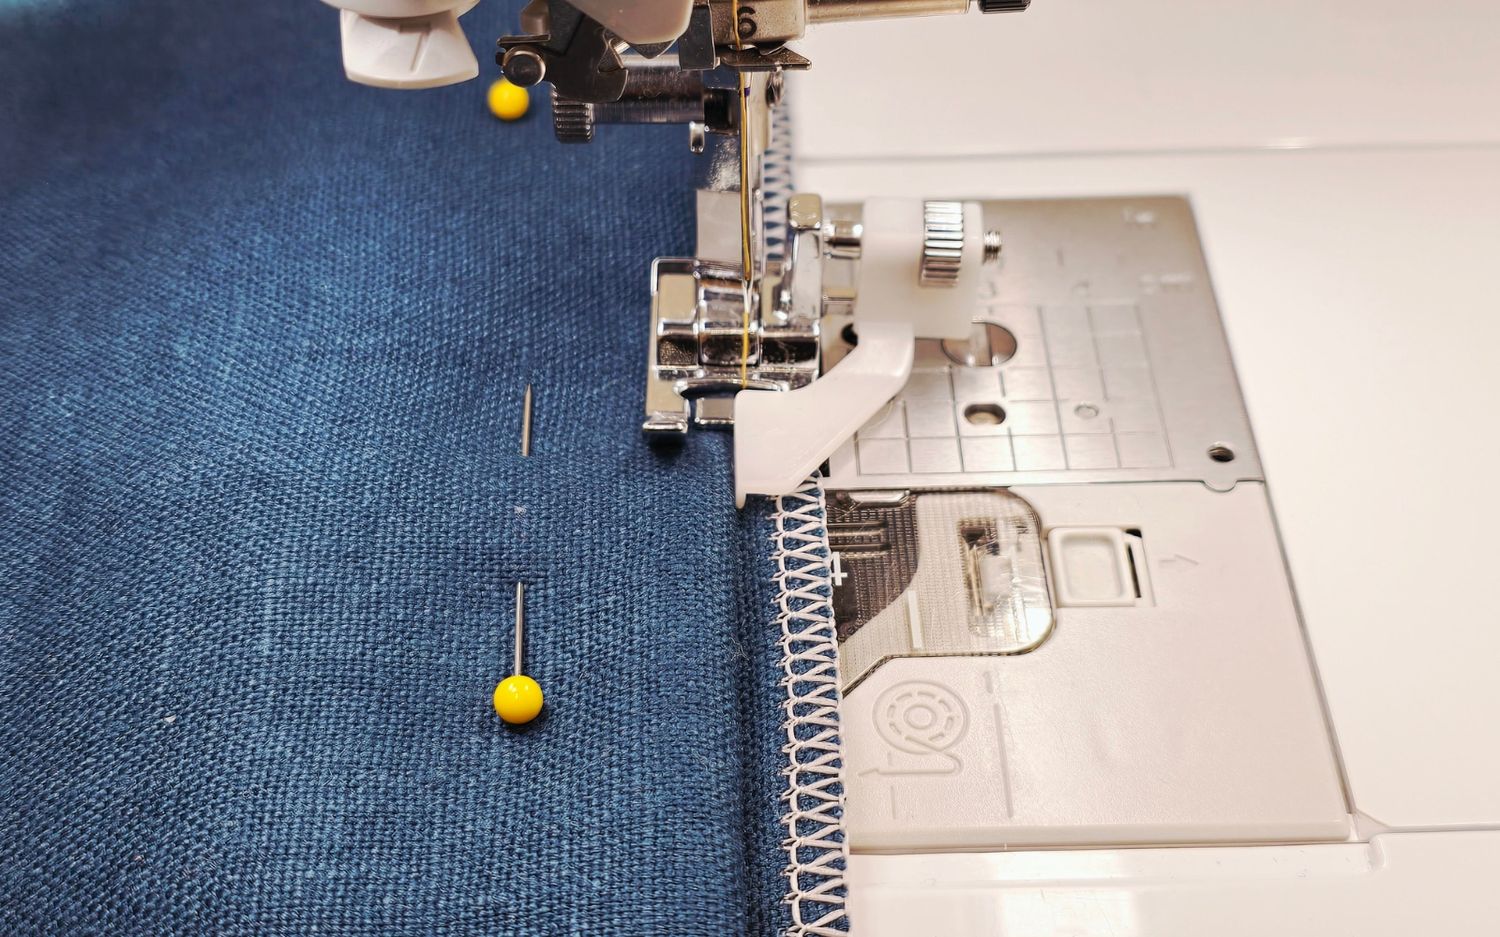
Finish the raw edge of your project with a zigzag stitch or overlocker. Press. Fold the hem on the fold line to the wrong side of the fabric and pin close to the fold.
Step 2
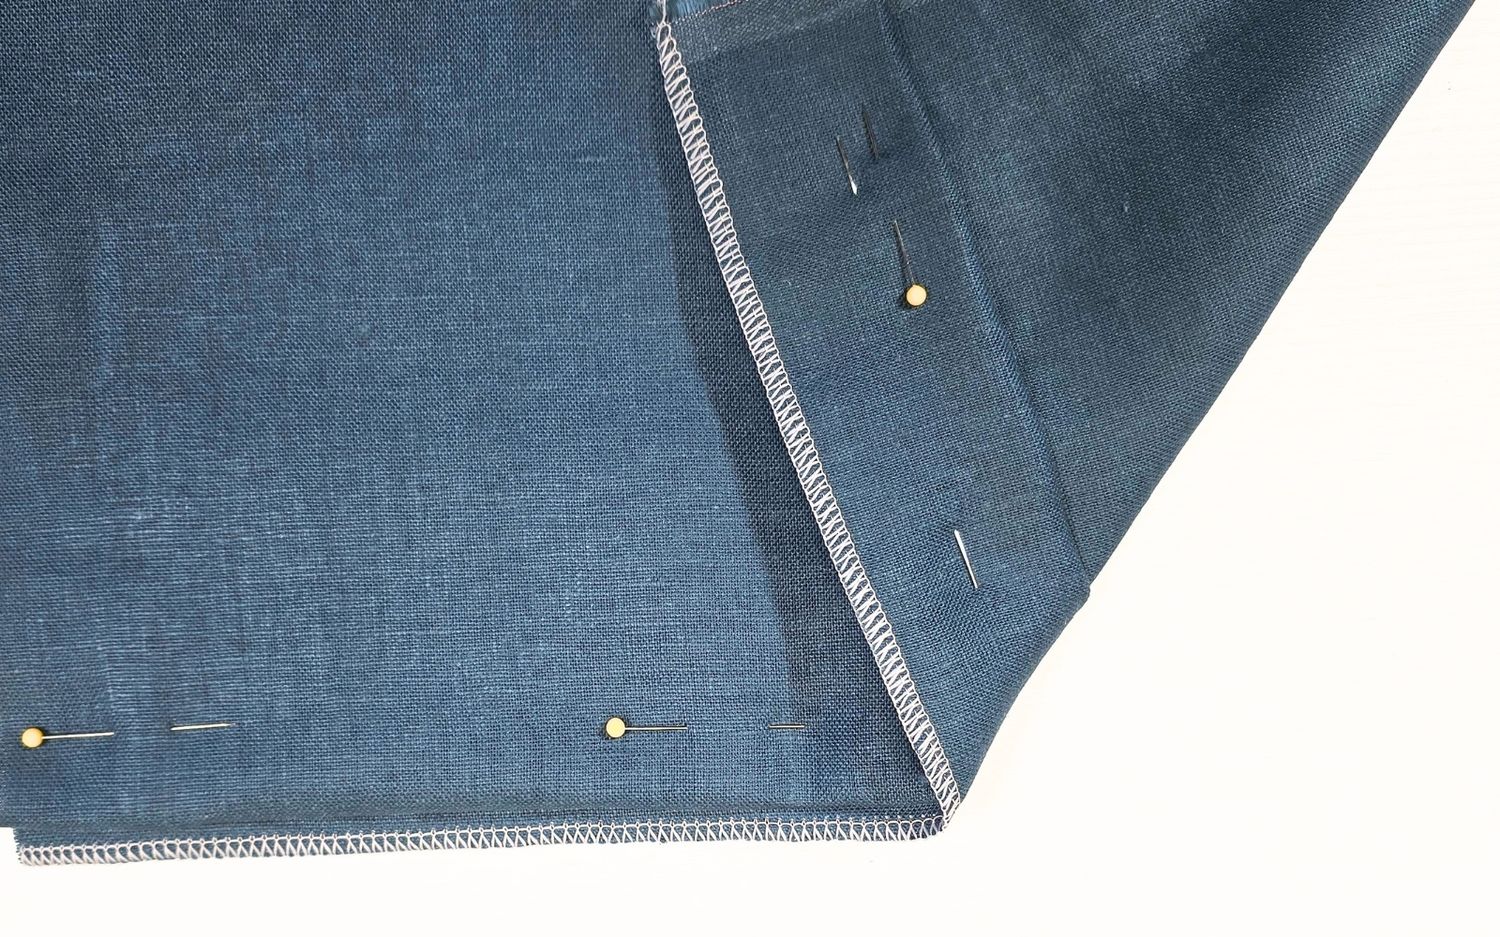
With the wrong side facing up, fold the doubled hem to the underside of the right side of the fabric, so the finished edge extends only about 5mm from the fold you just created. Pin again, making sure to place the fold the same distance from the finished edge all around.
Tip: keeping the fold in place is the key to a successful hem. You can tack the fold in place to help keep it in the correct position. This is helpful especially on large items or loosely woven fabrics.
Step 3
Attach the blind stitch presser foot to your Brother sewing machine.
Select the blind hem stitch: for stretchy fabrics, use the blind hem stitch with zigzag stitches in between the larger V shaped stitches. For non-stretchy fabrics, use the stitch with straight stitches in between the V-shaped stitches.
Step 4
First sew a test with a scrap of the same or similar fabric. Place the folded fabric under the presser foot, positioning the guide to run snugly next to the fold, but not on the fold.The small zigzag stitches or the straight stitches will be sewn on the single layer of fabric, on or very close to the stitches finishing the raw edge of the fabric. The large stitch will sew only just into the fold.
To find the correct position when placing the fabric next to the blind stitch foot, turn your sewing machine’s flywheel until the needle comes down for the large sideways stitch. Stop a few millimetres above the fabric and then move the edge of the fabric fold to be directly in line with the needle. Bring the needle down, catching just the edge of the fold. Lower the presser foot, and using the roller adjustment, move the guide to sit snug next to the fold. You may need to lift the presser foot and lower it to check a few times.
Once you have the guide next to the fold, continue to sew on your test.
Step 5
Sew a distance of approx. 10cm, take the fabric out of the machine and inspect the result.
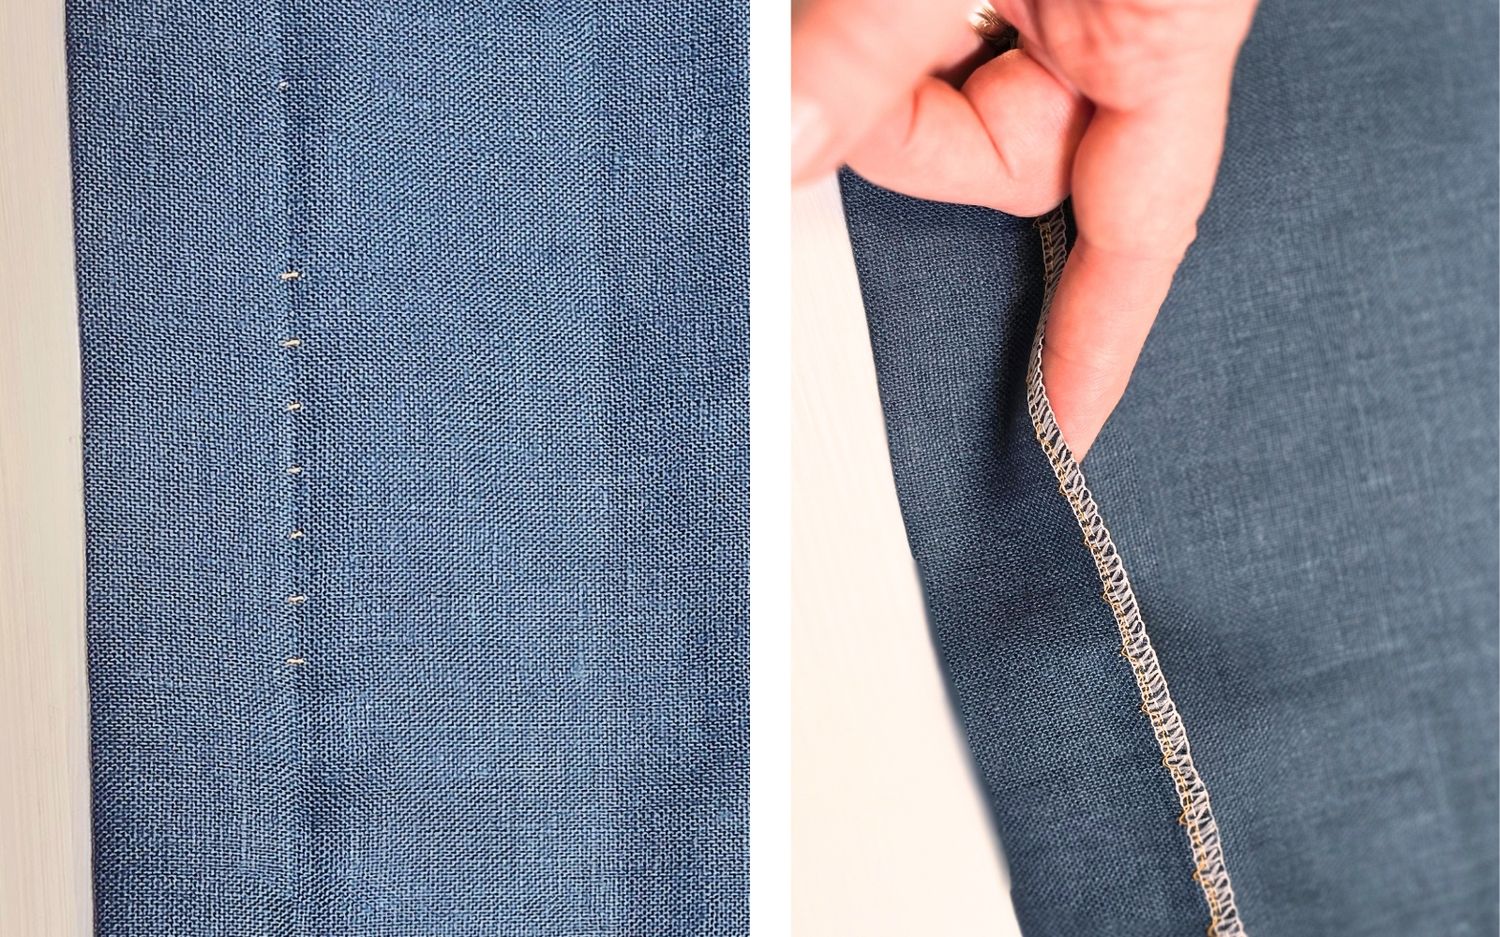
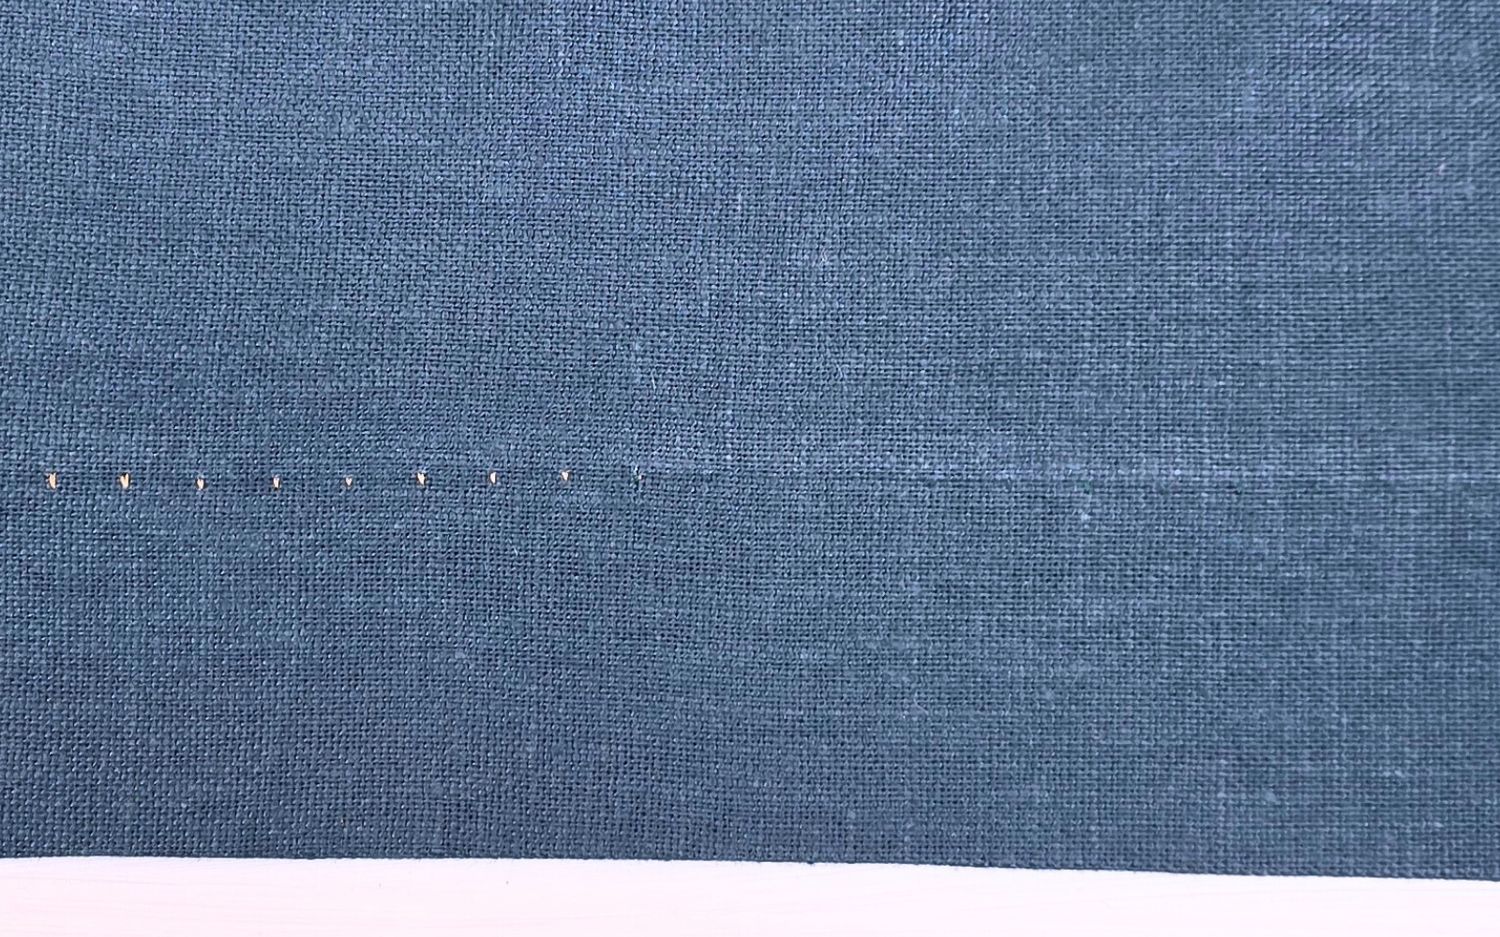
The objective is to catch a few threads of the fabric fold only: enough to keep the hem in place, but little enough to not be visible on the right side of the garment.
Tip: in the image below we have sewn a blind hem with both a contrasting thread and a matching coloured thread. On the left, you can see some tiny yellow stitches – this is how little thread needs to be sewn to pick up the hem. You can’t see the tiny stitches on the right – which underlines the need for always using a matching thread colour when sewing a blind hem.
What should I do if I’m getting a poor result when stitching a blind hem?
If you’re getting a poor when sewing a blind hem you can:
- Adjust the stitch width and sew again
- Adjust the needle position if needed.
- Place the garment under the presser foot and sew all around the hem, keeping the guide in place.
- Fold the hem and press again.
- Most importantly: repeat your test until you get it just right – don’t sew on your main fabric until you’ve perfected the blind hem on your test pieces.
In the images below you can see too much of the fold has been caught in the stitches on the left, and not enough on the right.