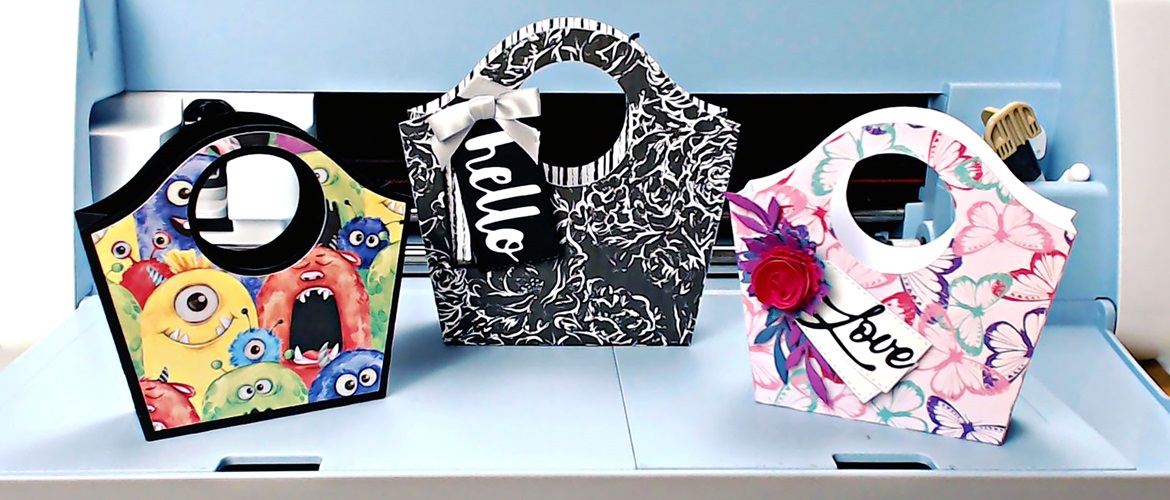
Tapered tote gift bags


Use your Brother ScanNCut to create these bespoke tapered tote bags.
Customise them using cardstock to match your event, personality or mood. They’re the perfect size to use for wedding favours, party bags, gift bags or desk storage.
Best of all, you can resize the pattern and make different sizes to suit whatever it is you need to store in them.
Size
Tote bag measures approximately 250mm wide by 500mm high. When cutting at the minimum cutting size, you can fit two bags on a 12 x 12” cardstock sheet.
If you want to cut a larger version, use a 12 x 24” cutting mat and larger sheets of cardstock.
Materials needed
Paper/card (per hat)
- 1 sheet of 12 x 12” solid colour 200gsm/80lb cardstock
- 1 sheet of 12 x 12” patterned 160gsm/65lb patterned paper
Note: if you plan to use coloured or patterned cardstock for the main body of the bag, you do not need the extra sheet of patterned paper.
You will also need
- Bookbinding glue or low tack/quick grab glue or double-sided tape
- For scoring the fold lines, I recommend a fine tipped stylus and a metal ruler
- Embellishments
Please note: the instructions below are for the basic tote bag. You can freely embellish to your liking by adding elements such as text, 3D decals, cut outs, foiling etc. The ScanNCut has a wide range of built-in designs, fonts and applications for this purpose. Additionally, you can find thousands of extra cutting files on the Brother Artspira design app. Have fun!
Equipment needed
ScanNCut - hardware
- Brother ScanNCut – any CM Model
- Standard mat [CAMATSTD12]
- Standard blade [CABLDP1] and blade holder [CAHLP1]
OR
- Brother ScanNCut – any SDX model
- Standard mat [CADXMATSTD12]
- Standard auto-blade [CADXBLD1] and holder [CADXHLD1]
ScanNCut - software
- CanvasWorkspace for PC or Mac
Download cutting files here
How to
Step 1
Download the CanvasWorkspace project file. Open it in CanvasWorkspace (the desktop version). Open the layers tab on the right.
Tip: if you plan to resize the project, select both layers and group them before you start resizing.
Step 2
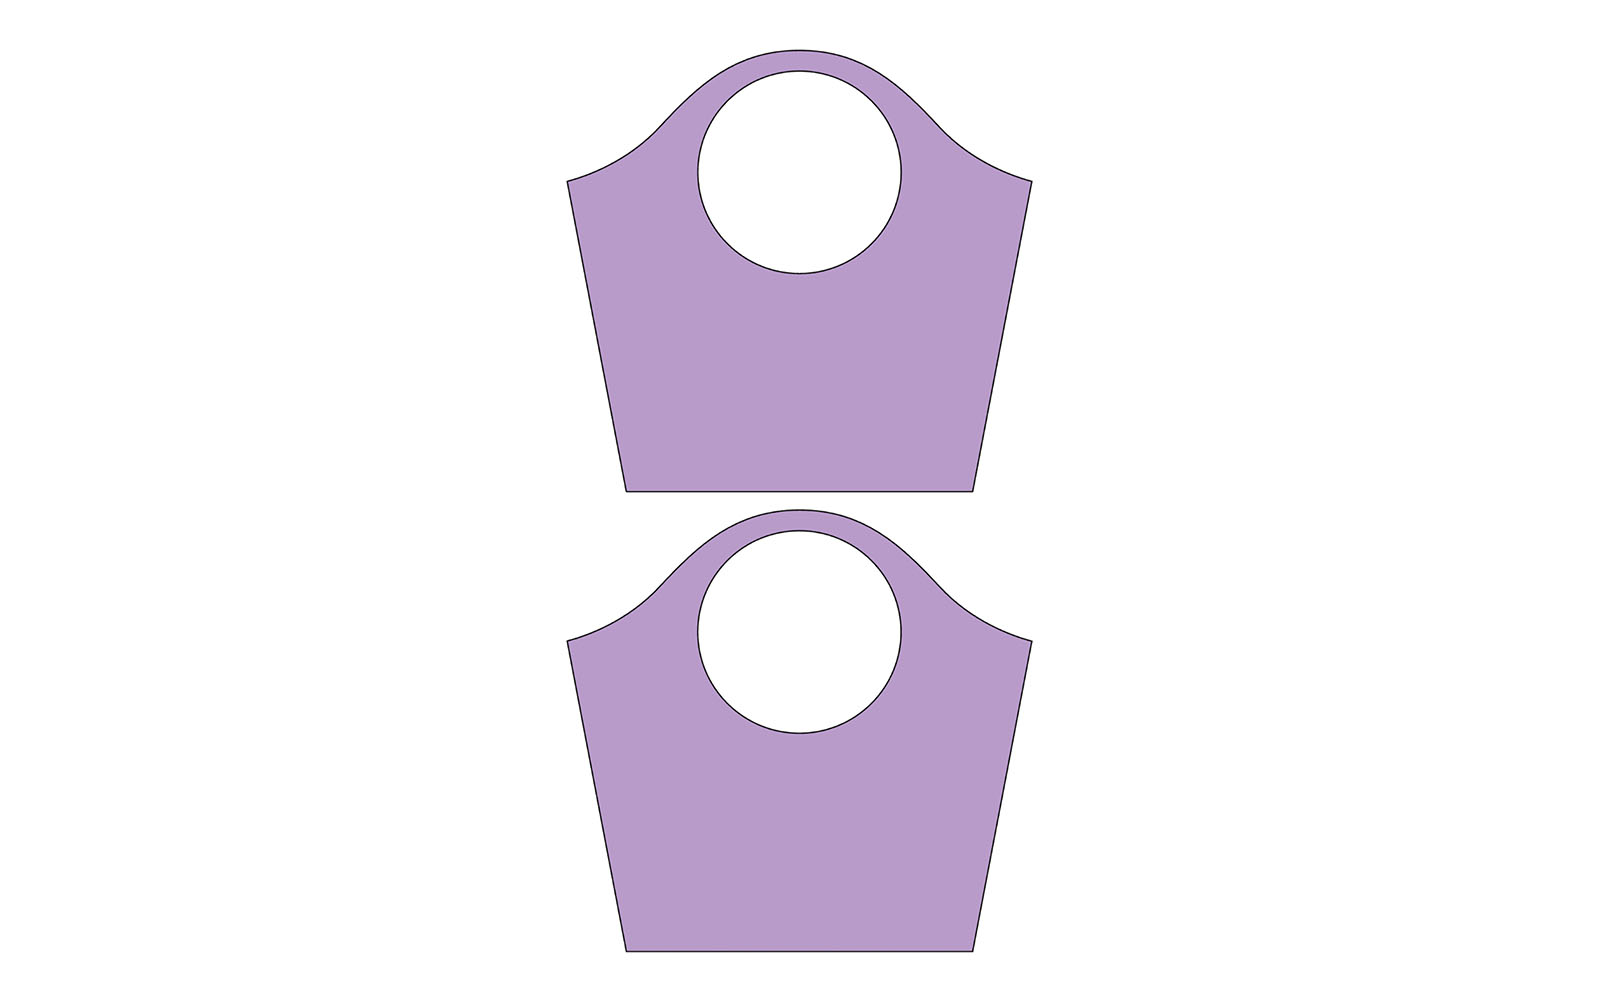
Hide and lock all layers except the one titled 1. Transfer this to your machine using the File>Export/Transfer FCM File menu option. Cut once from solid colour 12 x 12” cardstock. Cut size: 164.1mm wide and 219.5mm high.
(Note: maximum cut size: 220.5mm wide and 294.9mm high).
Step 3
Hide and lock all layers except the one titled 2. Transfer this to your machine using the File>Export/Transfer FCM File menu option. Cut once from patterned 12 x 12” paper.
Cut size is 164.1mm wide and 219.5mm high.
(Maximum cut size is 128.3mm wide and 249.7mm high).
Note: this step is optional. If you plan to use coloured or patterned cardstock for the main body of the bag, you can skip this step.
Step 4
Assemble as shown in the video.
If you make this, remember to tag in Brother on Instagram and Facebook, and myself on Facebook (and give us all a follow too)! You can also find Brother on Pinterest and YouTube for even more ScanNCut inspiration.


