Machine embroidery for beginners

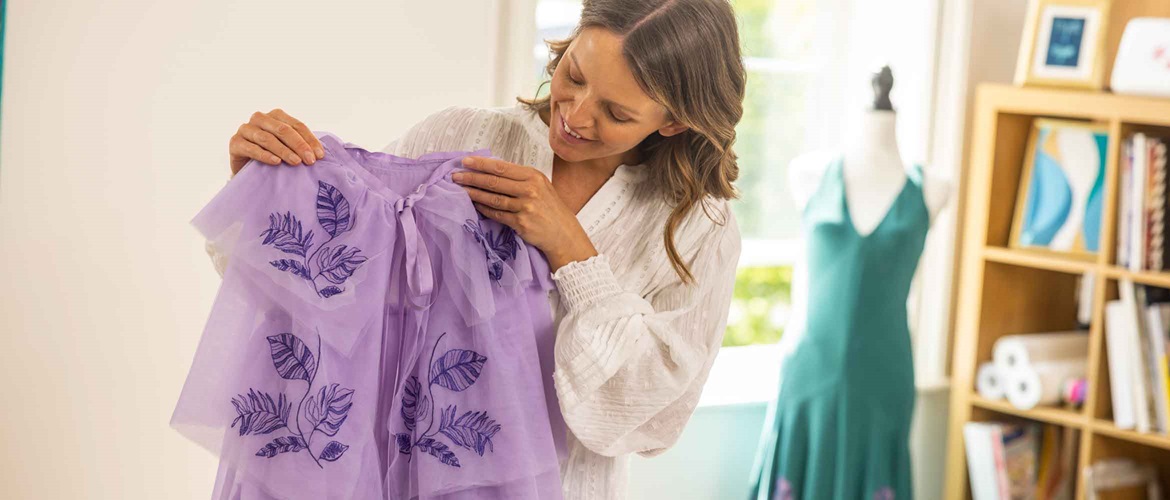
Brother embroidery machines are amazing and the things they can stitch out can be extraordinary!
However, disappointment can sometimes follow when the first stitch outs aren’t so great.
If you’re new to embroidery and are struggling to master the skill, don’t despair! Read on; our handy guide will help you to understand the basic materials, tools and techniques needed to create great embroidery pieces in no time.
What does good embroidery look like?
Let’s start with what good embroidery looks like.
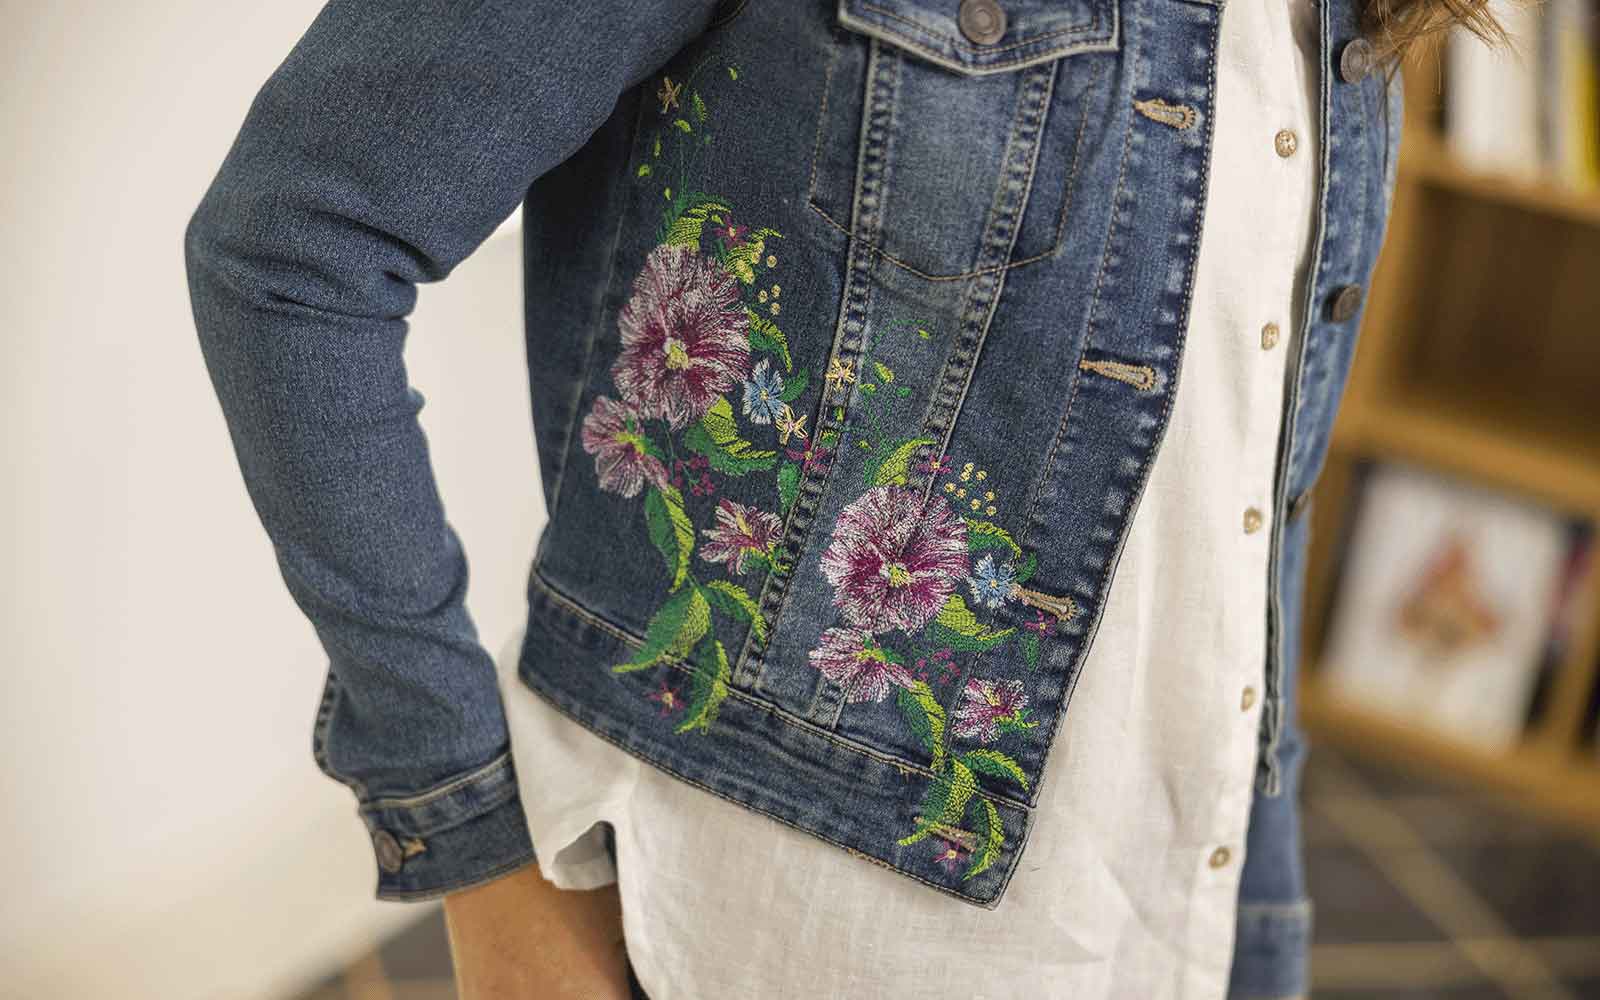
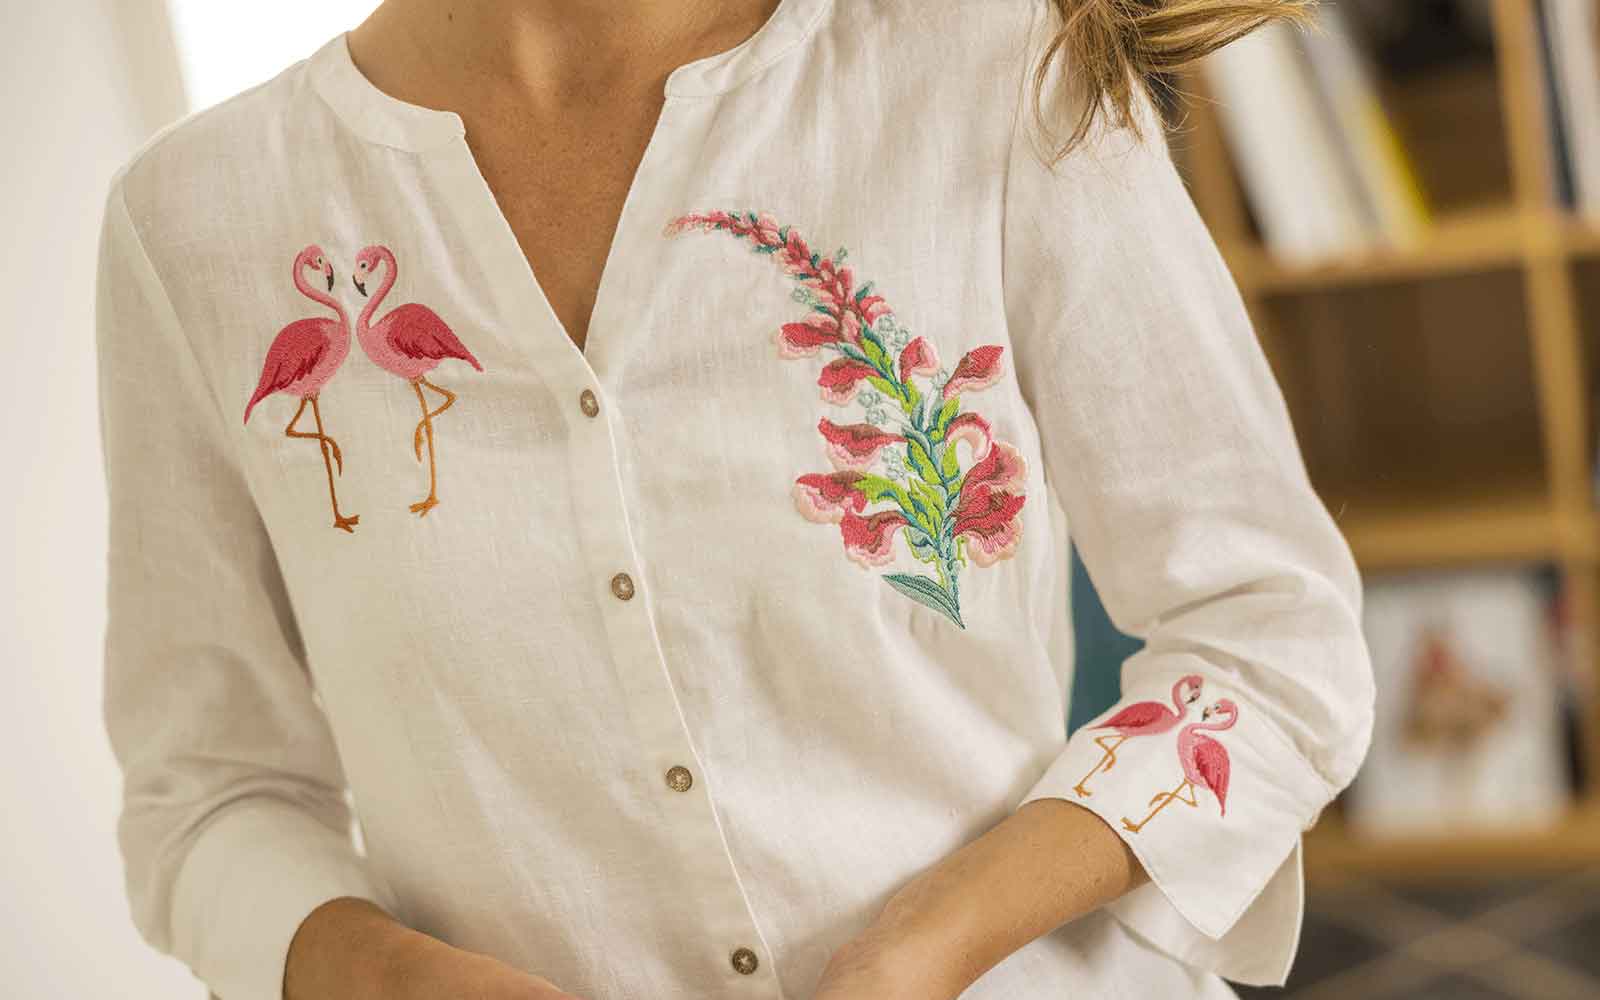
Successful embroidery will lie flat. The fabric around the stitched-out design should not buckle or pucker (look wrinkled) after pressing. The design will not be distorted.
On a well-stitched embroidery, the stabiliser should not be visible on the right side of your project. (don’t worry, depending on the stabiliser used, a little may still be visible on the wrong side).
Great embroidery is the result of combining the correct stabiliser, an embroidery design that is suitable for the fabric you’re stitching onto and good hooping. Using good quality thread, the correct weight bobbin thread and the right needles will also contribute to the success of your project.
So, let’s discuss these factors.
What are the best items to embroider onto?
Embroidery is possible on virtually any textile, but there are a few factors to consider.
The fabric types that are easiest to embroider on are medium to heavy weight, non-stretchy, woven fabrics with a smooth surface. Good examples are sheeting-weight cotton, light canvas and linens, upholstery fabrics, cotton duck, denim and sturdier knits like fleece and tracksuit fabrics.
Fabric types that are prone to distorting or giving a poor stitch quality are very thin or stretchy fabrics or fabrics with a pile. Examples are fabrics used for activewear, piled fabrics like towelling, bouclé, fur, brushed fabrics, velvet, embossed fabrics and very thin fabric like voile or sheer fabrics like chiffon or georgette. This doesn’t mean you can’t embroider onto these thinner, or more technical fabrics, you just need to prepare, stabilise and hoop them correctly.
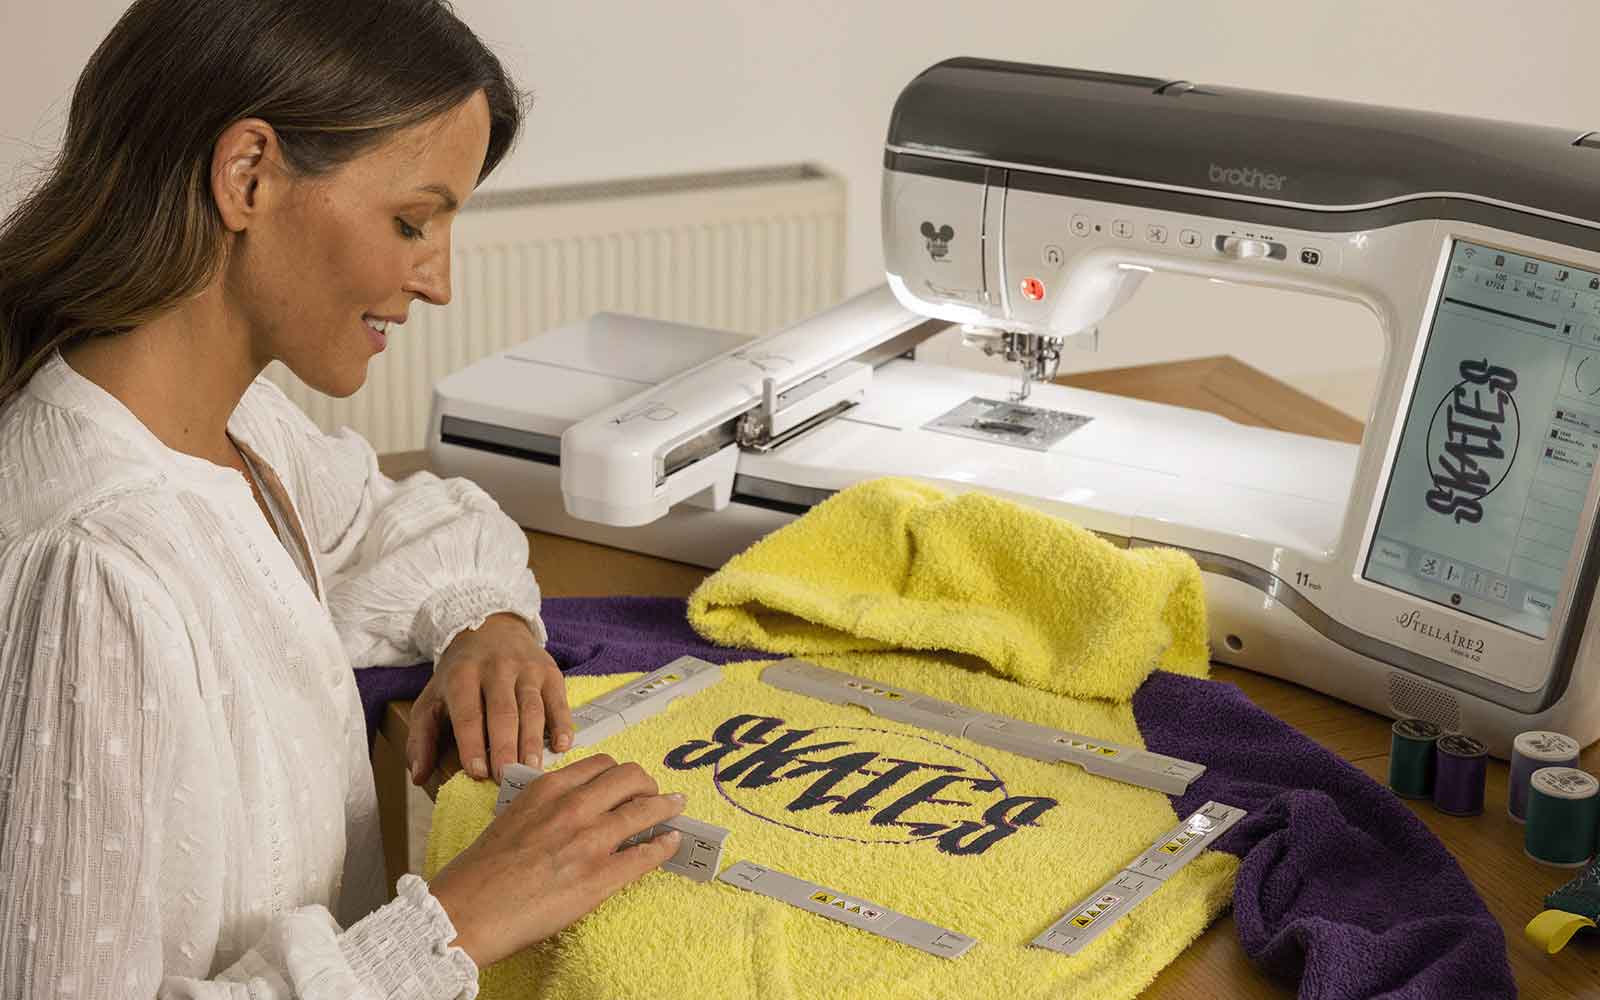
Another factor to consider when you pick the item you want to embroider on is the construction of the garment and the capabilities of your machine. For example, a flatbed embroidery machine will not be able to embroider on trouser legs or the sleeves of a jacket without you having to unpick and then resew the seams. However, a free arm embroidery machine, like the Brother Skitch PP1 or the Brother PR range, are fitted with a cylinder frame that allow tubular items to be easily embroidered.
The key is to know your machine’s capabilities, frame size and attachments available when planning your embroidery project.
What is embroidery stabiliser and how do you use it?
Stabilisers are extra fabric or film that is added to your embroidery fabric to keep it from distorting while being embroidered.
They are also referred to as backing fabric or material. Calling it ‘backing’ fabric is only partly true, as sometimes it is necessary to add a stabiliser to the front of the fabric as well.
There are many types of embroidery stabiliser, and which one/s you need to use will depend on what you’re embroidering, on which textile, with which thread. You can read all about the best type of embroidery stabiliser to use for each project here.
How do you hoop an embroidery project properly?
Hooping your machine embroidery project properly is very important if you want to get a good result. Here are a few guidelines:
- Always use the smallest embroidery frame possible that can accommodate your embroidery design.
- Make sure the fabric and stabiliser are not creased. If you can, press or steam before you start.
- Using a pressing aide or light starch will keep the fabric smooth while you hoop and embroider. Check that your fabric and stabiliser are compatible with these products before you start.
- Make sure your fabric and the stabiliser are smooth, flat and lightly adhered to each other if possible. Fusible tearaway or cutaway stabiliser is a great help.
- The fabric and stabiliser should be at least 5cm larger than the frame all around.
- Make sure all layers are clamped well into the embroidery frame. The surface of the fabric should be taut but not stretched.
- When your embroidery design is loaded onto your Brother embroidery machine, you can add a basting box if your machine has this function.
- Where possible, opt for Brother’s magnetic embroidery frames. They are easier to use and prevent hoop burn.
There are many ways to hoop when embroidering on a Brother embroidery machine – and too many to cover here! If you want to read a more in-depth guide on how to properly hoop fabrics and garments for machine embroidery, read our blog post on how to hoop here.
What embroidery thread should I use on a Brother embroidery machine?
Collecting all the beautifully coloured embroidery threads is one of the joys of machine embroidery! But not every thread is made for machine embroidery, and not every embroidery thread is made the same!
For machine embroidery the thread should be thinner than normal sewing thread. Choose 40wt polyester, rayon or metallic thread.
In the bobbin you should use bobbin thread, which is thinner than the top thread – normally a 60wt for Brother combination embroidery and sewing machines, and a 90wt for Brother embroidery-only machines.
Polyester embroidery thread is sturdy and strong. It will not shred or break easily so is less prone to thread breaks or tension issues. The colours are bleach resistant, so will not fade. It is slightly less heat resistant and pressing with a hot iron directly onto the embroidery is not recommended. Glossy and matt options are available.
Rayon embroidery thread is slightly glossier than polyester and is silky to the touch. It is more heat resistant but will fade over time or with use of bleach. It also shreds and breaks much more easily than polyester.
Metallic embroidery thread can add sparkle to your designs. It can be trickier to work with. Use a metallic embroidery needle and lower the top tension if you have issues. The thread is also prone to twisting so use a telescopic thread stand or even put the spool into a jar on the table behind the machine!
How should I finish my machine embroidery project?
Pressing your machine embroidery project can get rid of minor puckering and distortion in the fabric.
After your embroidery is done, remove it from the embroidery frame and trim any excess stabiliser and thread ends.
Press with an iron. Set the temperature to one that is suitable for the fabric the embroidery was done on. It is also important to use a pressing cloth.
There are many products available that can help you to press well without flattening the embroidery or risk scorching the thread. The basics are:
- a pressing cloth
- a pressing surface like a wool pressing mat
- a pressing spray like Best Press or Flatter, and
- a good quality steam iron.
When pressing from the back, you can lay your embroidery facing down onto a soft surface like a soft wool pressing mat or a thick towel. Cover the work with a pressing cloth and press carefully.
If pressing on the front, cover with a pressing cloth and, depending on the nature of the embroidery, you may want to avoid pressing too hard onto the embroidered areas.
We have lots of other handy How To articles on creative machine embroidery. You can read them by heading to the Embroidery Emporium section of our website. Check out our YouTube channel for helpful How To videos.


