How to use the Brother ruler foot

The Brother ruler feet allows you to glide along the edge of a shaped ruler to create accurate quilting lines.
If you are already familiar with free motion quilting, this foot will add another tool to your toolbox.
If you have never done free motion quilting, we suggest you take a lesson or practice that technique first.
Accessory snapshot

Which Brother ruler foot is the right one for your machine?
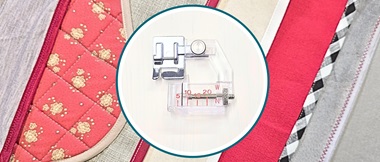
Brother has two ruler feet, a high shank foot and a low shank foot.
What’s the difference? As the name indicates, it is the height of the shank. Choose the one that is correct for your machine.
Tip: to know if your sewing machine has a high or low shank, measure the shank which is attached to your machine, and which you clip the N foot on to. If the distance from the bottom of the screw hole measures less than 2cm, your machine has a low shank, and if it measures 2cm, your machine has a high shank.
Ruler foot for high shank Ruler foot for low shank
How to use the Brother ruler foot
1. Remove the shank from the sewing machine and screw the ruler foot in place.

2. Set your machine to straight stitching and free motion mode. You may have to drop the feed dogs with a manual switch, depending on the model you are using.

3. Choose your free motion quilting design and make any markings as indicated by your quilting ruler or pattern.

Tip: to prevent knots on the wrong side of your work, do not use the thread cutter. Start and end your work with a long thread tail, which you can pull through to the back and bury in the sandwich after the quilting is done.
* Quilting rulers and free motion patterns sold separately.

Tip: quilters gloves make this easier!