Sarah’s diary - how to personalise a T-shirt

“I really like clothing that has interesting detail round necklines and cuffs. It adds a premium look, but is actually quite simple to do at home. Customising your own clothes is one of the easiest ways to make a personal fashion statement and ensure that whatever you wear, you won’t see anyone else in it!”
I’ve always been one who likes to have a unique style. With the financial, and now the environmental, cost of always buying new, my sewing machine has become my go-to tool when I want a new look.
Making new clothes from scratch is pretty daunting and something I’m still learning to do. But, seeing that my Brother Innov-is A80 comes with lots of decorative stitches, I thought why not use them to quickly add a personal touch to some of my plain T-shirts?
I really like clothing that has interesting detail round necklines and cuffs. It adds a premium look, but is actually quite simple to do at home. The only problem I had was choosing which stitches I was going to use as I liked so many of them! In the end I went for an Aztec style look to match some of the skirts in my wardrobe.
It’s not just stitches you can use for customising. You can use appliqué, add buttons, sew on beads, embroider and add bows – the options are endless.
Before you start this project it’s worth testing your stitches on a spare piece of jersey to make sure you get the length and tension right. Decorative stitches all require slightly different settings and may not be suitable for the material of your T-shirt.
Iron-on backing is important for this project as it gives the T-shirt stability and stops the material ripping.
You will need:
- A T-shirt
- An iron
- Iron-on backing fabric
- Threads in three different colours, and matching bobbins
- Scissors
- Ballpoint needle, for sewing onto stretch fabric
- Sewing machine – we used the Brother Innov-is A80
Step 1
Turn your T-shirt inside out and place the iron-on backing on the area you want to customise, such as around the neck line.

Step 2
Remove the accessory compartment at the bottom of your machine, so you have a free arm machine to work with. This will allow you to easily sew smaller areas like necklines and sleeves.

Step 3
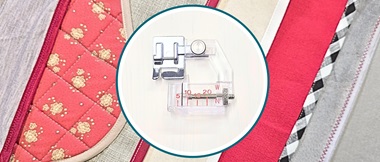
Replace your standard sewing machine needle with a ballpoint needle.
Step 4
Thread your machine with the first colour thread you want to use and create a corresponding bobbin in that colour. Load the bobbin.

Step 5
Choose a decorative stitch you’d like to use.

Step 6
Place your T-shirt, right side up, under the needle of your sewing machine.
TIP: Make sure your T-shirt is placed at the point you’d like the stitching to start.
Step 7
Stitch your first row of decorative stitches, keeping an equal distance from the edge.
TIP: Keep a modest average speed for sewing decorative stitches to give you more control in guiding the stitching.
Step 8
Once you’ve stitched round your neckline, or whichever other part of the T-shirt you’d like to customise, raise your needle, remove from machine leaving a long thread tail. Pull top thread to the back, and tie off to prevent it coming undone.
TIP: If your machine has a lock stitch function, use it to tie off your stitching neatly and securely.
Step 9
Change your thread and bobbin to the next colour you’d like to use. Select your next stitch. Move your T-shirt to the next part you’re customising, for example the beginning of the neckline again. Stitch. Repeat again.

Step 10
When you’ve finished stitching, trim your threads and tear the backing carefully away from the back of your T-shirt. You can also use water soluble backing if your T-shirt material can be washed.

What did I learn?
- Try out the stiches you want to use on some scrap material first. This means you know exactly what they look like and can practise with speed and tension. When I got my sewing machine, I made a swatch of all the decorative stitches. It now hangs on my studio wall, so I can easily decide which stitch is right for which project.
- It’s important that you use a backing stabiliser when customising with decorative stiches and embroidery. I forgot the backing on the first T-shirt I customised and the material tore as it was being stitched – ruining a top I really liked.
- Use a ballpoint needle if you’re stitching on a stretchy material, it means you’re less likely to rip the material.
- Unlike for straight sewing, when customising with decorative stitches, it’s better to go slower and steadier. Depending on the stitch you’re using sewing speed can affect your stitch finish.
- If you’re not following a garment line eg. a neckline, use a soluble marker or tailor’s chalk to mark where you want to stitch on your garment. This will make it easier for you to follow your design.
Which pieces in your wardrobe will you customise first?