Photostitch explained

Photo Stitch is a functionality found in Brother’s PE-Design software. It turns your treasured photos into embroidery data, so you can literally paint with stitches!
We often get questions about Photo Stitch - what size is best to use, does the photo need to be good quality, is it better to use more colours in the stitched design?In this article, we answer the most frequently asked PE-Design Photo Stitch questions, so read on.
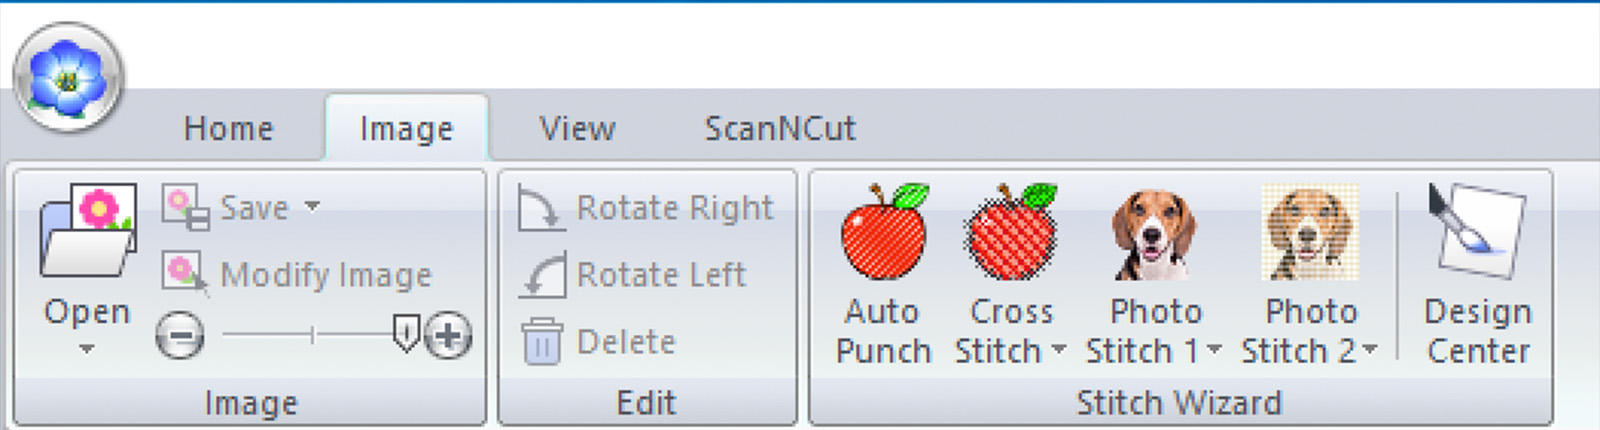
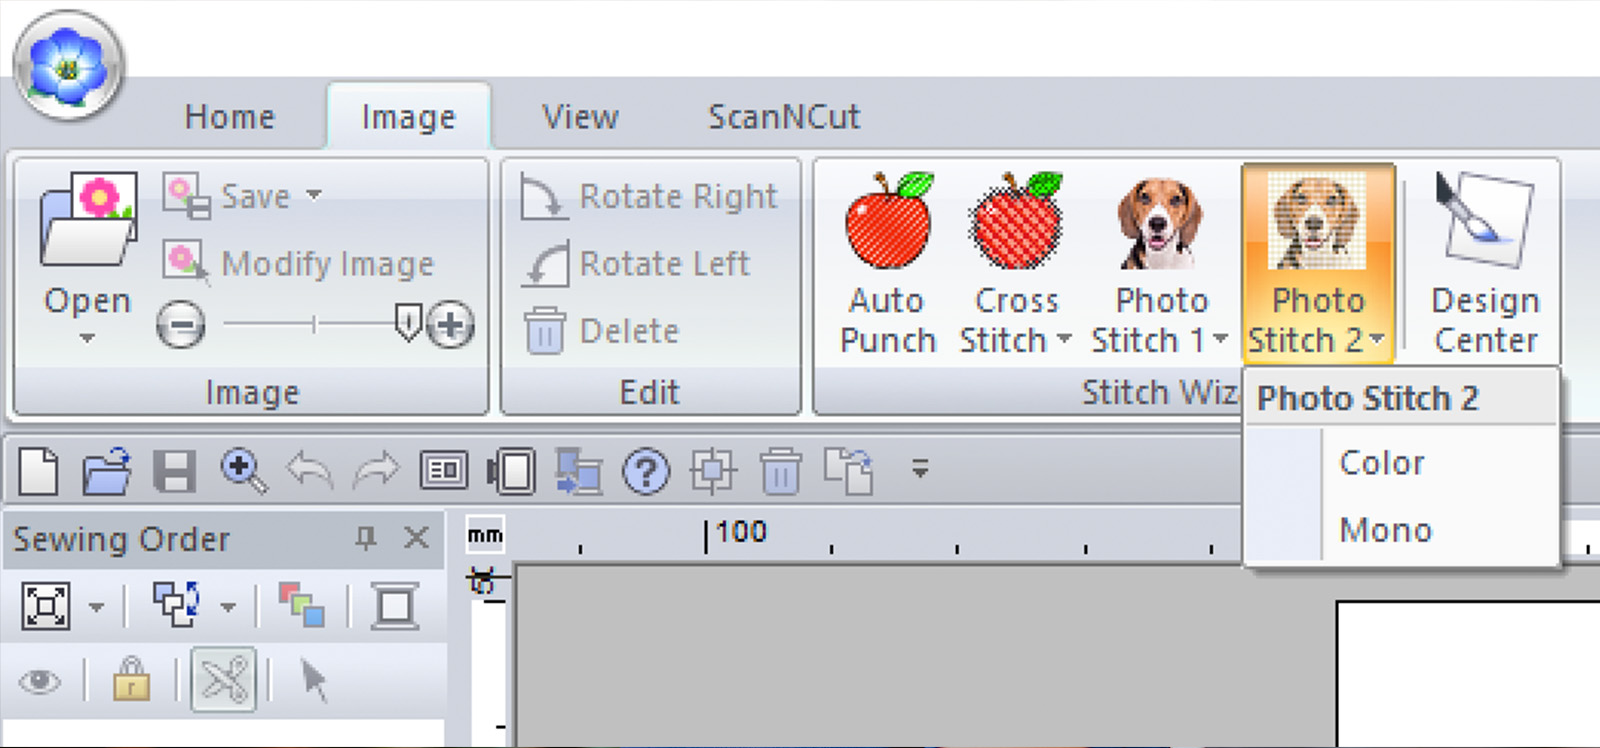
Q. Where do I find Photo Stitch in PE-Design?
If you’re the owner of any of the Brother PE-Design software editions (11, 10, PLUS, 2 etc), you may have noticed the little Photo Stitch Icons located inside the ‘Image’ tab. This is where you’ll find the Photo Stitch functionality.
Q. What is the difference between the different options within Photo Stitch?
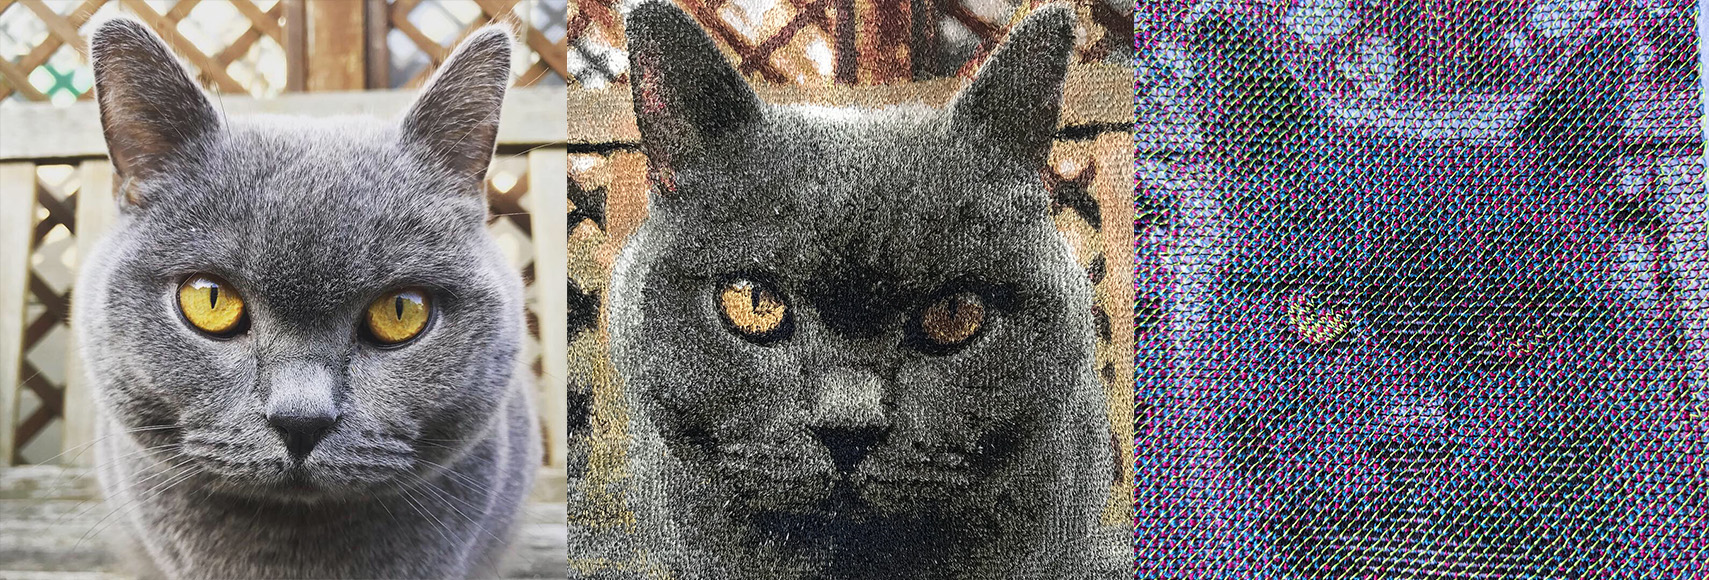
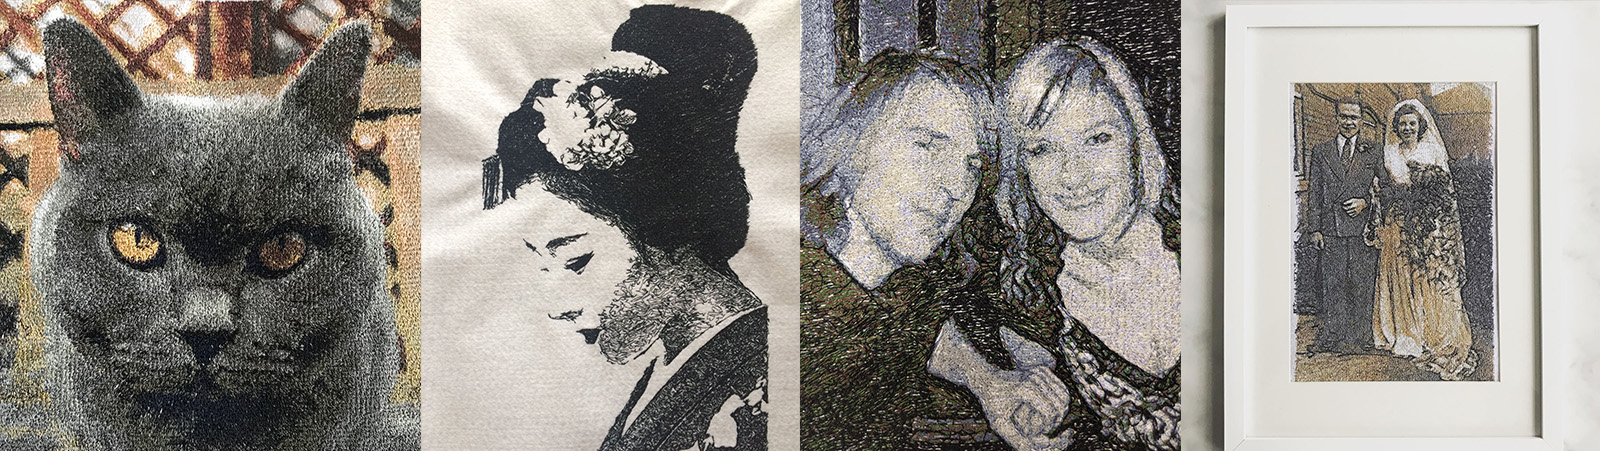
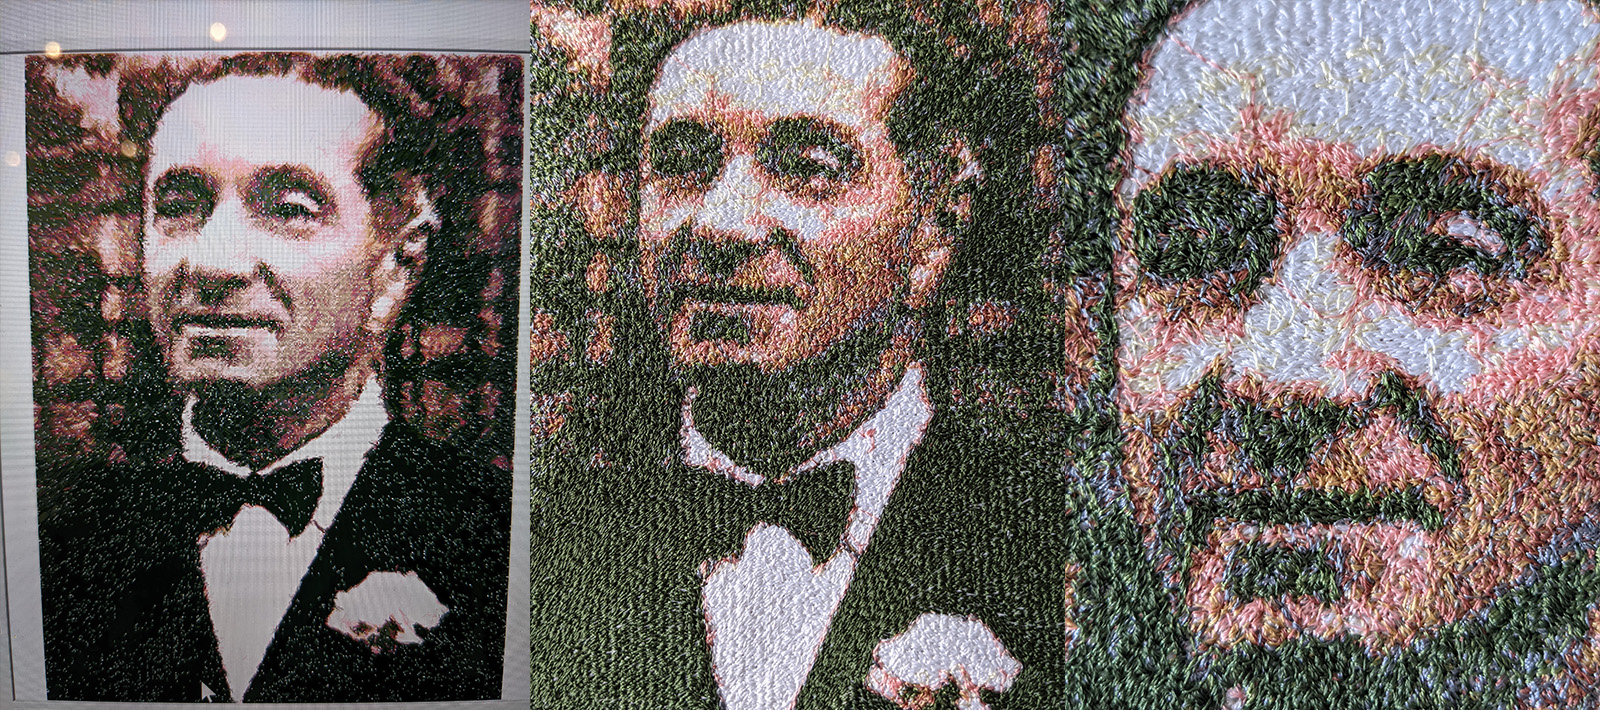
Within the ‘Image’ tab, you have two Photo Stitch options.‘Photo Stitch 1’ is the more realistic version and has the potential to use a large number of colours. The standard setting is ten colours, but this can be increased or decreased to suit the image being converted. These colours are layered on top of each other, blending together to create multiple tones.
‘Photo Stitch 2’ gives a more abstract effect, usually using a maximum of four colours. These colours are stitched in straight lines, each colour being stitched in a different direction to create the abstract effect.
The examples below show the original picture (left) converted using both methods (Photo Stitch 1 in the middle, Photo Stitch 2 on the right).
Q. Do I have to convert my photo into full colour?
No, not at all. You have a few options to choose from regarding colour.
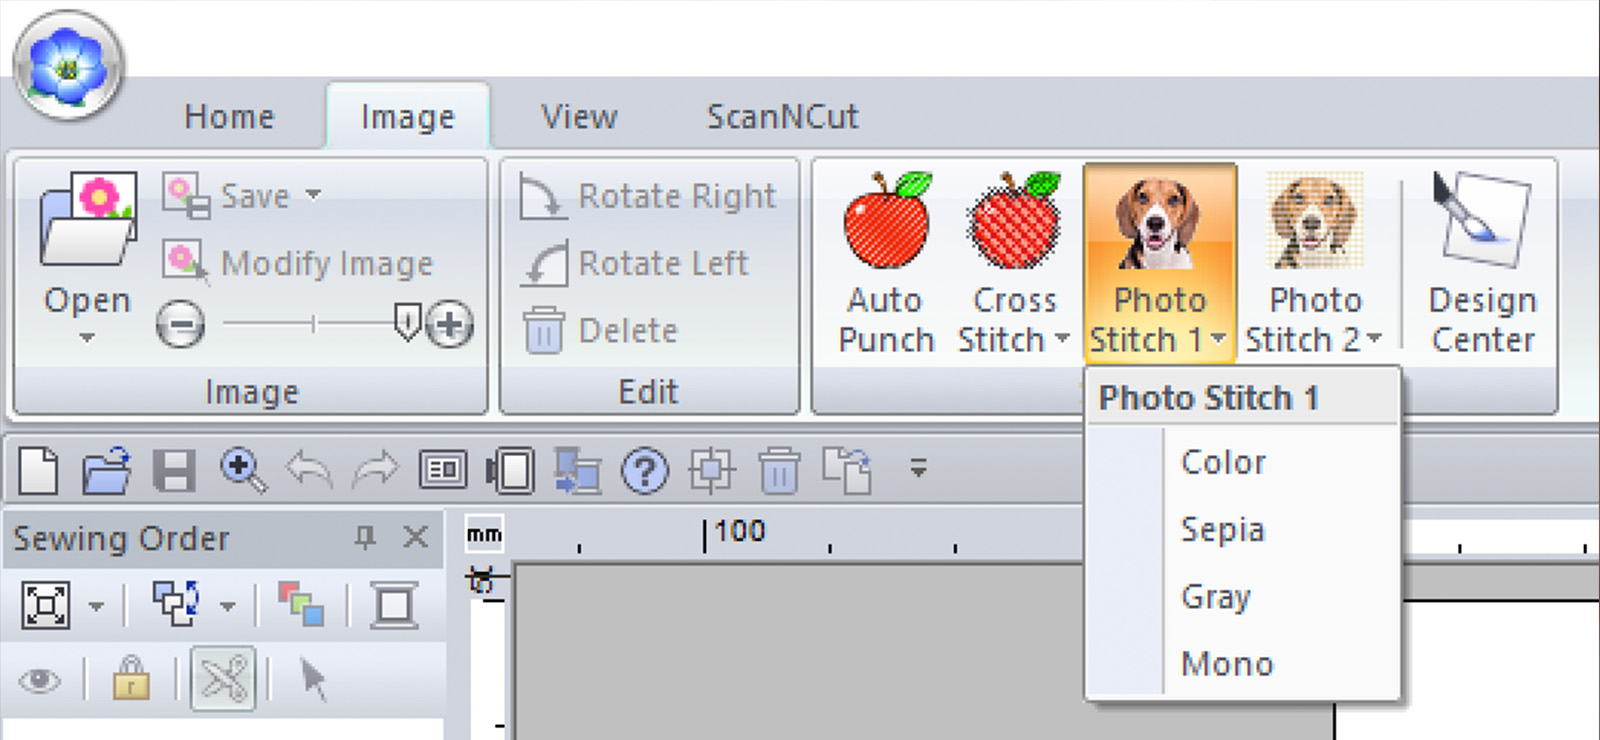
In ‘Photo Stitch 1’ you have:
- Colour
- Sepia
- Grey
- Mono
All of these options (except Mono) will automatically generate ten colours as a starting point. You can then manually adjust the number of colours depending on your photo and desired outcome. The Mono option will only generate one colour, and the shading is created by the density of the stitches.
Here you can see the different colours of Photo Stitch 1 (from left to right) – Sepia, Grey and Mono.
In ‘Photo Stitch 2’ you only have two options:
- Color
- Mono
The ‘Color’ option will generate four colours, and initially these will be colours that are the closest match to the original photo. As in ‘Photo Stitch 1’ the Mono option will only give you one colour.
Q. Will I always get a better result if I increase the number of colours?
Usually, but this isn’t always the case. It depends on the original photo, and the brand of thread you’re using.Some photos will work better with fewer colours, especially if you want the conversion to focus on the main key colours within the photo. If you increase the number of colours, it may just add unnecessary additional colours that don’t add much to the design.
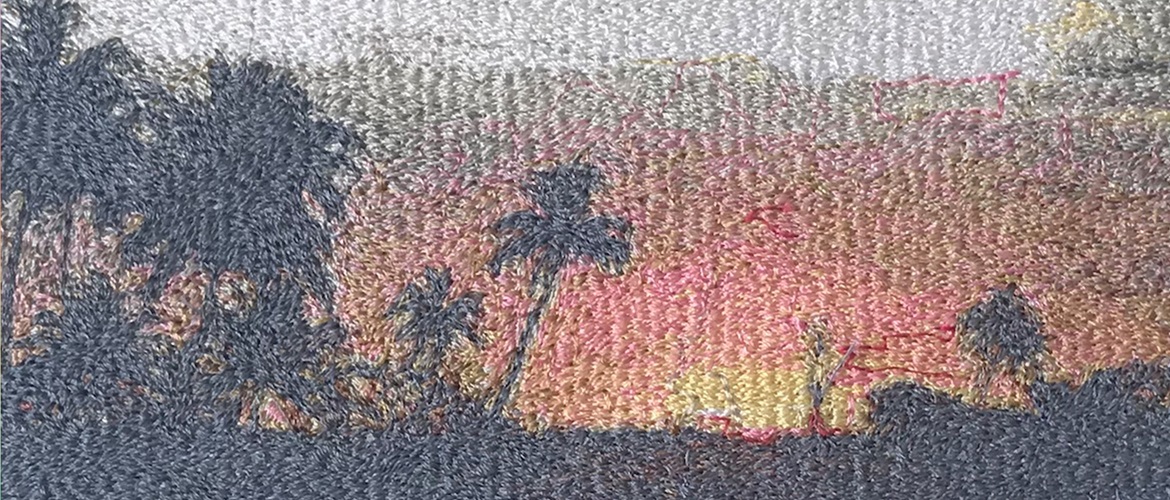
For example, the sunset embroidery (below) on the left has ten different colours in the design, whilst the version on the right only has five.
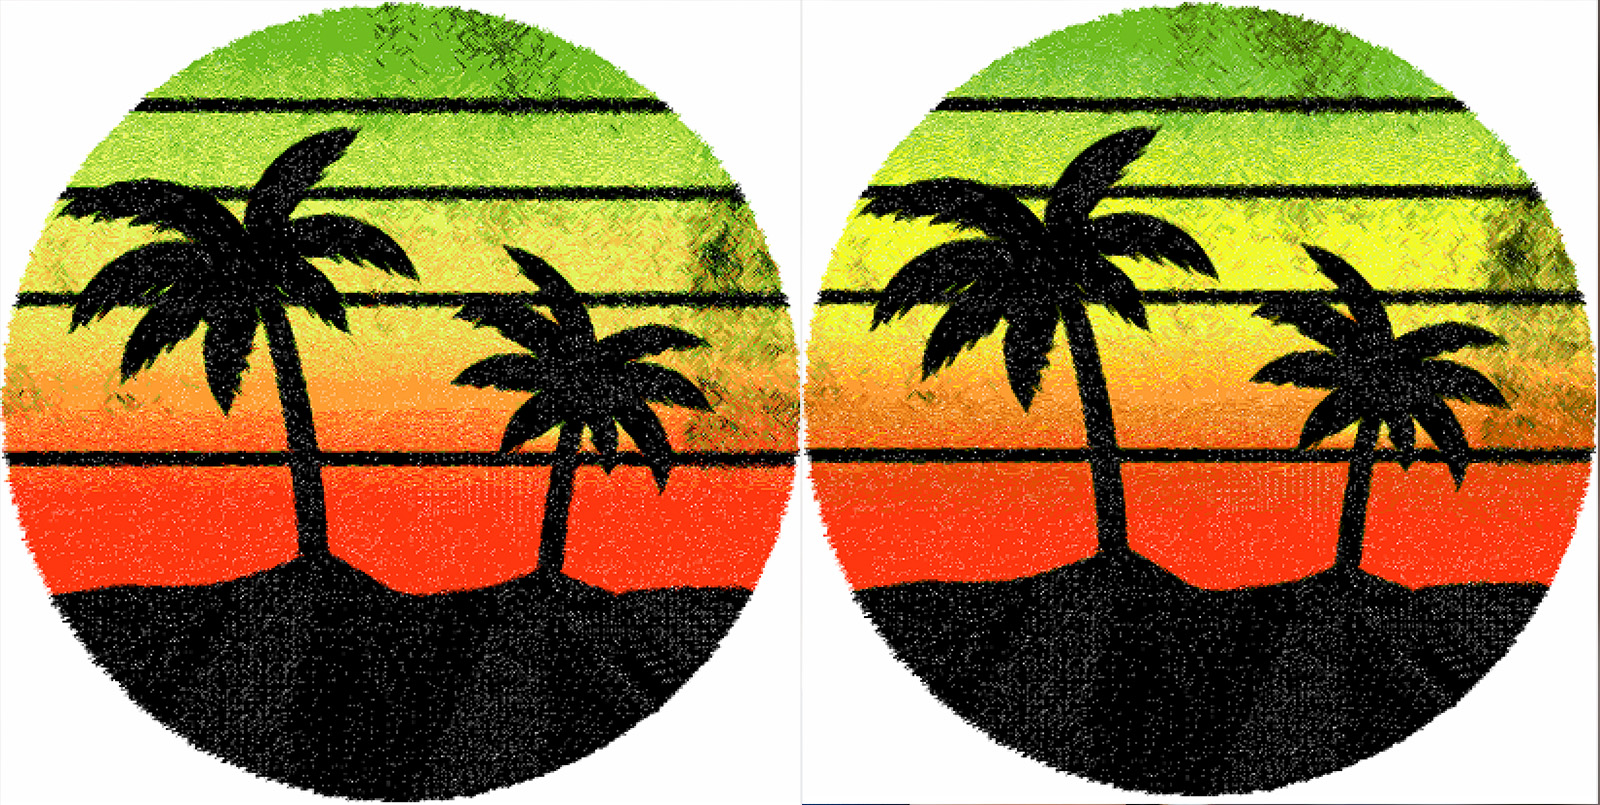
In the standard Brother range of satin embroidery threads there are 62 colours. So, if you use this range, the Photo Stitch Wizard will only have 62 colours to work with.
If you use another brand of thread from a thread manufacturer (such as Madeira) they may have a lot more colours within that range. Madeira Polyneon, for example, has around 400 colours in that range alone. The more colours the Photo Stitch Wizard has to choose from, the less impact those colours might have, and the more colours you might need to add to your design.
We have always found the Brother thread colours very good when it comes to Photo Stitch conversions.
Tip: if the Wizard suggests using a colour that looks a little odd - go with it! You’ll be surprised how well it works!
Q. Does the original photo have to be amazing quality?
Definitely not. Some of the best Photo Stitch designs we’ve created have been from poorer quality, lower-res images. Old photos, screenshots and photos in books have all turned out beautifully.The original image (on the left) is a very small photograph from an old family photo album. We took a photo of this on a mobile phone and transferred it to PE-Design. The stitched version size was increased to 20 x 30cm.
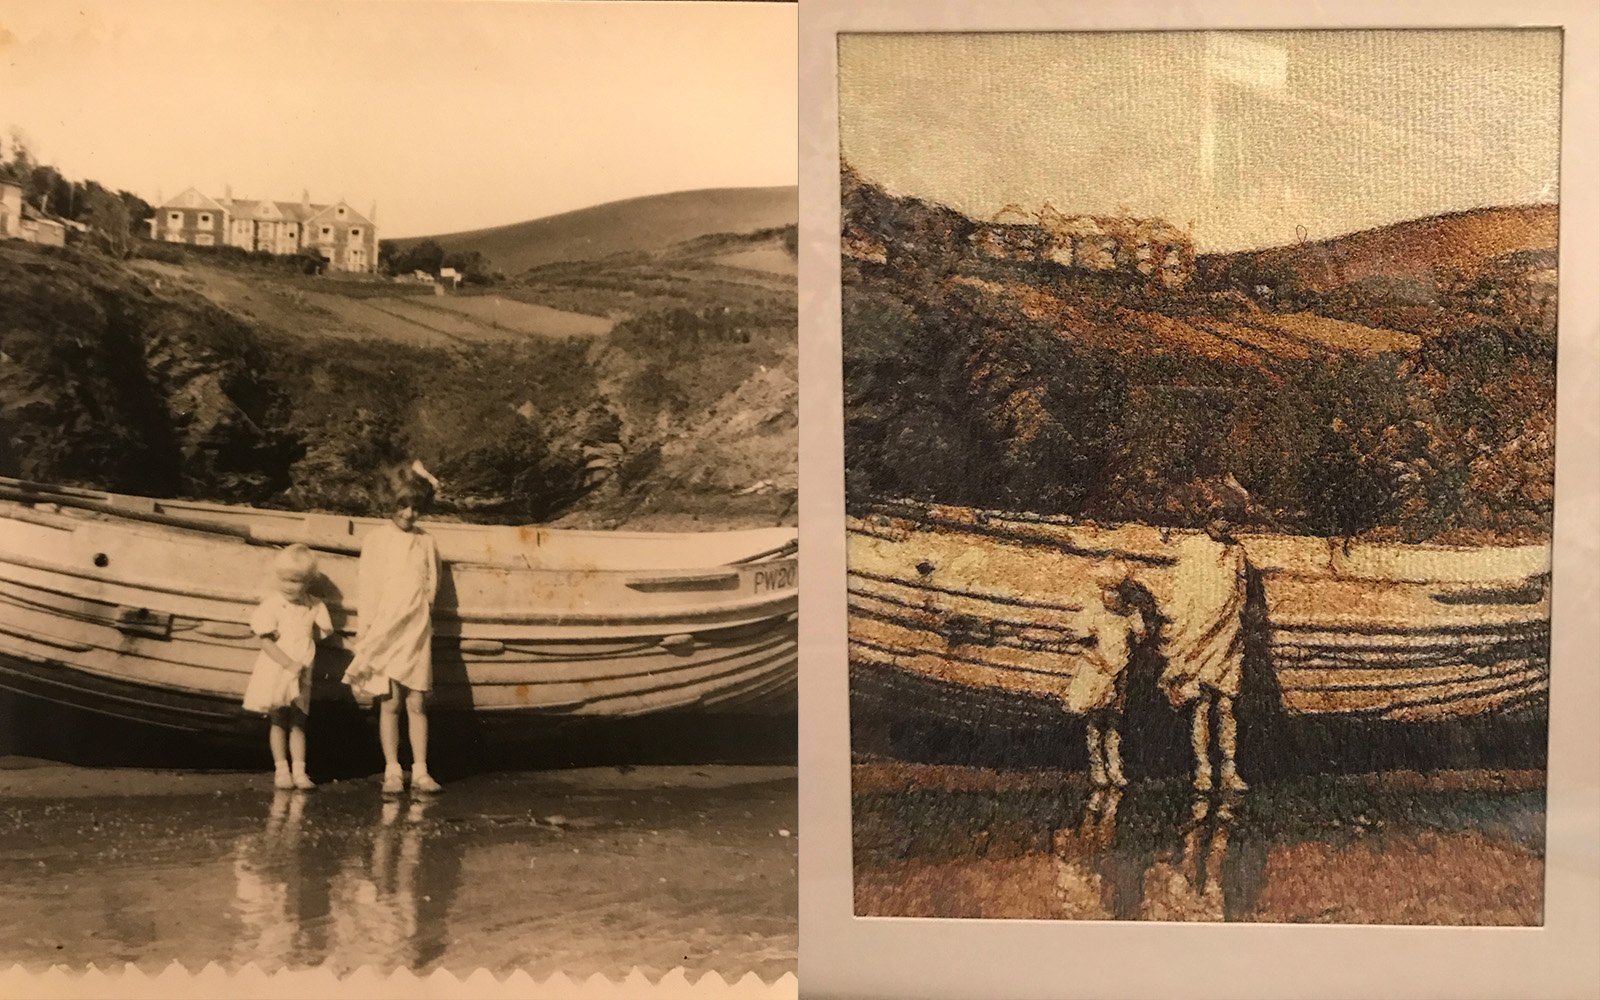
The original image is a very small photograph in an old photo album. We took a photo of this on a mobile phone. The stitched version size was increased to 20 x 30cm.
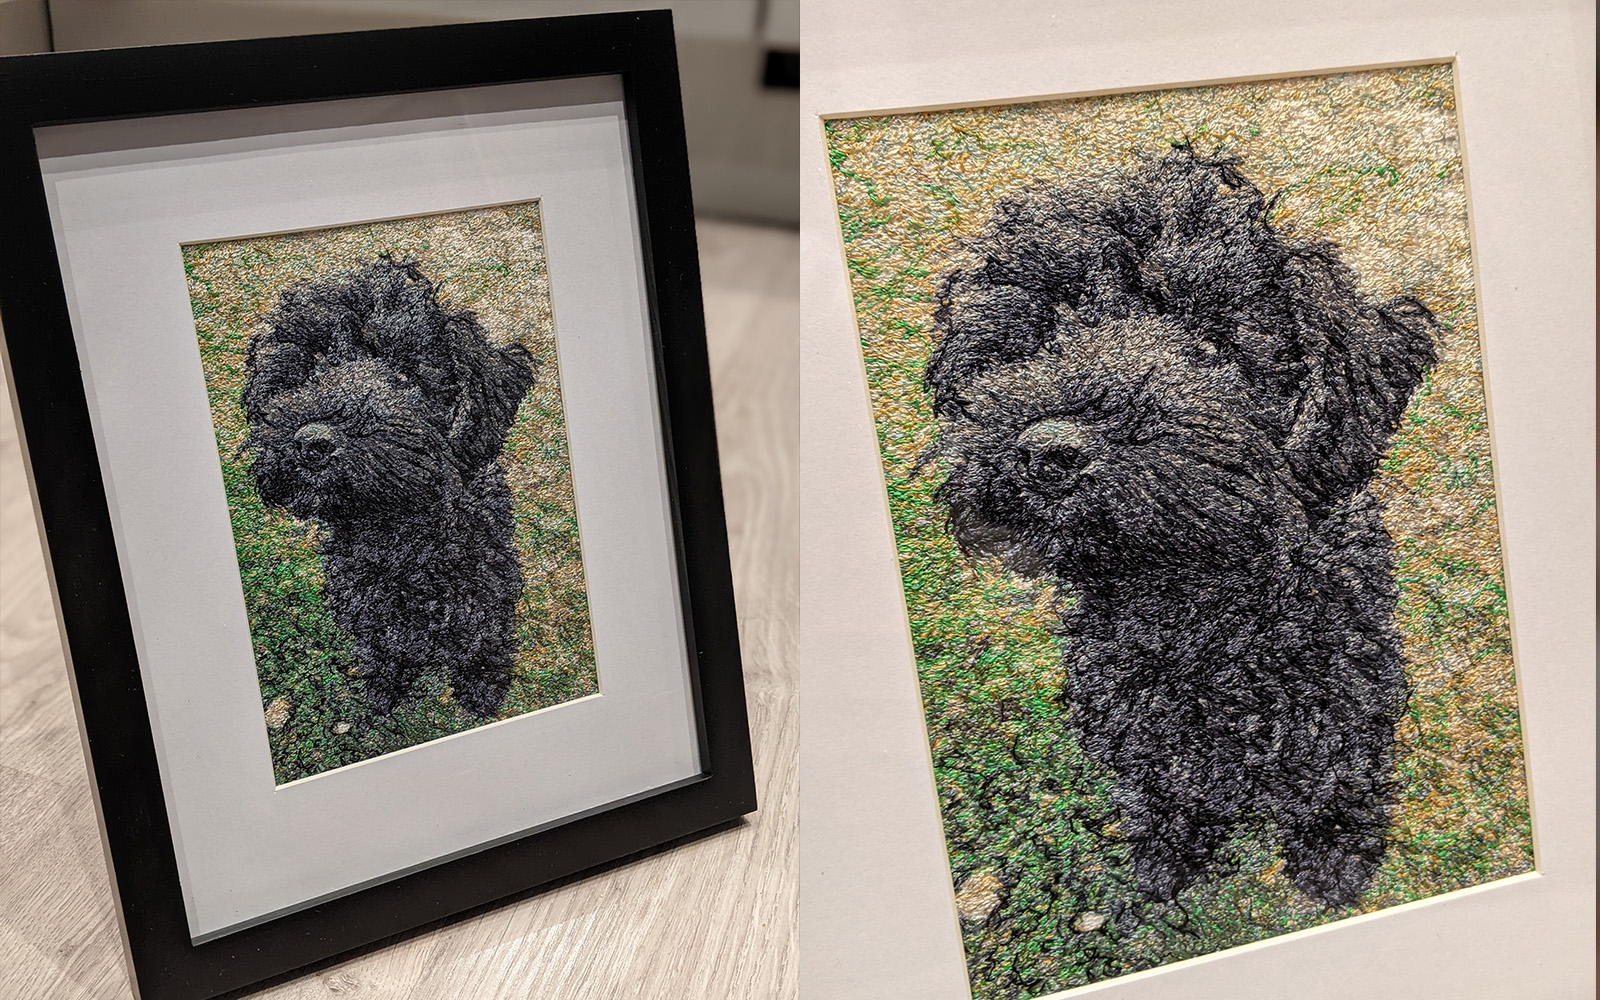
For the image below, we played around with the brightness and contrast until enough definition was visible for the Wizard to pick out the highlights and lowlights of the dog’s black fur.
Q. I’m going to give it a go! Am I best to start with a small image first?
You can certainly convert Photo Stitch designs to fit a 4 x 4” (10 x 10cm) hoop, but you will lose a lot of the definition if you go that small, and you may be disappointed in the outcome.We suggest that you try a 5 x 7” (13 x 18cm) hoop as a minimum size (if your machine can use that size). You can also try creating the design in the next hoop size up, and then reducing in size once it’s been converted - making sure you hold the Ctrl button while resizing, so the design is reduced in stitches as well as size.
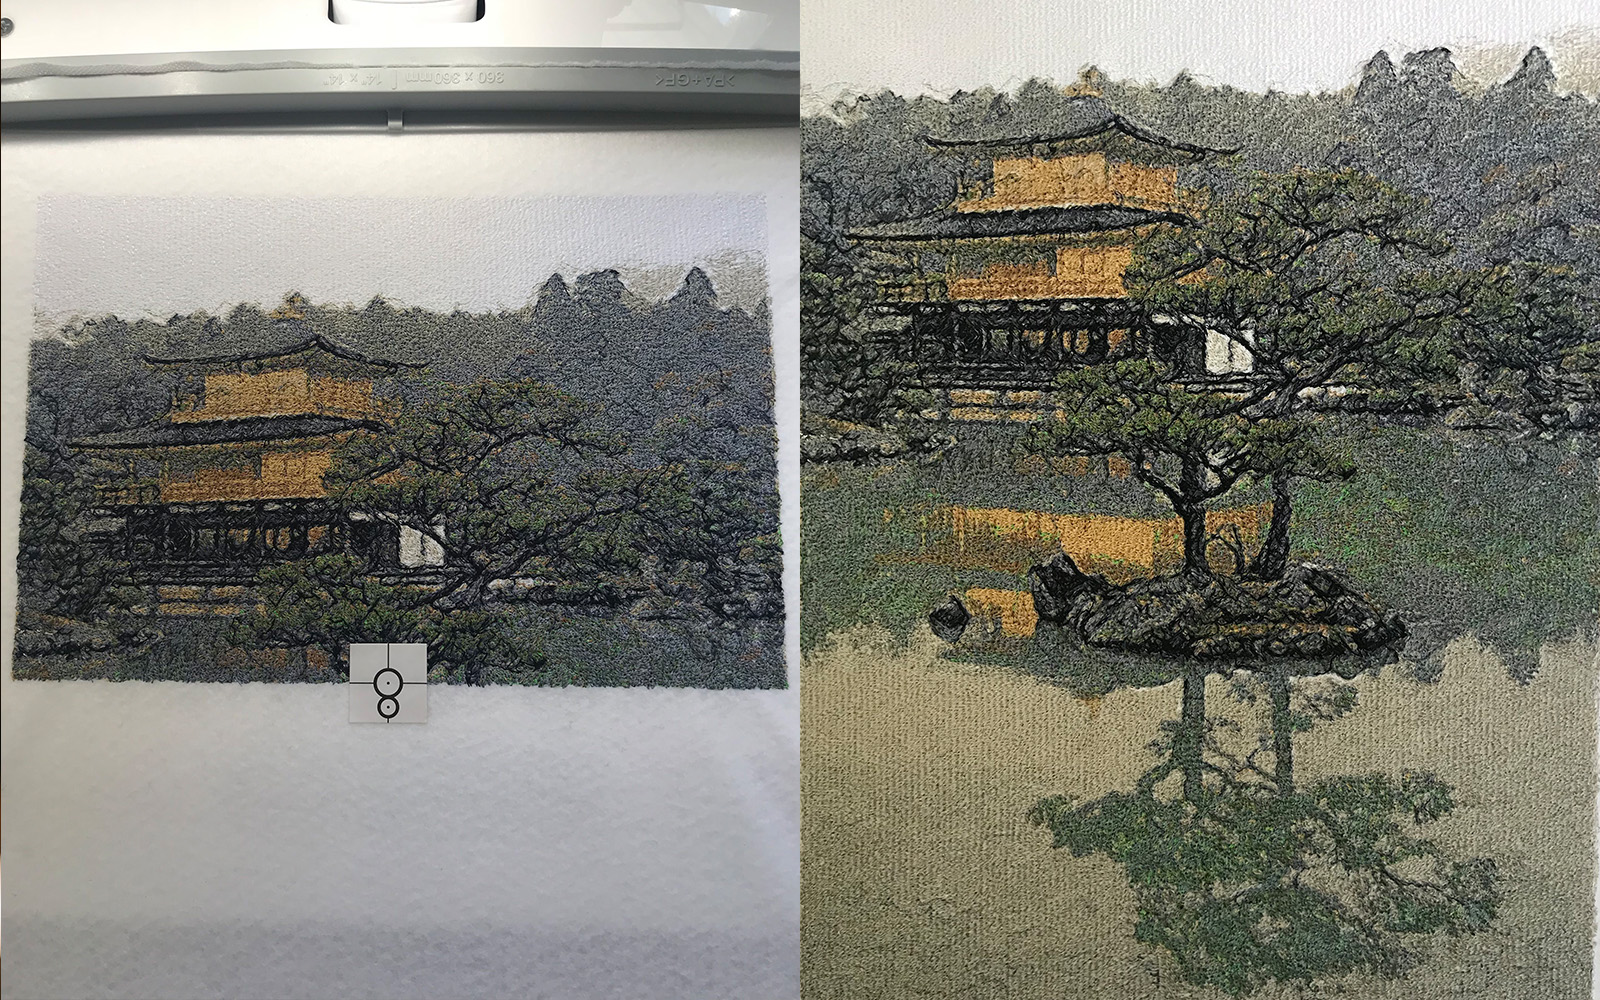
The best designs we’ve created have definitely been the larger ones. The Photo Stitch embroidery (below) was created in two pieces, stitched on the PR1055X using the Jumbo hoop. The top half was stitched first, then turned around to finish the second part. We used the ‘Snowman’ placement sticker so that in the finished stitch out the join is close to invisible.
Tip: be sure to check out your machine's maximum stitch capacity as some machines have restrictions on how many stitches per design they can read.
Tips & tricks
Try the following to get the best result from your Photo Stitch designs:
- If you only want the main subject of the photo to be stitched, try using a background remover app to quickly and easily take the background away.
- Use the “Image Tune” button at the start of the Wizard to tweak your photo's sharpness, brightness, contrast, and colour intensity.
- If your photo is very large, it may slow down the Wizard process. Skip straight to the size window and click “Fit to page” now. Then you can return to the previous screen to work more on your photo.
- If you’re increasing the number of colours in your design, try increasing by five colours at a time and click the “Update Preview” button to apply the changes you have made.
- On the final page, try reducing the “Run Pitch” and slide the “Detail” slider to “Fine” - then click “Update Preview” to apply these settings.
- The preview of your embroidery design on the final page is the most realistic example of what your Photo Stitch will actually look like once it’s been stitched out. We usually take a screenshot of this, as when you click “Finish” it can often look a little less amazing, so it is nice to be able to compare to the previous preview!
We hope this article will help you and inspire you. Another question we get asked regularly is if you can achieve this kind of effect in My Design Center on the Stellaire and Luminaire series machines. The answer to that is a whole other blog post! Make sure to follow us and sign up for the newsletter so you’re the first to hear when a new blog post is published!


