CanvasWorkspace 101 – let’s make our first design together

Brother’s ScanNCut machines come preloaded with loads of free designs. You can also download hundreds of free projects from CanvasWorkspace.
Sometimes you don’t want to use someone else’s ideas, you want to express yourself and create your own.
This is where our free software, CanvasWorkspace, can help. Let’s walk through opening a new design and creating one together.
Before you start
We’re doing this on the online version of CanvasWorkspace.
First of all, you’ll need to log in online (not on the desktop version) – click here or copy and paste this URL in your browser:
https://canvasworkspace.brother.com/en
Starting a new CanvasWorkspace project
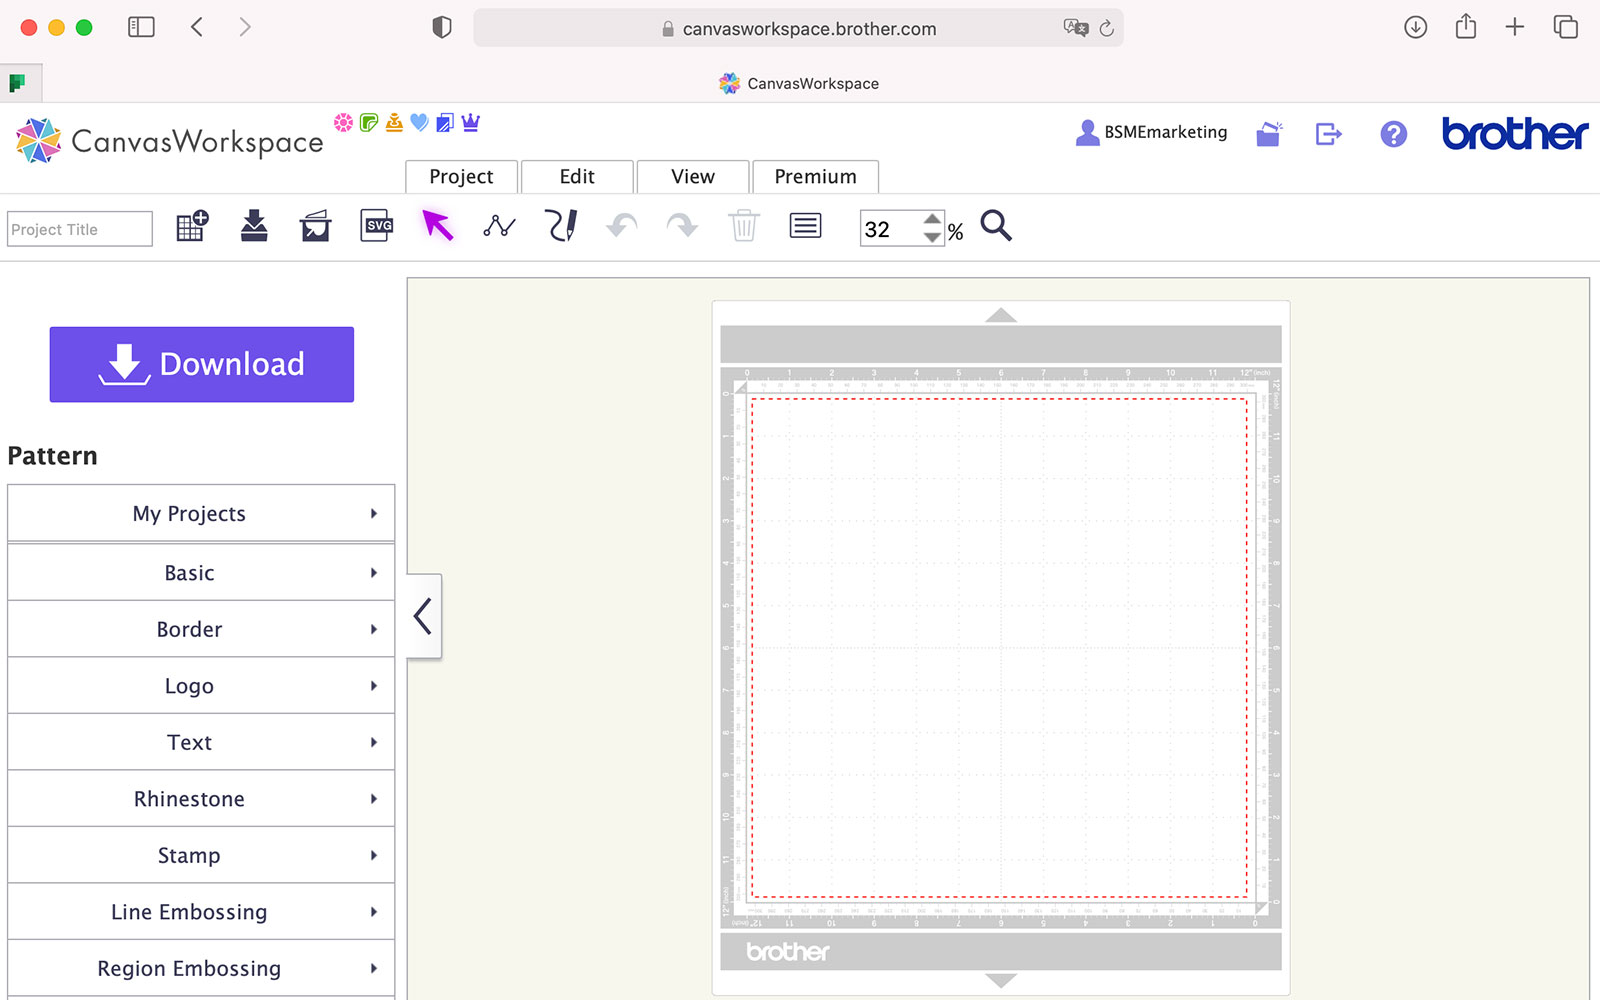
To start a new online project, click on the ‘My Projects’ tab, and select ‘New’.
When you open a new project a screen with a simulation of a ScanNCut mat on will open up before you. You will design straight onto this ‘mat’. This helps you easily see how it will fit on your mat.
On the left-hand side of the screen, you will see a menu listing lots of design components, such as ‘Basic’, ‘Border’, ‘Text’ and any of the premium functions you can access, like ‘Rhinestone.’ This is where you can add design elements to your pattern.
Above the top of the ‘mat’ and under the CanvasWorkspace logo, you will see a line of icons.
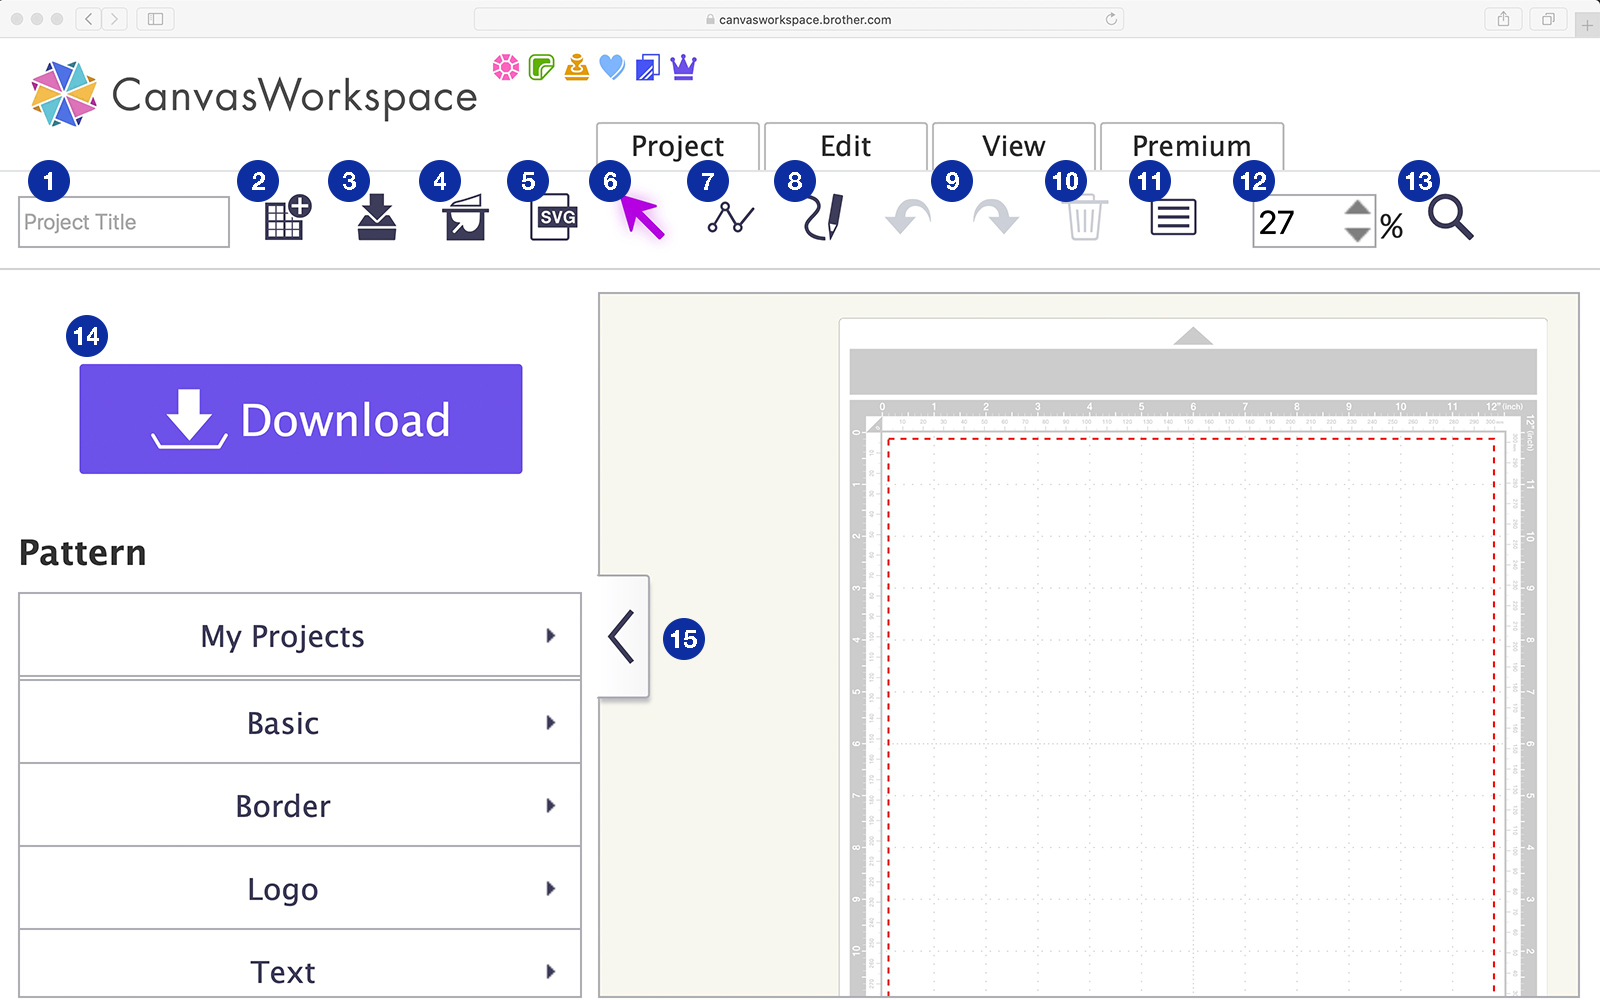
- Use this to name your design. CanvasWorkspace will assign a list of letters and numbers, but it’s better to give your designs names to make them easier to find and so you can remember what they are.
- Click here to create a new project (make sure you save the one you’re working on first).
- Use this to ‘overwrite’ (or save), the project you’re working on.
- This is the image tracing function. Use this to upload a file, such as a drawing or photo, to use as an outline. You can choose normal or enhanced tracing (paid function).
- Here you can import vector files like SVG, DXF or FCM files of up to 2mb to turn into cutting data.
- Use the arrow tool to point, click and select.
- Here you can create your own design using straight lines. These lines can be changed into curves as well.
- The pencil (freehand path) – this allows you to create a freehand cutting line.
- Undo and redo buttons.
- The trash bin – click on part of your design and click the trash can to delete it.
- Properties – when you have a design aspect selected click on this icon and it will give you details about your design, such as size, angle, colour and line type. You can quickly change aspects of your design using this box.
- Zoom - use this to zoom into and out of your project.
- Magnifying glass – zoom in by clicking and dragging a box over the design.
- Download your design here. You can send it directly to your ScanNCut via WiFi. You can also send the data via transfer cable, or save onto a USB stick, if you have no access to WiFi or your machine does not have it enabled.
- Design elements – here you can find basic shapes as well as any paid functions like Rhinestone and Embossing designs. Drag and drop your chosen design onto the design mat.
More to come
There are lots of editing features in CanvasWorkspace that we go into more detail in other posts. You can also check out our video gallery for easy tutorials on how to use these functions.
Please visit the ‘Cutting Corner’ section of our blog to find more CanvasWorkspace 101 articles. There you’ll also find lots of free projects, useful ‘how to’ articles and plenty of inspiration.
What will you make today? We can’t wait to see! Remember to tag in Brother on Instagram and Facebook so we can share your makes and inspire others.


