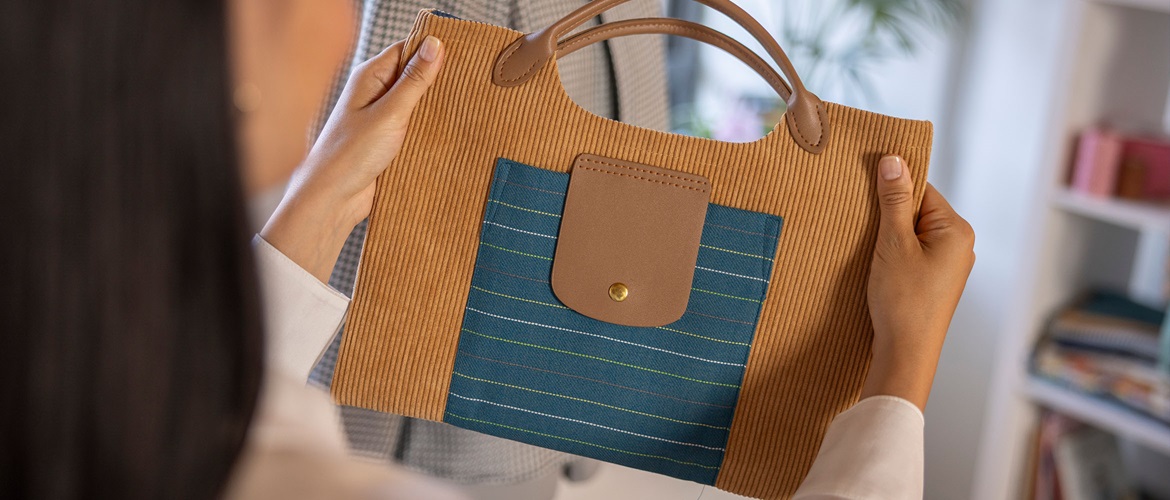
Sew a stylish corduroy bag


Add a touch of class to any outfit with a simple but stylish bag.
Our cute corduroy handbag sewing project has a contrasting pocket, shaped faux leather handles and closing flap. It is an easy make and is suitable for confident beginners.
The finished bag measures 34.5cm wide x 26.5cm high.
Materials needed
- Corduroy: 30cm x width of fabric
- Lining: 30 x 80cm cotton fabric
- Pocket (contrast to corduroy): 25(w) x 30(h)cm
- Medium stiffness bag interfacing: 30 x 90cm
- Bag handles (the handle part should be 20cm) and closure set
- Top stitching thread to match bag handles
- Sewing thread to match pocket and corduroy
Equipment needed
- Sewing machine
- Hand sewing needle
- General sewing supplies
- Patterns – please download using the button below
Notes
- Seam allowances are 1cm unless specified differently.
- Sew straight stitch on 2.5 setting, unless specified differently.
- Avoid pressing directly onto corduroy – test first on a scrap. It is best to press on the wrong side and use steam.
- If your contrast fabric is thin, add fusible interfacing to the back before cutting to stabilise (that is what we did!)
How to
Step 1
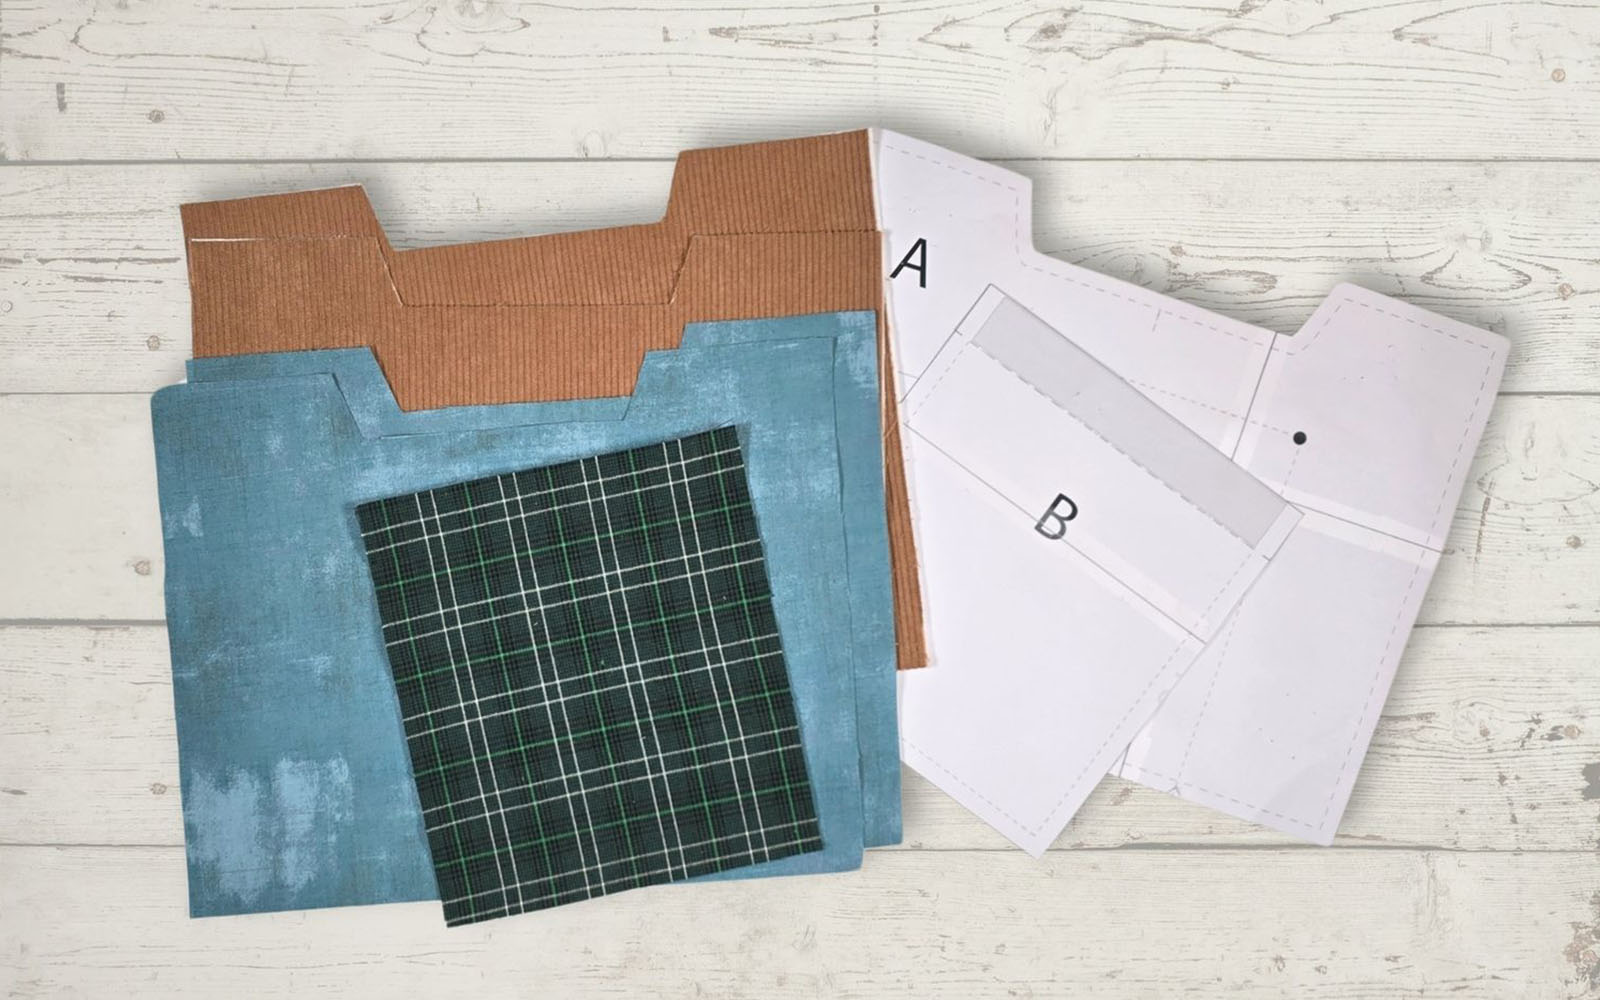
Download pattern and print at 100% or full size. Tape the pieces together and cut out on the solid lines.
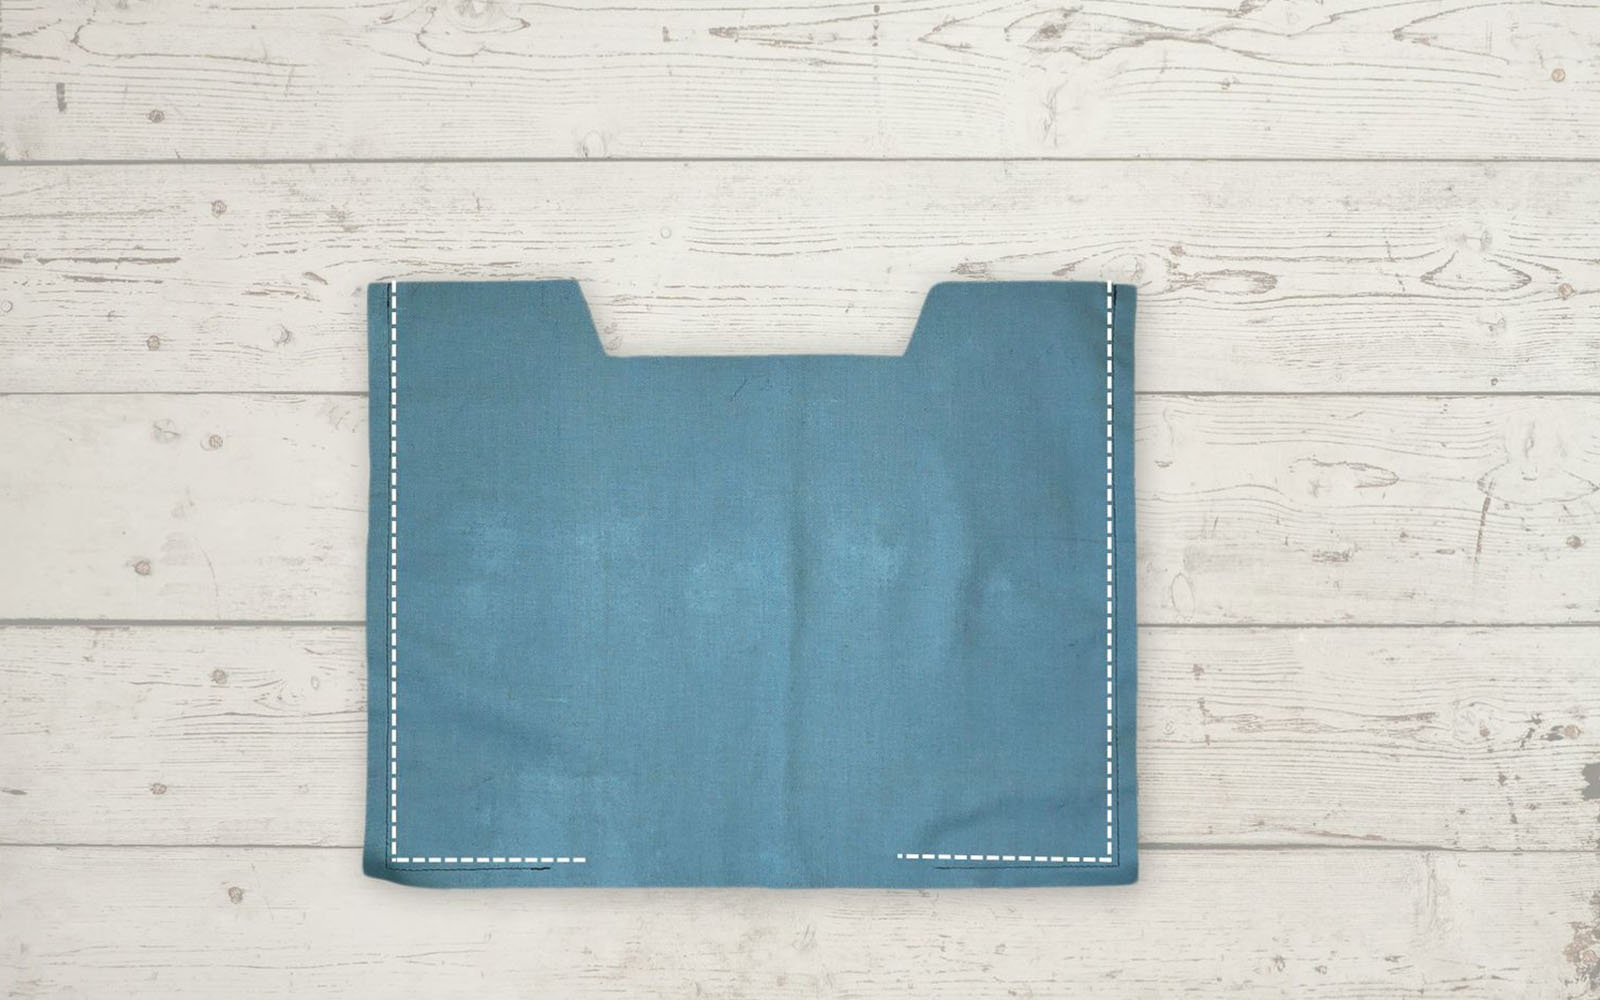
Cut:
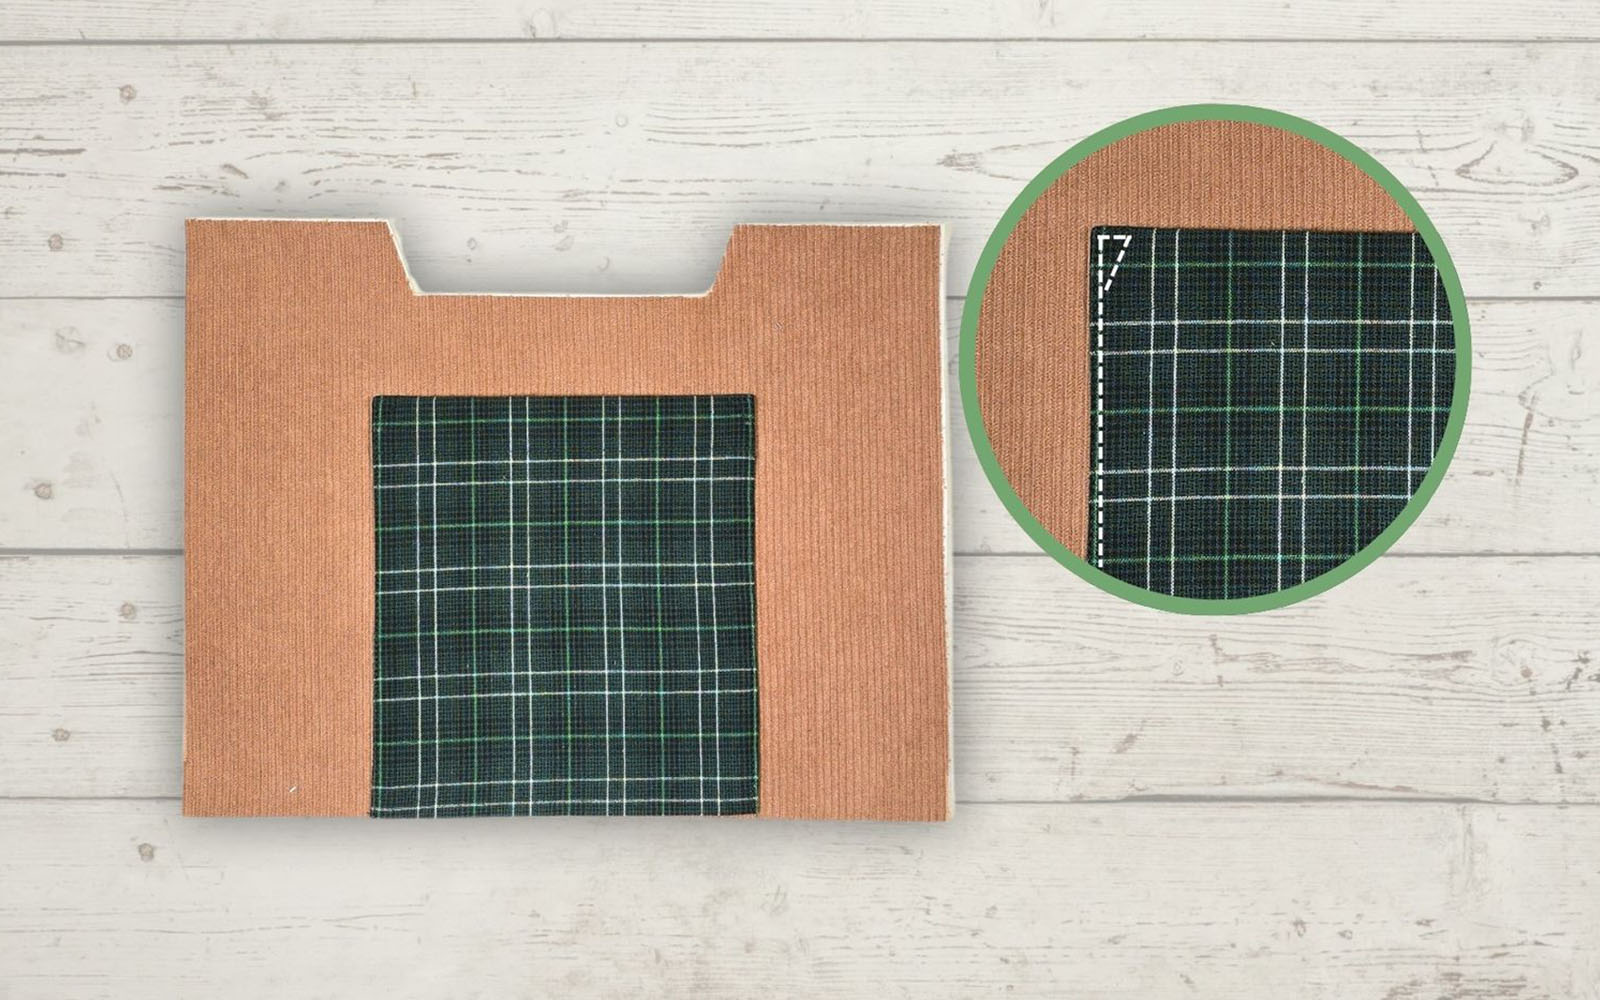
From corduroy: 2 x A
From lining fabric: 2 x A
From pocket fabric: 1 x B
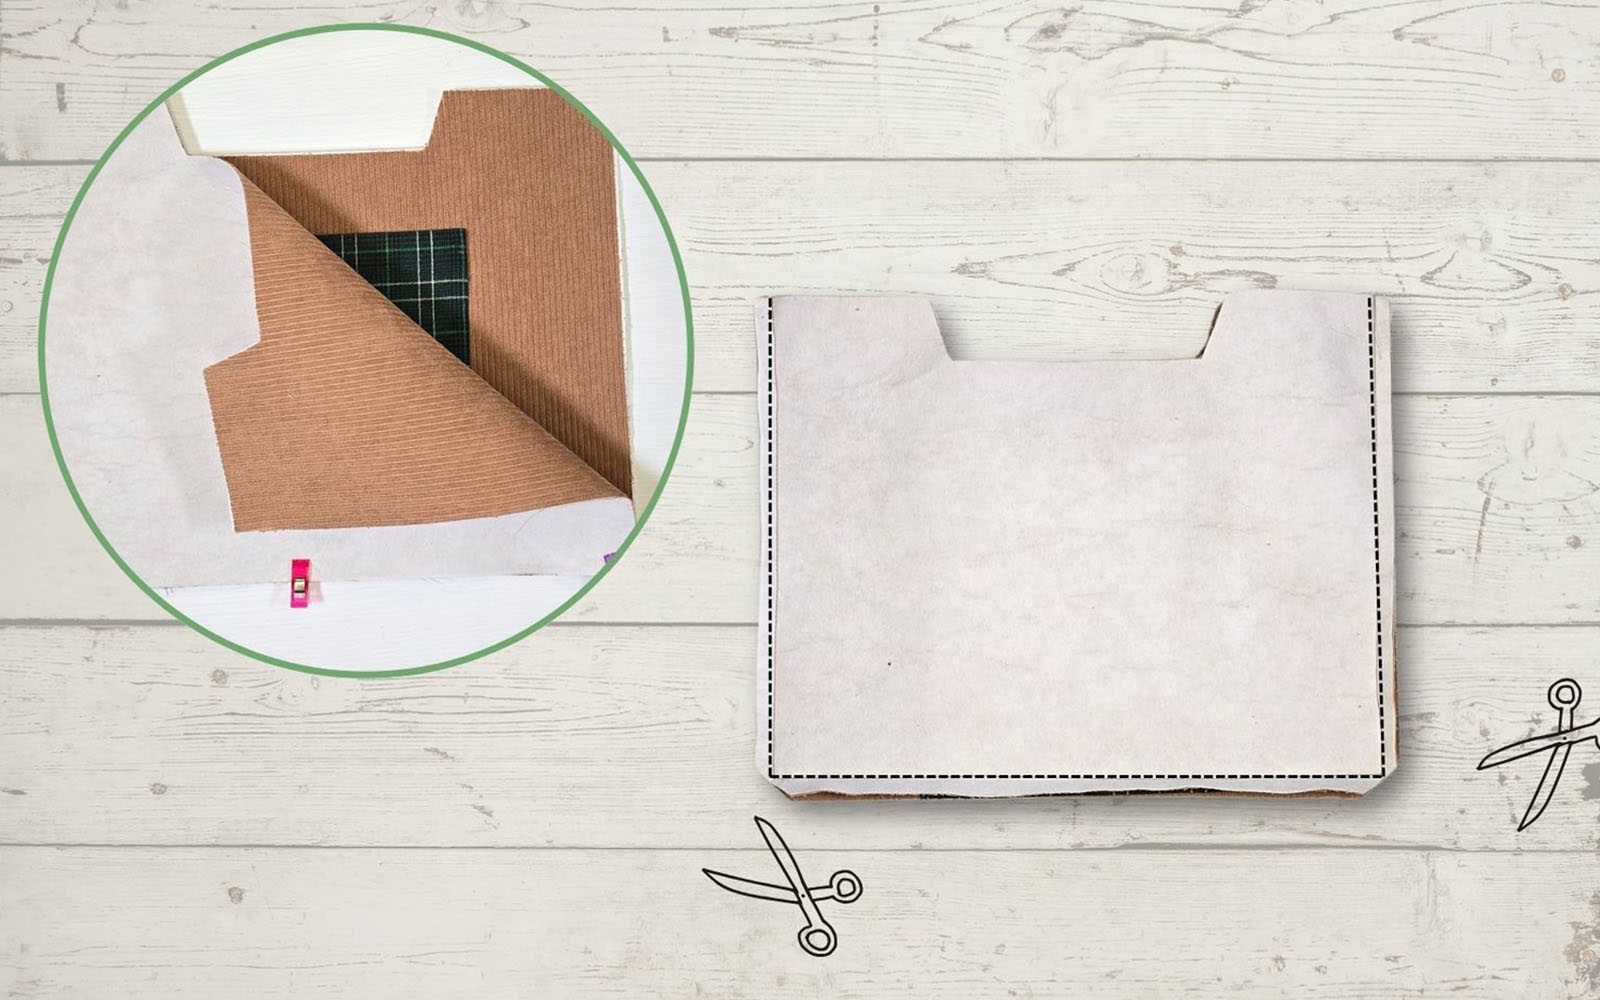
From stabiliser: one piece of 20 x 3cm and 2 x A
Step 2
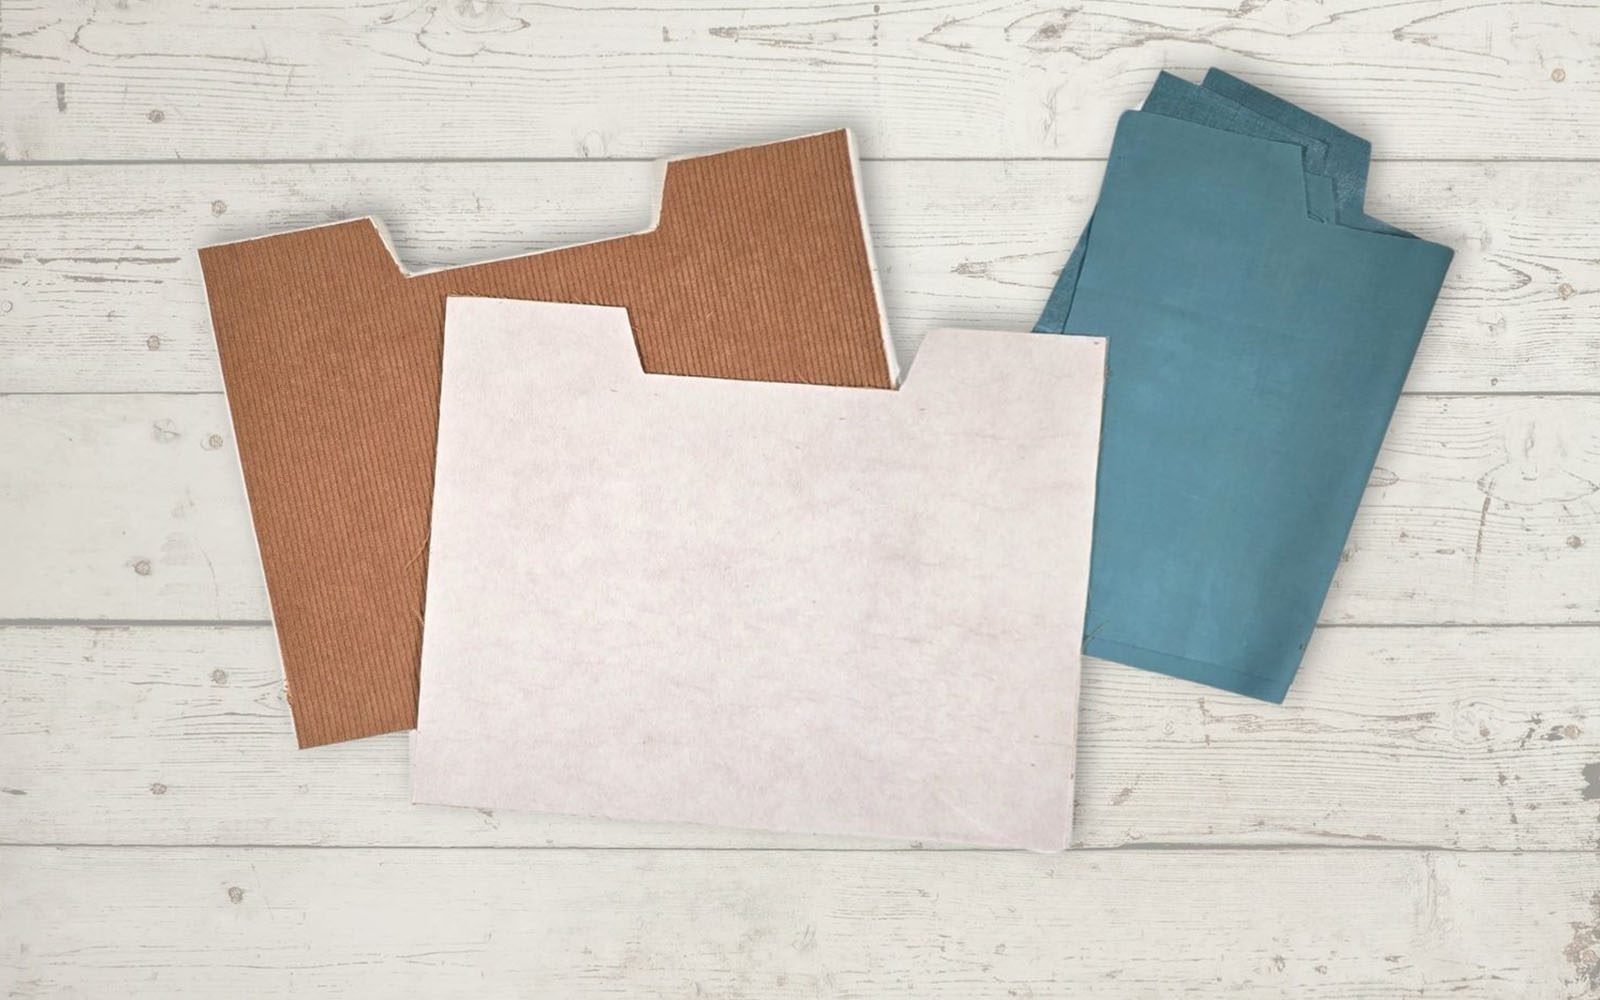
Fuse the bag stabiliser pieces to the wrong sides of the corduroy pieces.
Step 3
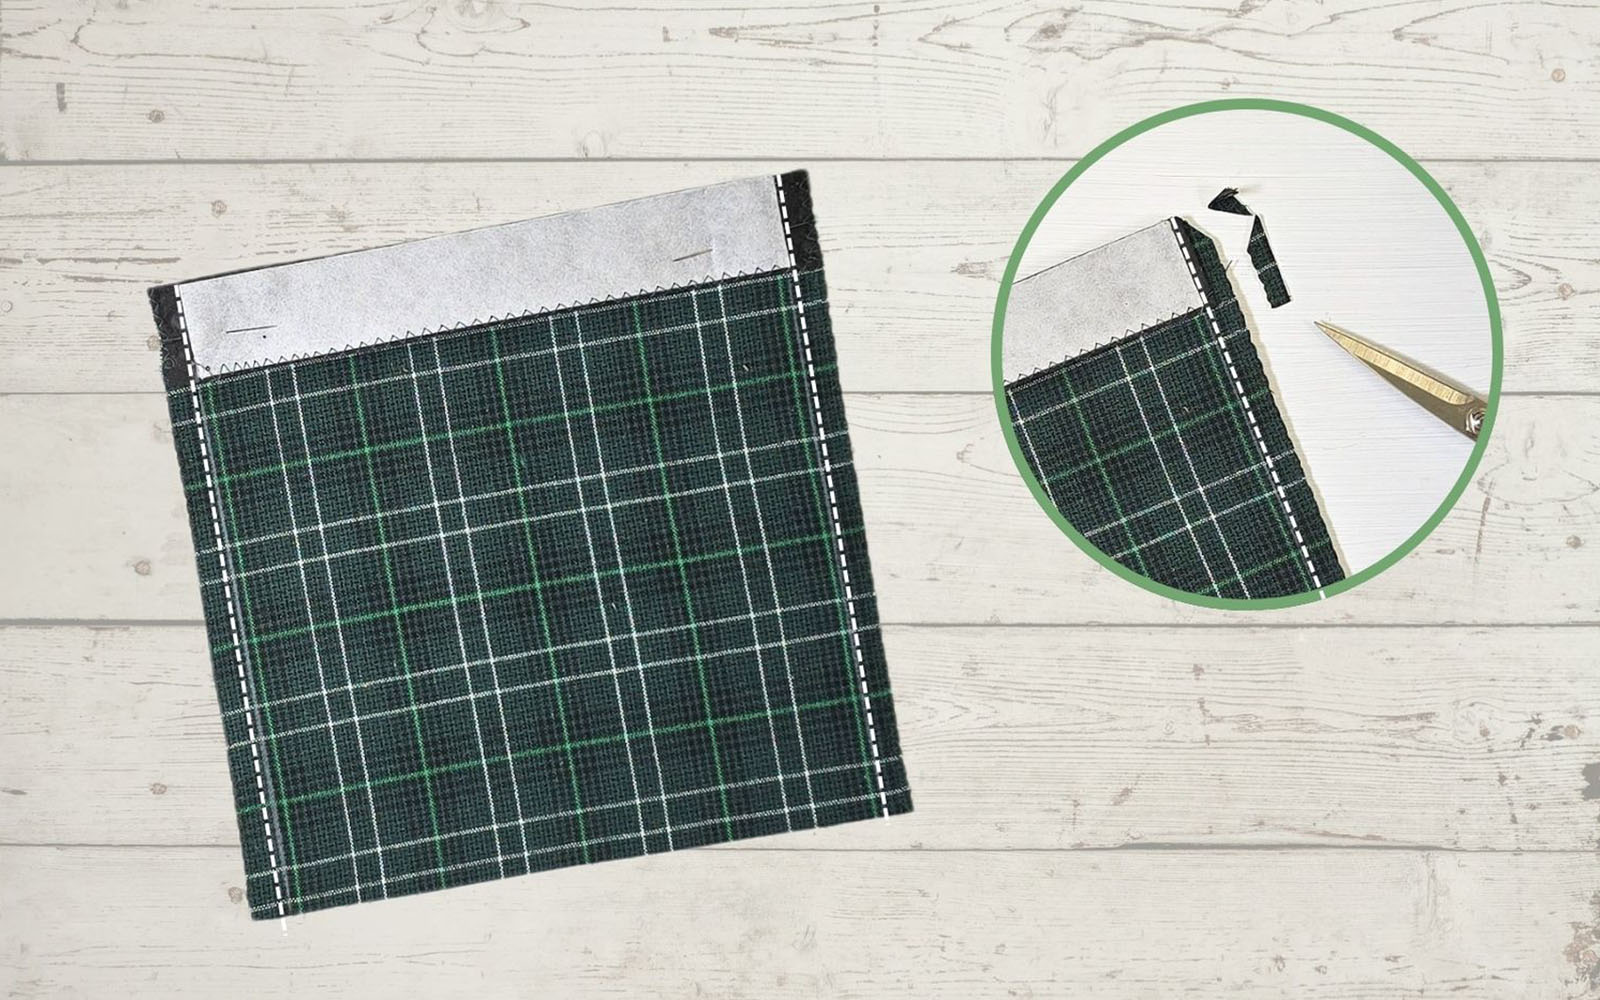
Fuse the small piece of stabiliser to the wrong side of the pocket, in the shaded area shown on the paper pattern piece.Zig-zag or overlock the raw edges of the pocket along the two long edges and one short edge where the interfacing is adhered.
Lay the pocket with the right side facing up. Fold the interfaced area over on the fold line, match the sides and pin. Sew a 1cm wide seam, starting at the fold, along the doubled section and continue all the way through the single layer to the end. This sewn line helps you to press accurately but also stabilises the fabric, so it does not distort during pressing.
Repeat on the other side.
Trim one side of the seam allowance from the doubled-up section and snip the corners. Do not trim the single layer.
Step 4
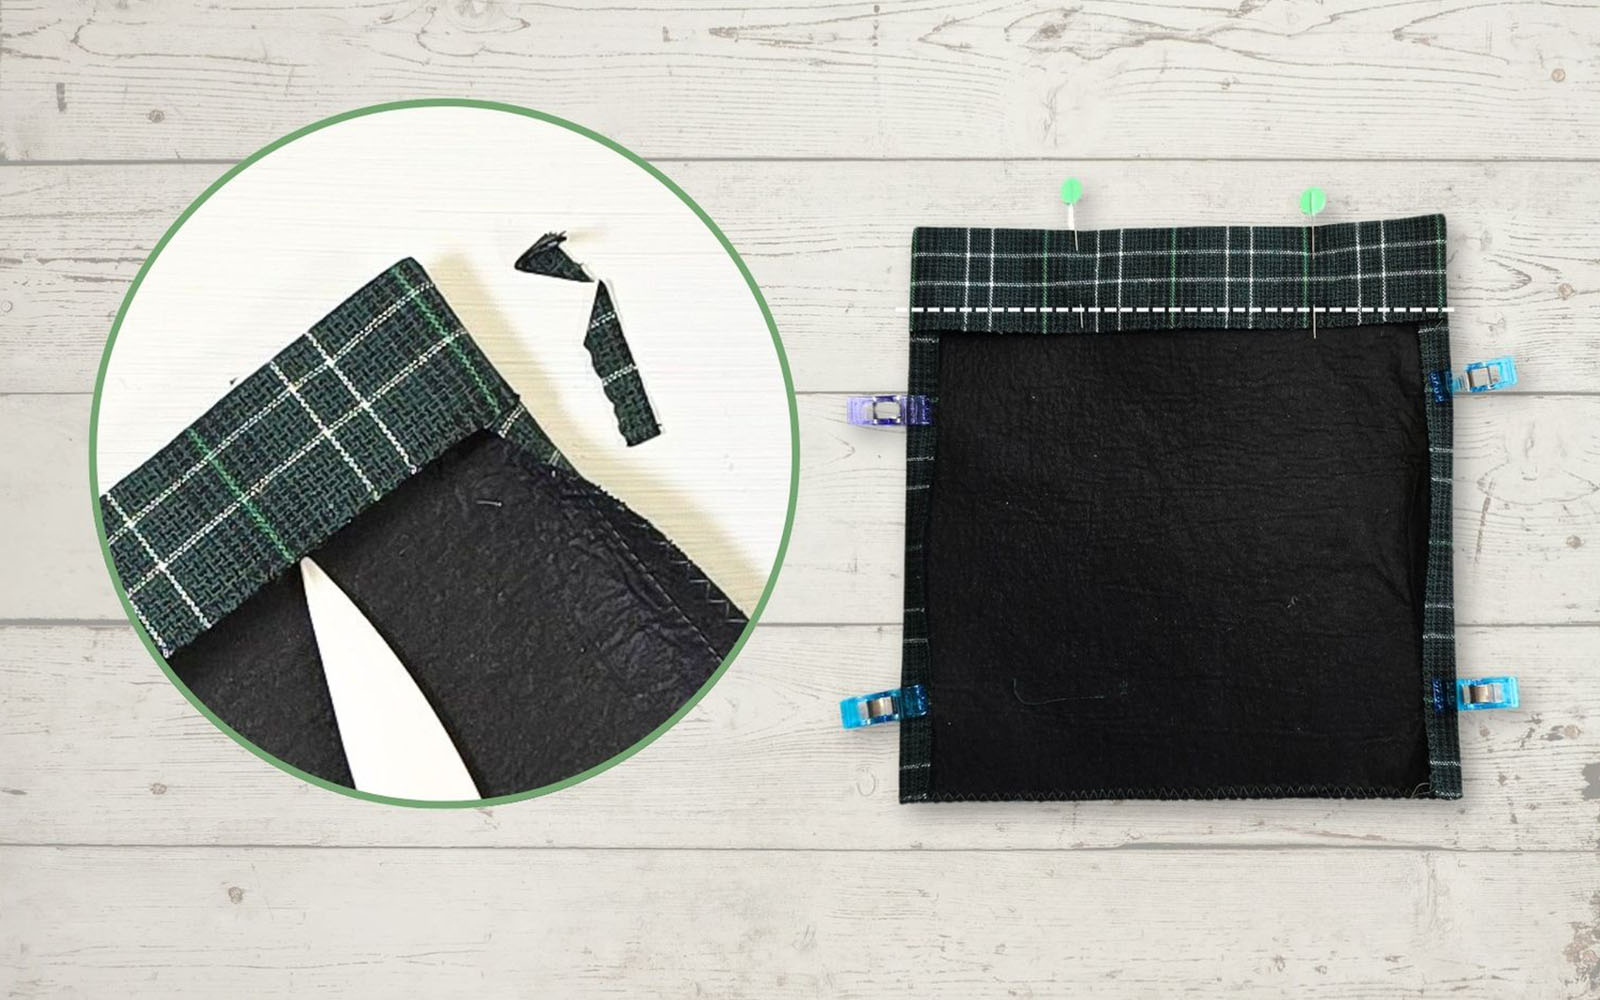
Turn the hem right side out and push the corners out. Fold the side hems to the wrong side on the sewn line.Press the fold at the top, as well as the folds on each side.
Sew the top hem in place. You can use topstitching thread here if you prefer. The topstitching thread will be more visible. Start and end with a long tail, and after sewing pull the top thread to the back, knot the ends and bury them in the seam allowance with a hand sewing needle.
Step 5
Pin the pocket in place on one of the bag pieces.
Make a mark 1cm from the top fold along the pressed edge on each side of the pocket.
Top stitch the pocket in place along the two side edges. Start at the bottom of a side. Tie off and sew 1mm from the edge until you reach the top corner. Stop with the needle down, pivot 90 degrees and sew three to four stitches along the top folded edge of the pocket, stop with the needle down and pivot to the mark you have made (as marked in diagram below). Sew to the mark and leave a long tail.
Pull the top thread to the back, tie the ends and bury in the seam allowance with a hand sewing needle.
Tip: there’s no need to sew along the bottom edge of the pocket, as it will be sewn together when we construct the bag.
Step 6
Place the corduroy pieces with right sides facing, sew along the vertical and bottom edges. Trim the corners and finger press the seams open. This helps for the bag to have a neat finish, even if the seams are closing again when the bag is turned.
Turn the bag with right sides out.
Step 7
Sew the lining pieces as you have done with the main bag pieces, with right sides together, but leave an opening of at least 20cm in the centre of the bottom seam. Trim the corners.
Step 8
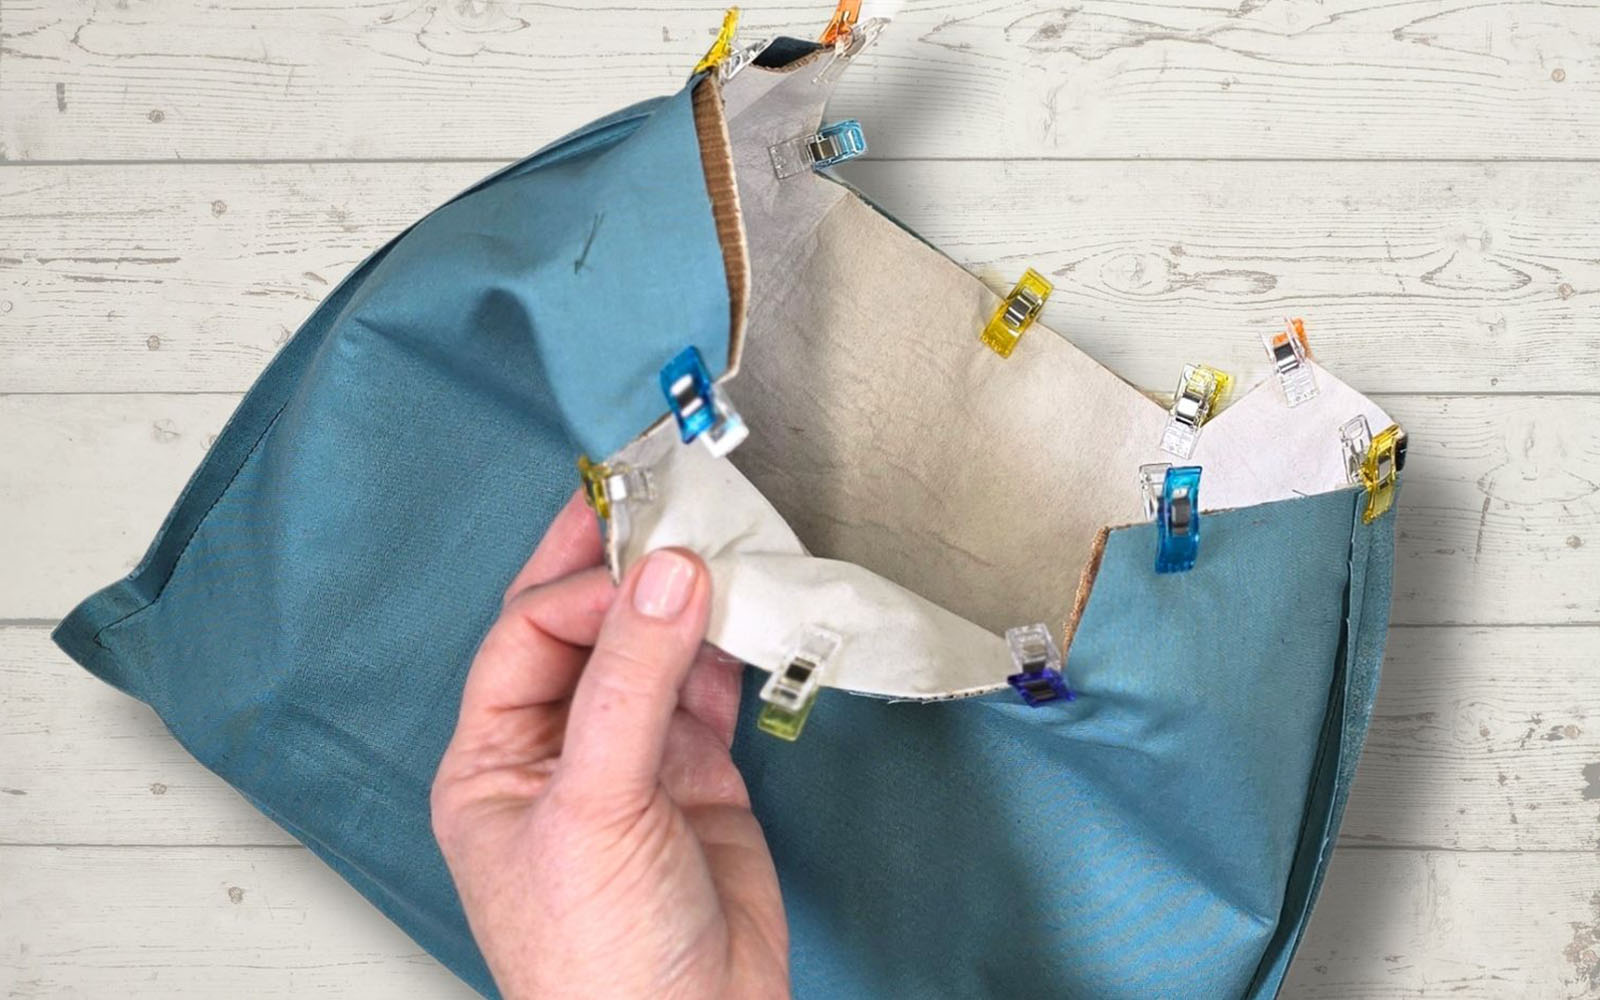
Place the corduroy bag inside the lining – you may have to roll the bottom somewhat to make it fit in. The right side of the lining and the right side of the bag will now be facing each other. Match the side seams (make sure they are open to avoid bulky bits) and centre marks of the corduroy and the lining pieces. Pin all around and then sew through both layers.
Trim the seam to 5mm, snipping the bulk out of the side seams. Make a few snips in the curved parts and clip the corners.
Step 9
Reach into the lining through the opening you left at the bottom. Gently pull the corduroy bag piece through the lining opening. Pull until the outer bag is out of the lining piece and the lining has its right side out. The opening will now sit at the top.

Step 10
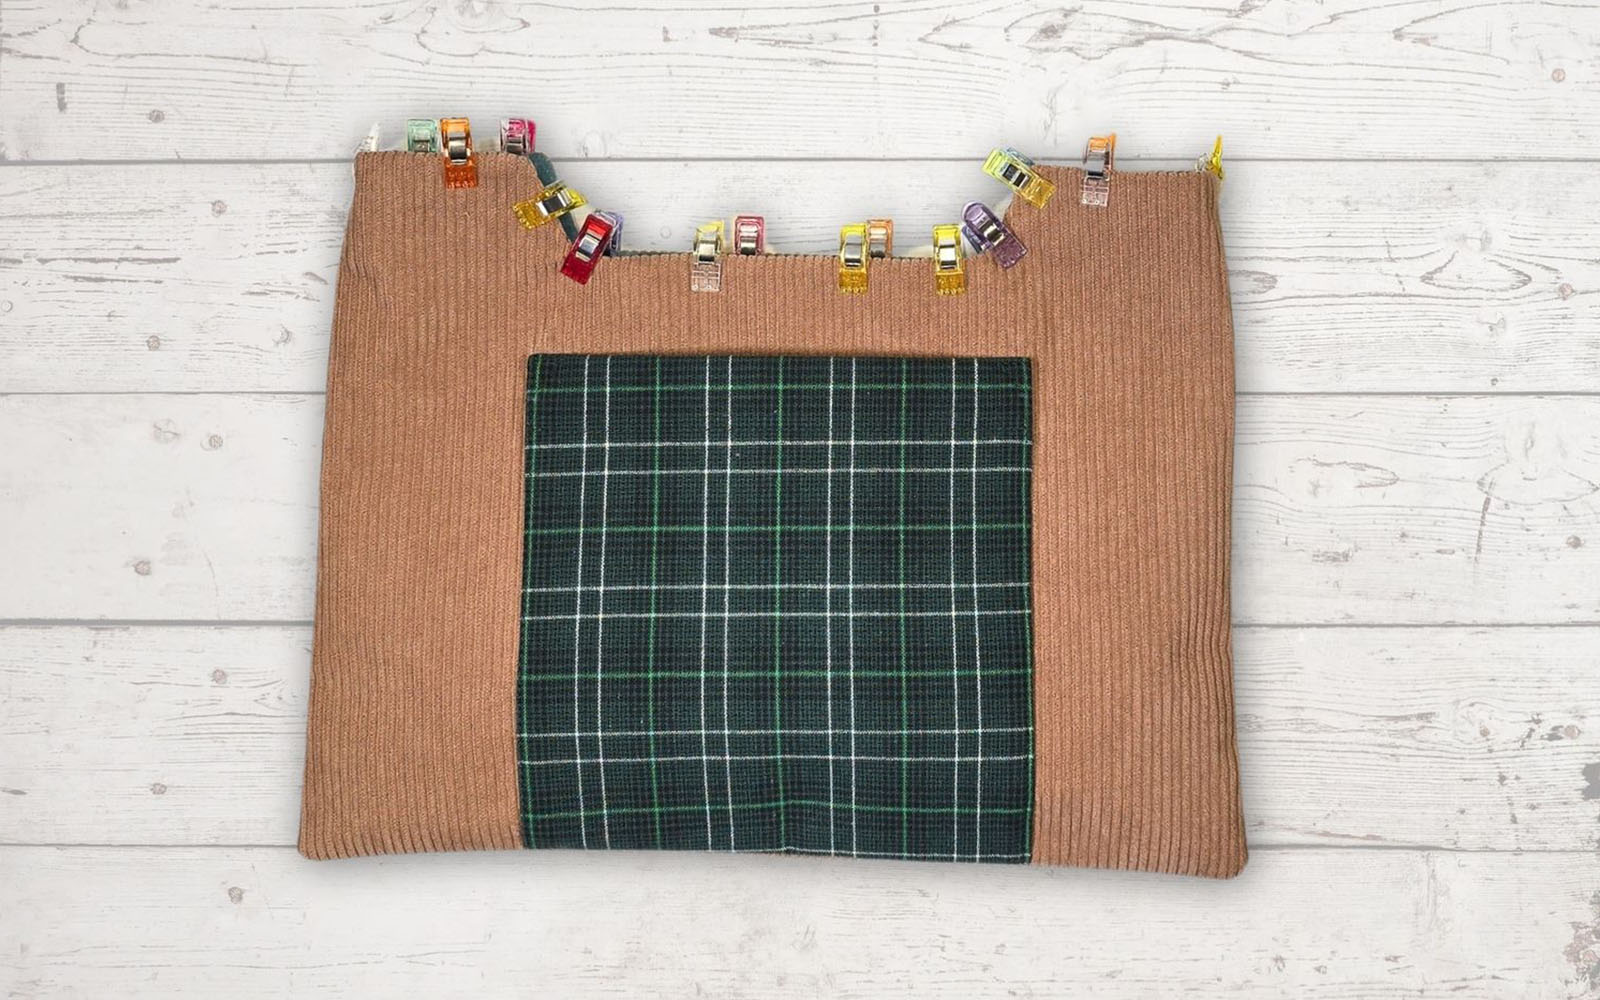
Shape the seam at the top of the bag, making sure the lining is lying nice and flat to the inside of the bag, and edges are neat. You can gently press, or finger press the seam towards the lining and then fold the two layers on each other to make sure the lining is not peeking out above the top of the corduroy. Use your point turner to poke the corners out neatly. Pin or clip securely and topstitch all around, 1cm from the top.
Pull the lining up out of the bag and sew the opening in the lining closed with invisible stitches. Push the lining all the way into the bag.
Step 11
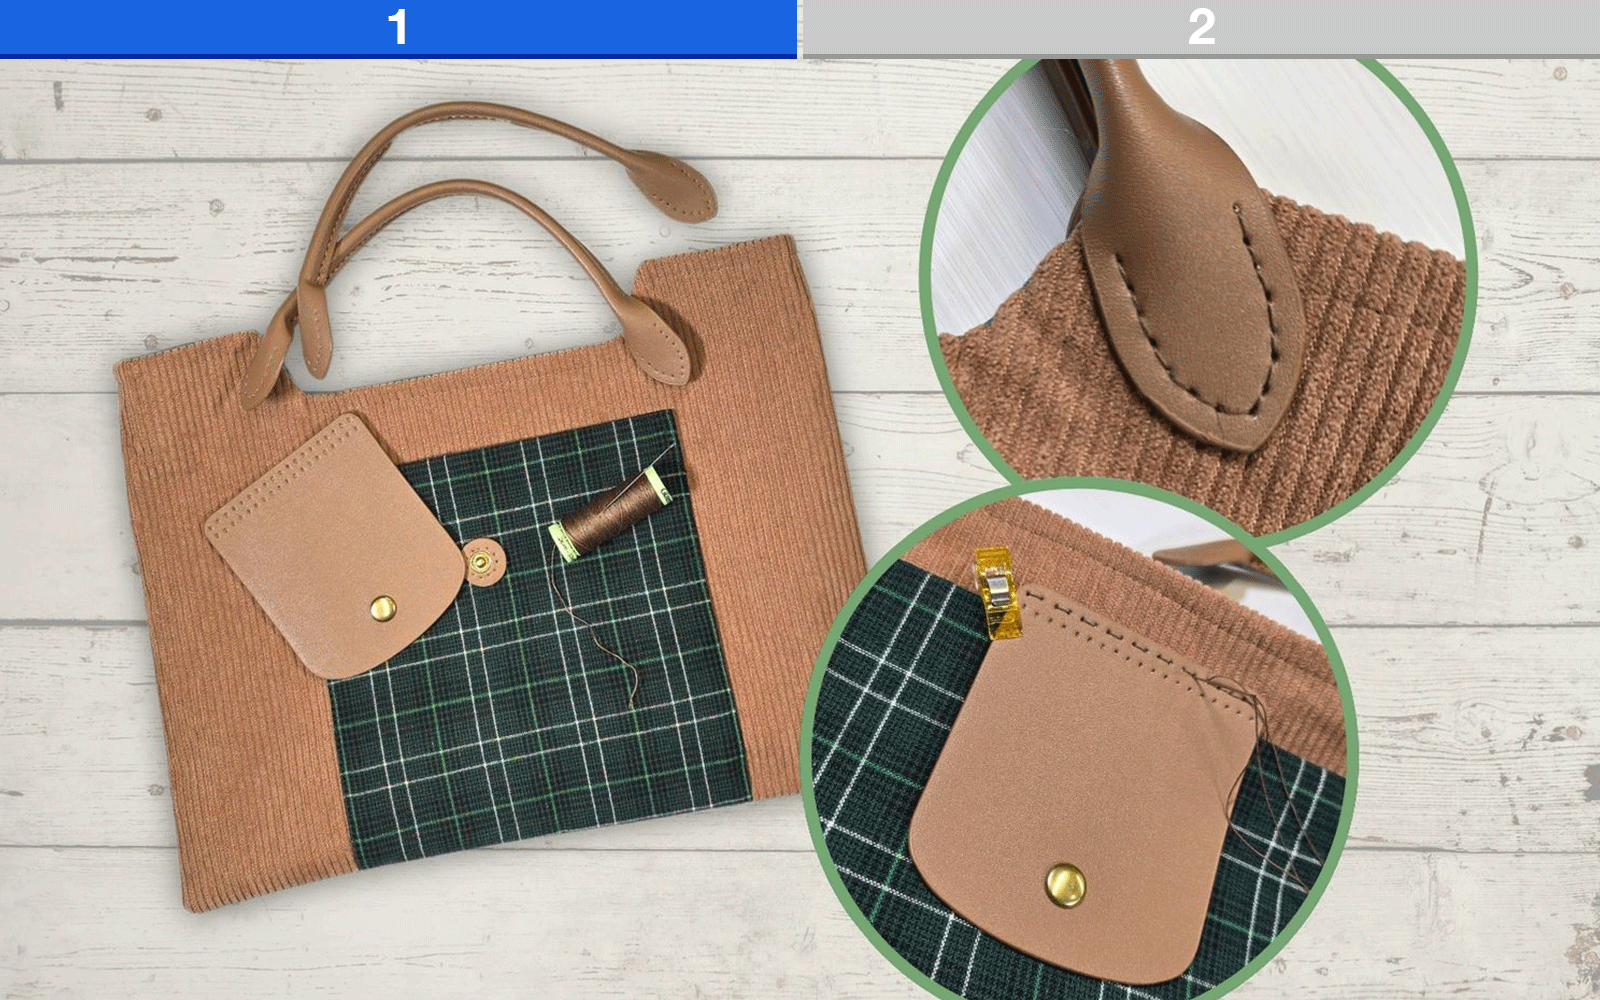
Attach the handles and flap with top stitching thread and hand sewing needle. Use a long piece of thread and start at one end, leaving a long tail. Work running stitch through the holes until you get to the end, then turn around and sew running stitch into the openings you left.
When you reach the starting point again, tie off by double knotting the ends together. Bury the thread between the lining and the bag. Cut the thread close to the lining so it will slip to the wrong side.
I hope you have fun making your bag. It is really a quick make and makes a great gift for your girlfriends!