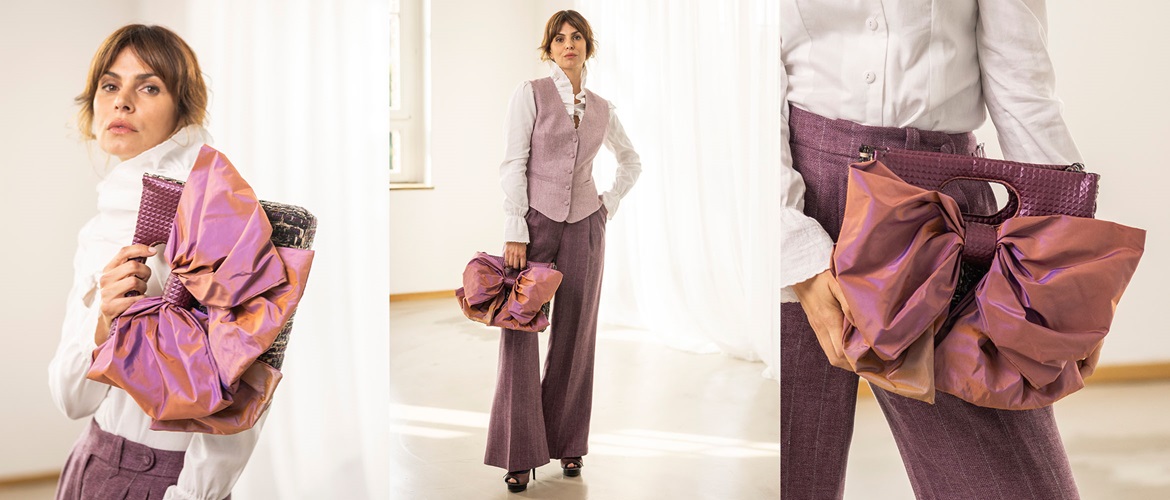
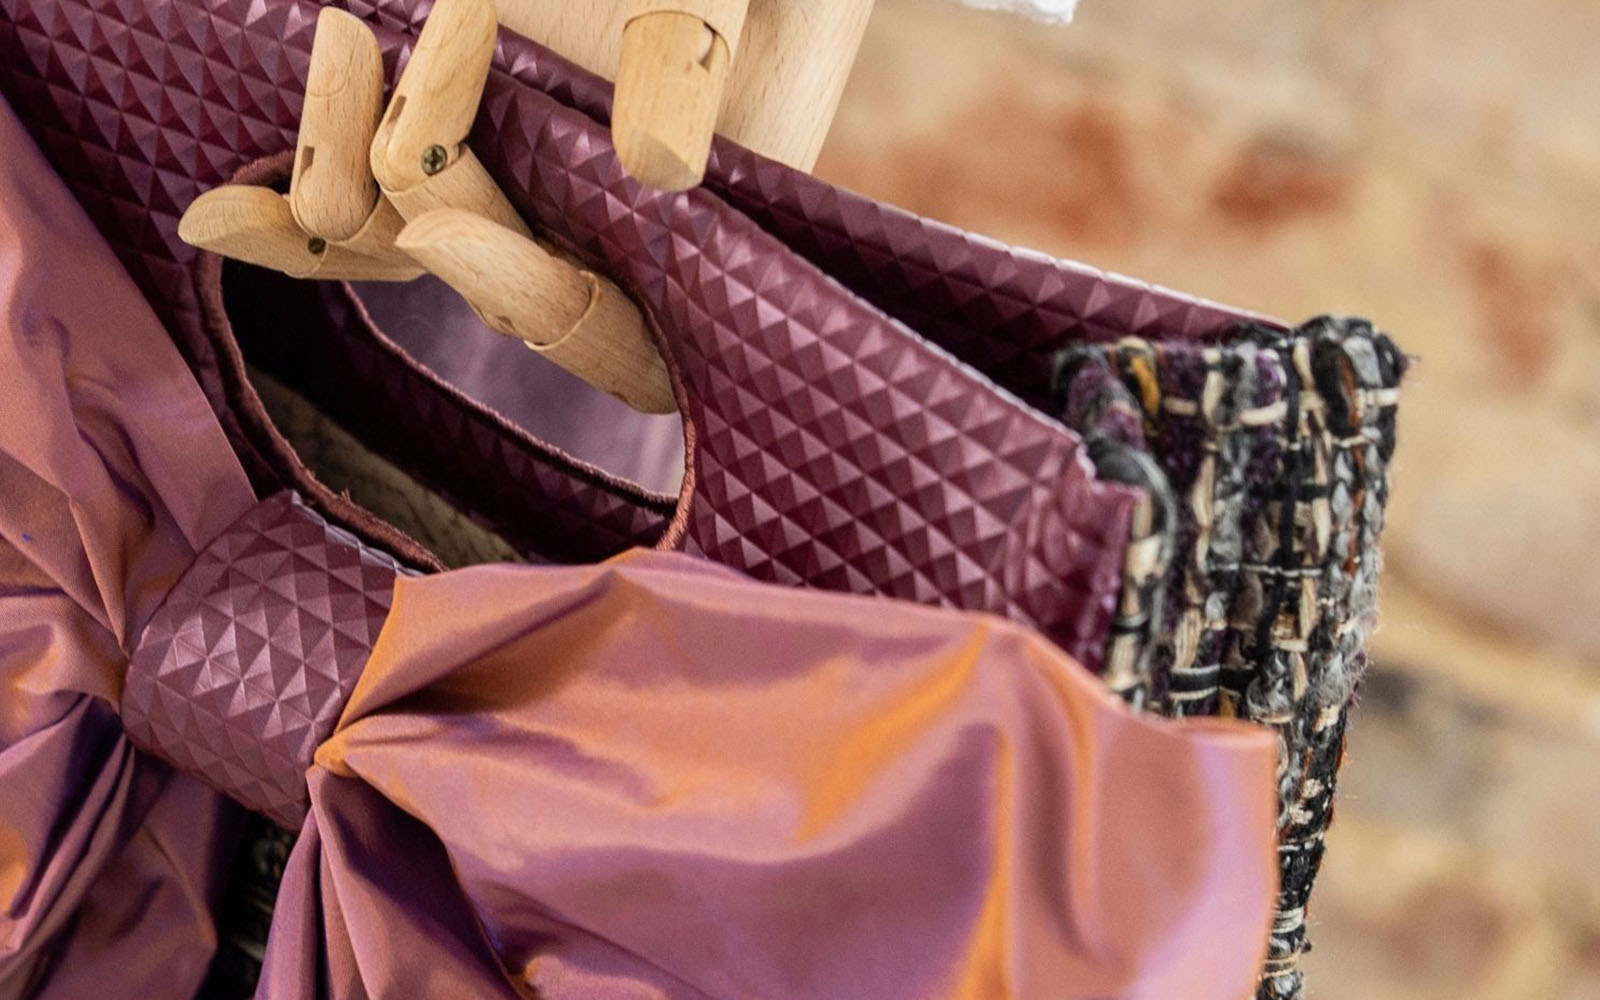
Small bag, big bow – sew your own handbag

A handbag with a big bow is a great way to lift an outfit in a fun but fashionable way. Sew your own and be the envy of all your friends.
The handbag has a rectangular boxed shape and as all the parts, except for the bow, are backed with foam stabiliser, you are free to use fabric that is loosely woven or has a lot of drapability. Avoid thick fabrics, as the layers get very thick when constructing the bag.
To sew this clutch bag we chose a gorgeous, loosely woven fabric with lots of texture and colour variations. The bow was made from shot taffeta, which creates a lively play of colour as the bag moves. A piece of patent leather/vinyl is folded double to enclose the top edges of the bag creating a simple but chic handle. A loop to hold the bow in place is also made from vinyl or pleather.
Read on for the free sewing pattern and instructions on how to sew your own version of this playful handbag.
Finished size: 28.5cm wide x 25.5cm high. The sides are 12cm wide.
Materials needed
- Main fabric: 0.5m (115 or 150cm wide) or 80cm (90cm wide) of a loosely woven fabric with an interesting texture or print
- Lining: 0.5m (115 or 150cm wide) thin cotton fabric
- Foam stabiliser (not thicker than 5mm): 55 x 40cm piece
- Bow: 50cm taffeta or stiff organza (at least 115cm wide) – the fabric needs to be lightweight but fairly stiff
- Handle panel: two pieces of 25 x 35cm each vinyl or pleather in a shade that matches the bow fabric and the bag fabric, plus a piece of 6 x 15cm to tie around the bow
- Basting tape
- Matching sewing thread
- Sewing or embroidery thread matching the colour of the vinyl as closely as possible
- Matching top stitching thread (optional)
- Temporary adhesive spray
Equipment needed
- Sewing machine
- Super universal needle – size 90 or 100
- Walking foot
- ScanNCut DX machine, standard mat and rotary blade (optional, see Step 1)
- Stiletto or awl (optional)
- Large hand sewing needle
- Wonder clips (sewing clips)
- Long, strong pins
- Basic sewing supplies
Download pattern and cutting files for the handle panel here
Notes
- Seam allowances are 1cm unless specified differently.
- When using adhesive sprays, always spray away from your machine, work surfaces and ironing board – the best is to have a piece of cardboard, like a flattened box, to use as a surface to spray on. Pick one at least 30cm larger than your largest piece. Also make sure that the adhesive is temporary and is intended for use with sewing projects. Do not over spray – a light dusting is all you need!
- When the layers are thick, GO SLOWLY. Turn the flywheel by hand if needed.
How to
Step 1
Cut pieces as follows:
Main fabric
One piece of 70 x 35cm. This will be the outside front, bottom and back of the bag.
Two pieces of 33 x 18cm – these are the outsides of the gussets.
Lining
One piece of 70 x 35cm. This will be the inside front, bottom and back of the bag.
Two pieces of 27 x 18cm – these are the linings of the gussets.
Foam stabiliser
One piece of 70 x 35cm for the bag body.
Two pieces of 17 x 29cm for the gussets.
Vinyl
Two handle pieces – use your ScanNCut for a professional finish. If you do not have a ScanNCut, download the PDF and print on 100%/real size. Trace the pattern onto the wrong side of the vinyl and scissor cut or use a rotary cutter.
Step 2
Spray a light coating of adhesive to the one side of the large piece of foam stabiliser. Cover with the lining. Turn it over so the foam side is facing up, spray and cover with the main fabric. Smooth down on both sides.
Step 3
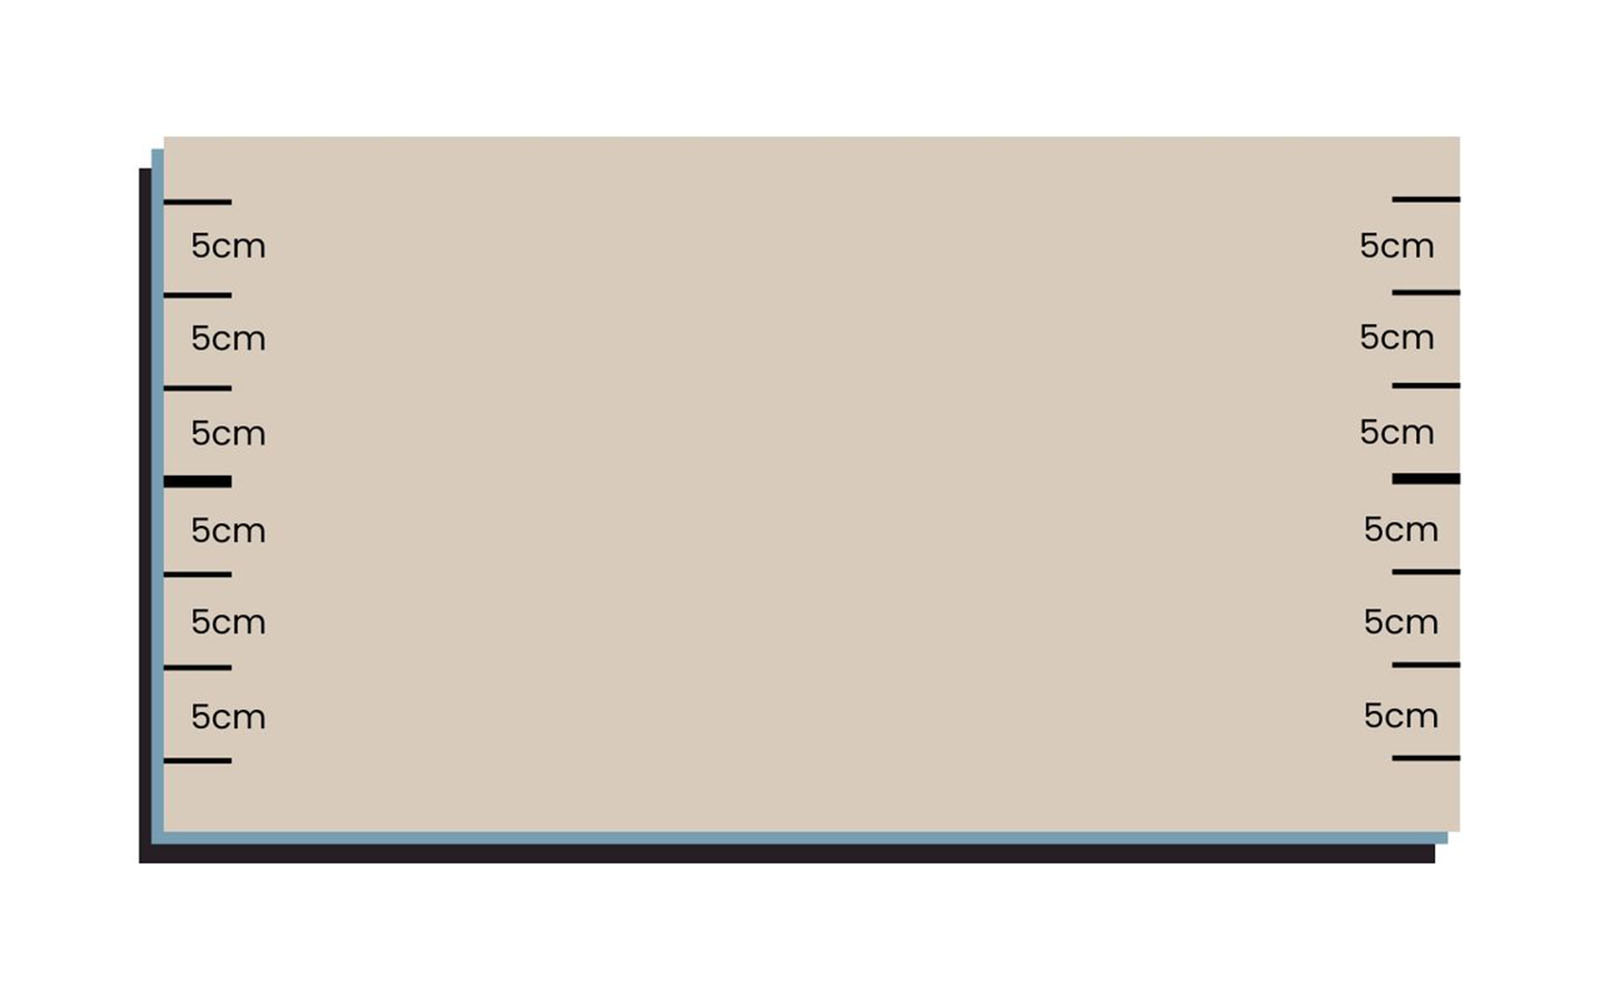
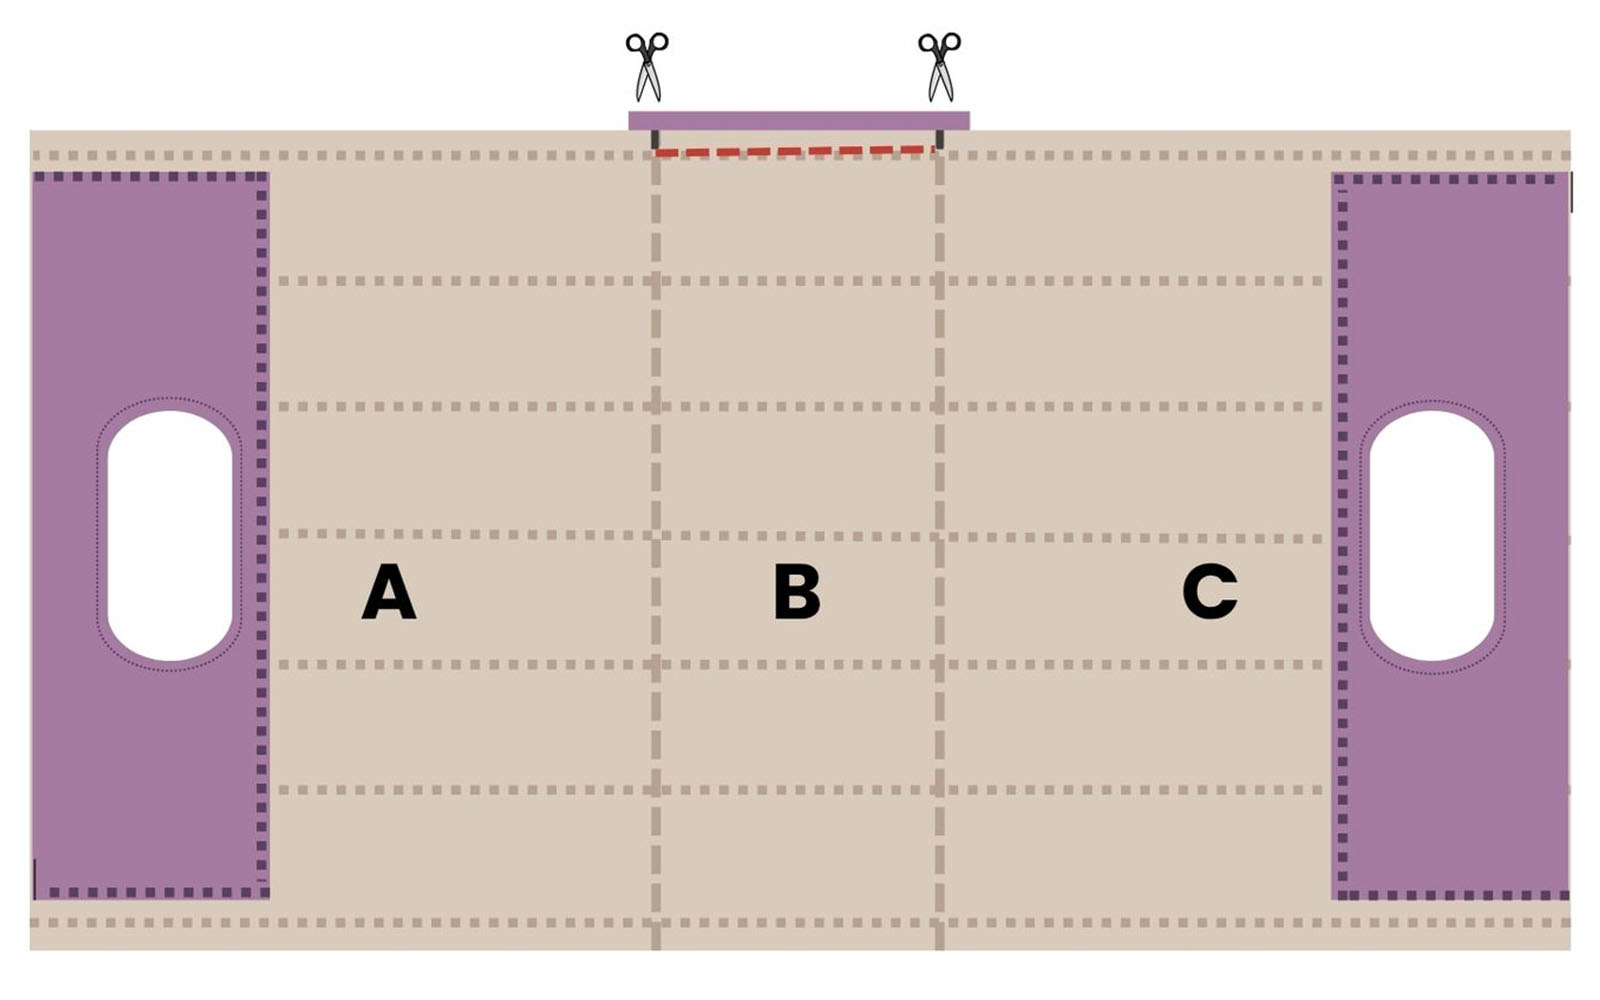
On the lining side, mark the centre of each short side. Mark at 5, 10 and 15cm from the centre on each side. Draw lines connecting these marks, so you will have lines spaced 5cm apart.
Step 4
Fit the walking foot on the machine. Use thread matching the main fabric in the bobbin and thread matching the lining in the needle.
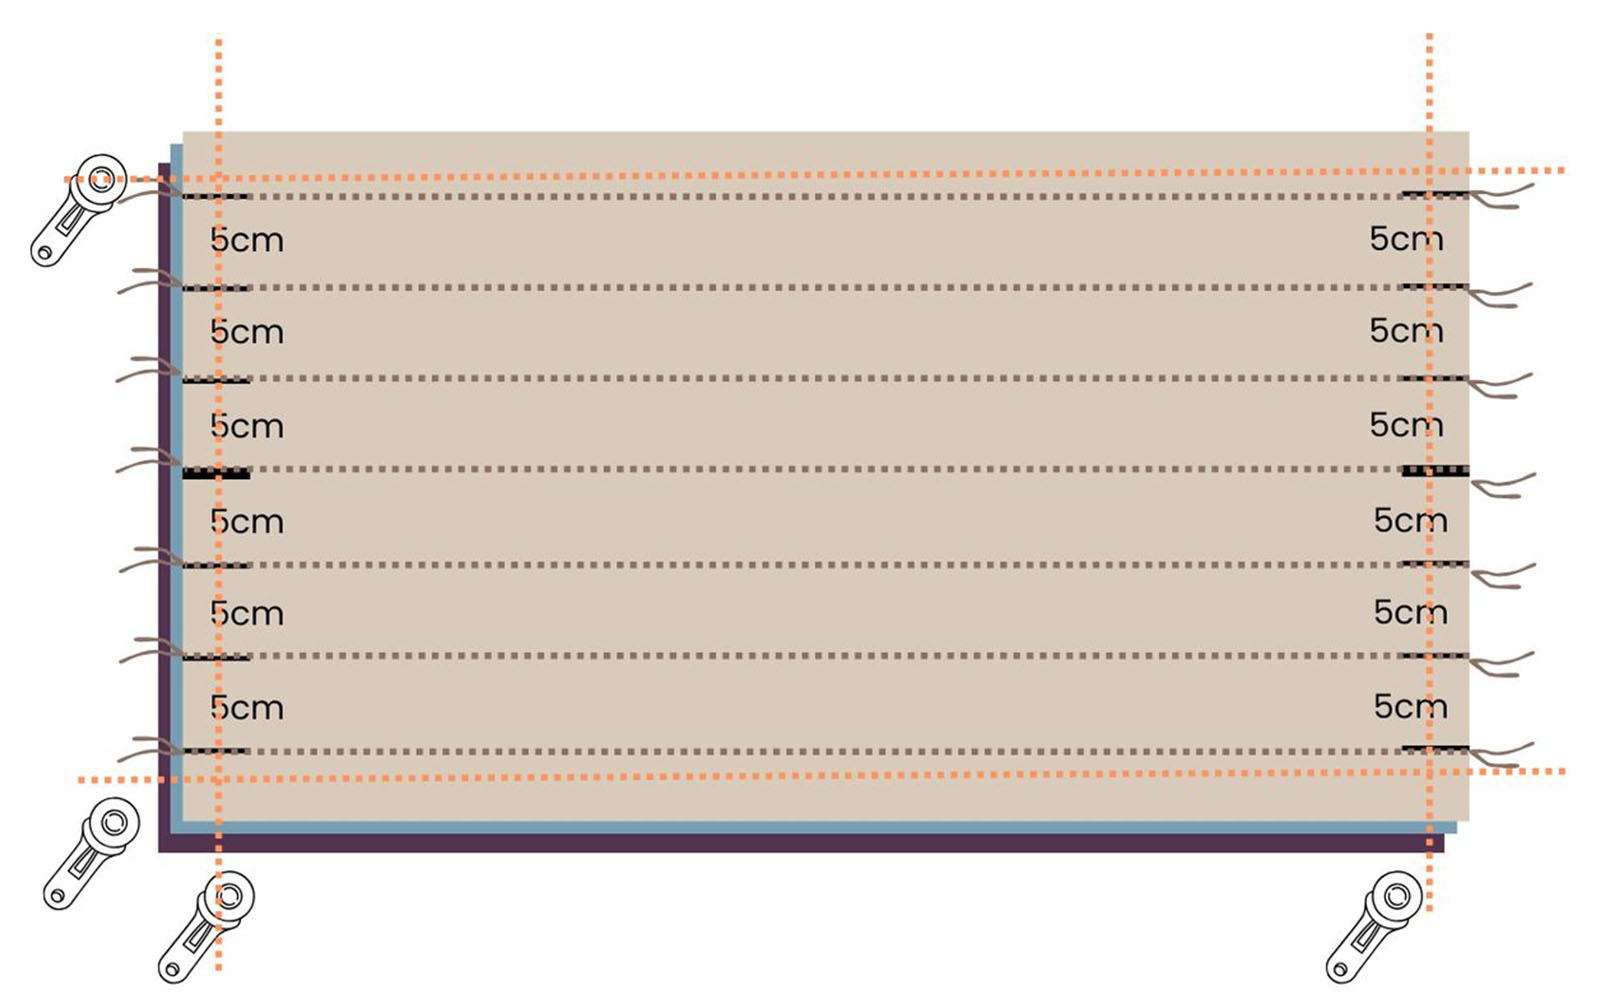
Set the stitch length to 3.5 and sew through all three layers on each of the lines you marked in Step 3.
Trim the piece to 32 x 63cm, keeping the centre line in the centre. Make sure it is cut very straight and that your corners are exactly 90 degrees. Sew a large zigzag stitch along all four edges to seal it and bind the three layers together.
Tip: a quilting ruler can help you get the cutting angles just right.
Step 5
Measure and mark a line 25.5cm from each short edge, parallel to the short edge, leaving a 12cm section in the centre. Sew from side to side on these lines. These are the fold lines that will create the front (A), back (C) and bottom (B) of the bag.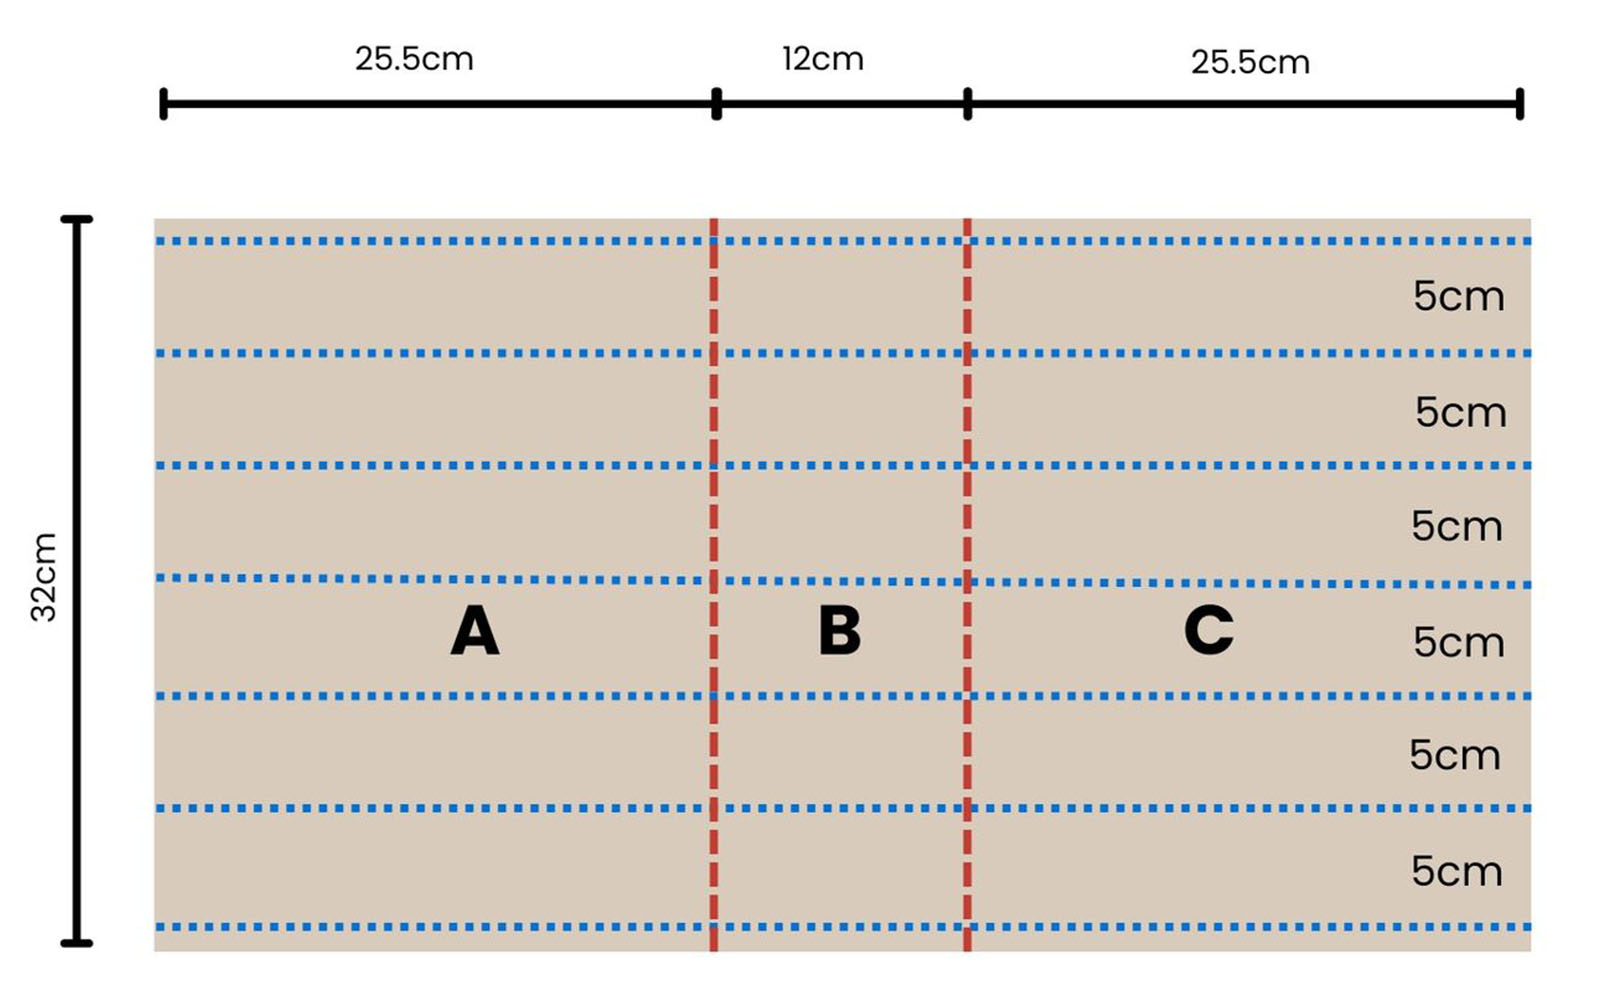
Step 6
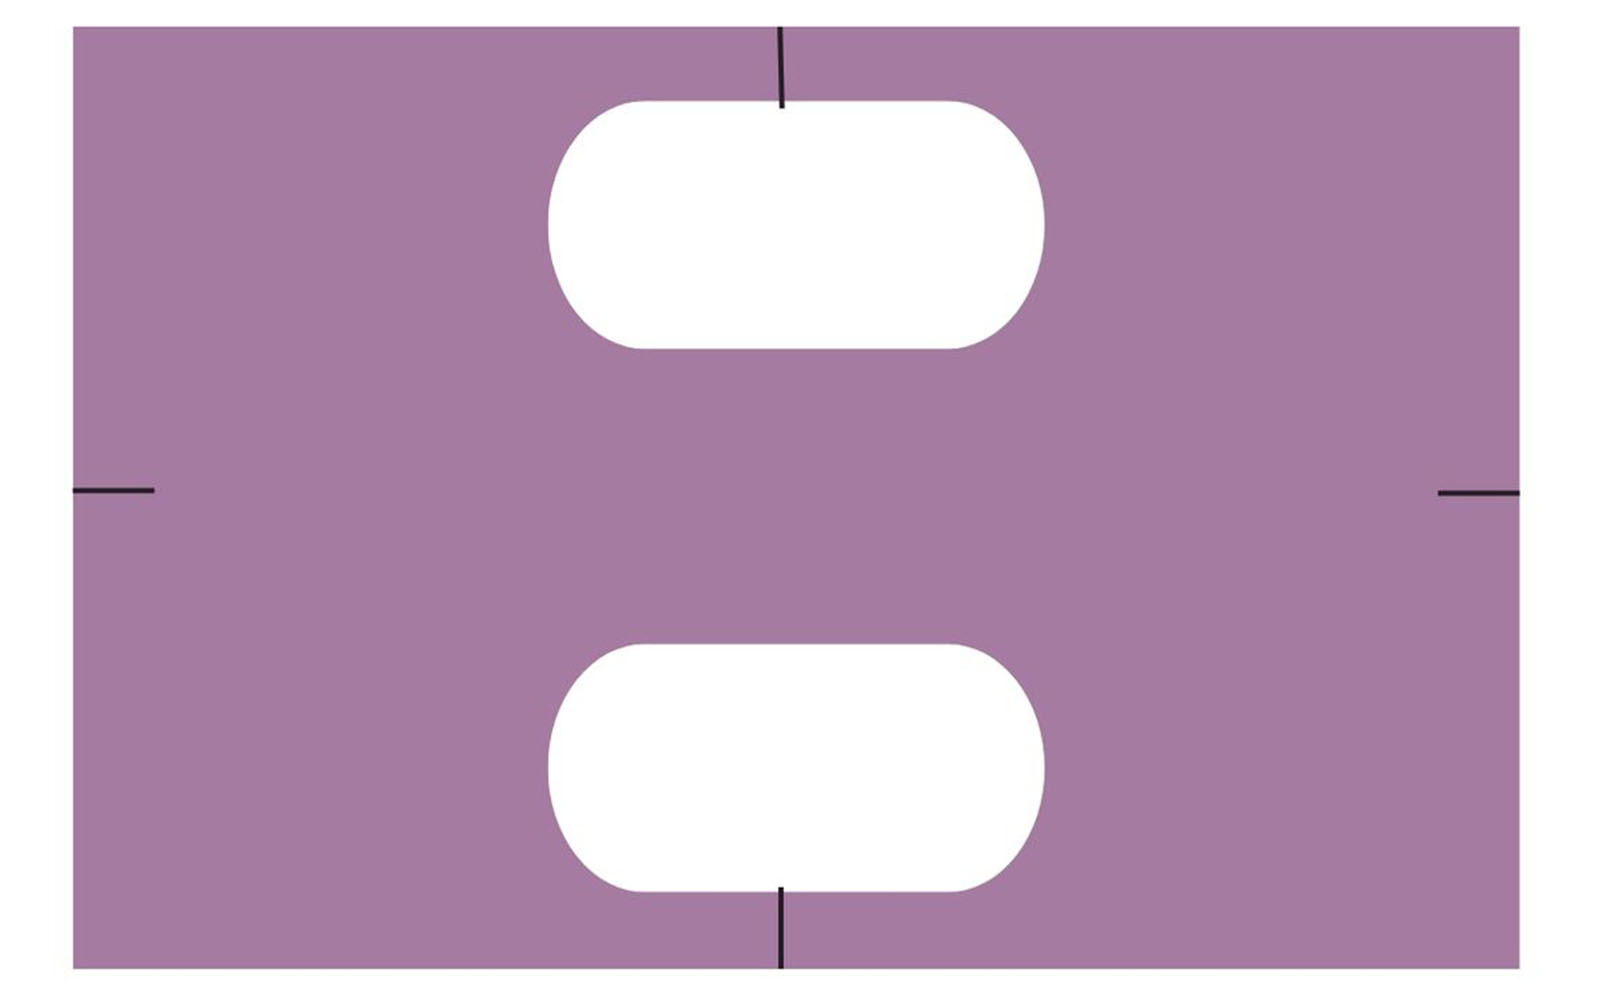
Fold the vinyl handle panels with right sides facing and the holes aligning exactly. Mark the centre fold on the wrong side at both ends.Fold along the vertical and mark the vertical centres as well.
Step 7
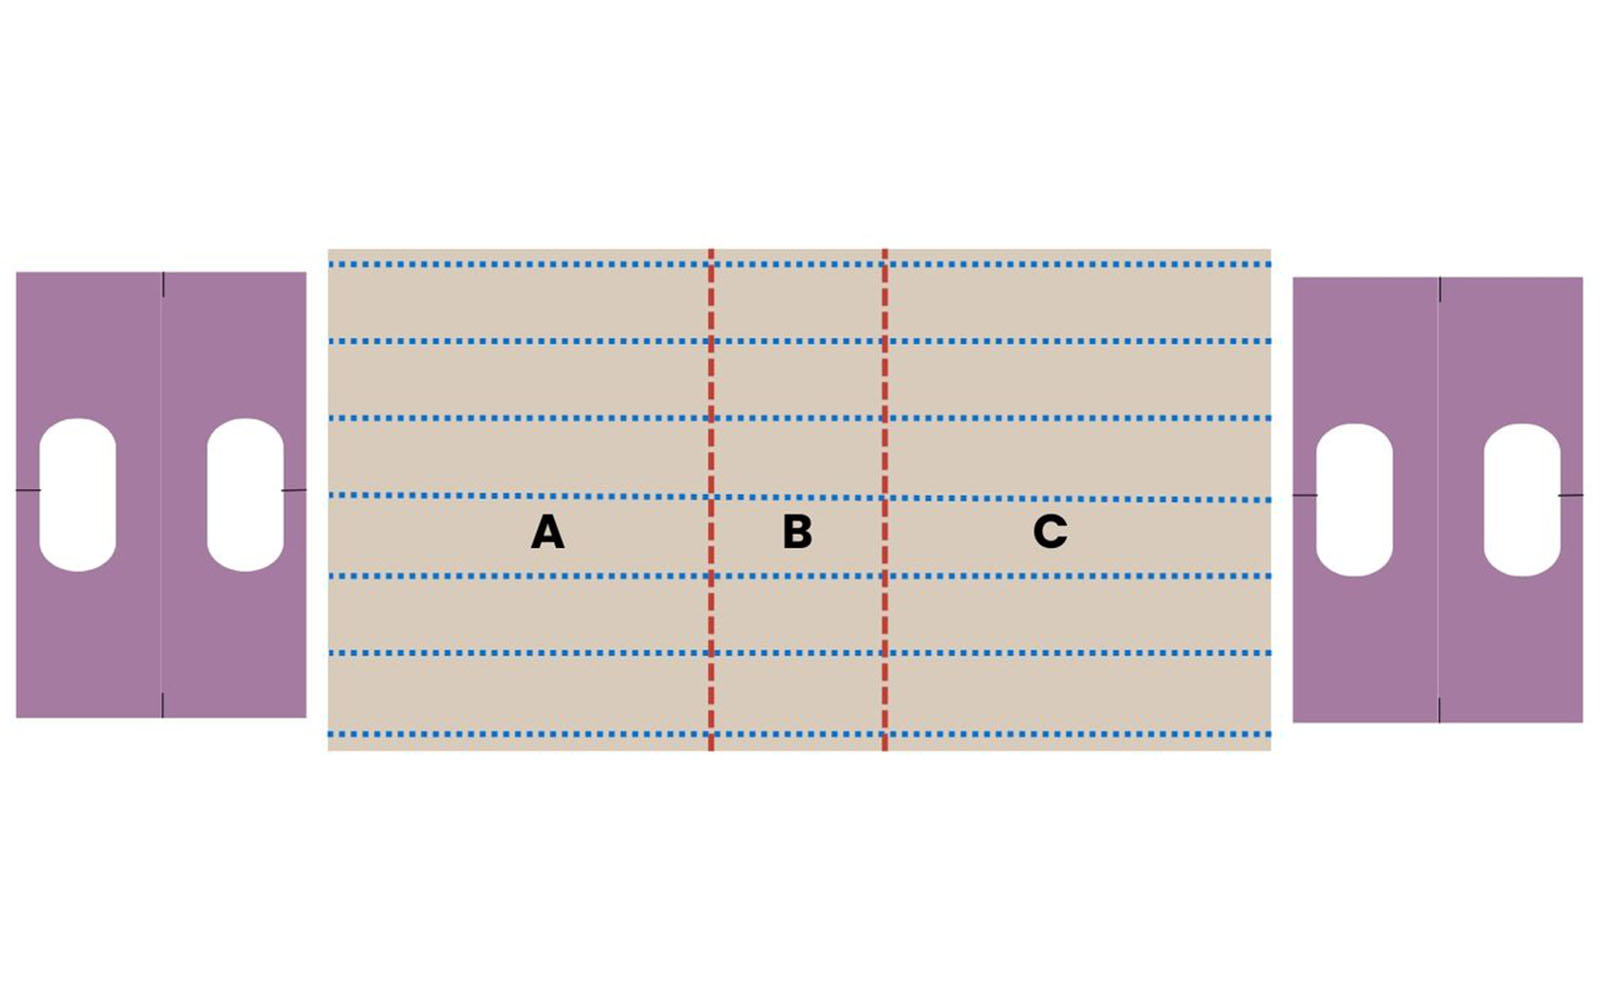
Place the handle piece over one short end of the main bag piece, with the bag edge snug in the fold and the centre marks of the bag piece and the handle matching. The handle panel will reach up to 1cm from the corner, leaving 1cm of the top edge of the bag exposed. Secure with clips – not pins!
On the lining side, trace the hole position. Check that the holes are aligning (push a pin through the bag piece on the very edge of the handle - it should emerge on the other side of the bag piece, only just touching the vinyl).
Set the vinyl aside. Repeat on the other end with the other piece of vinyl.
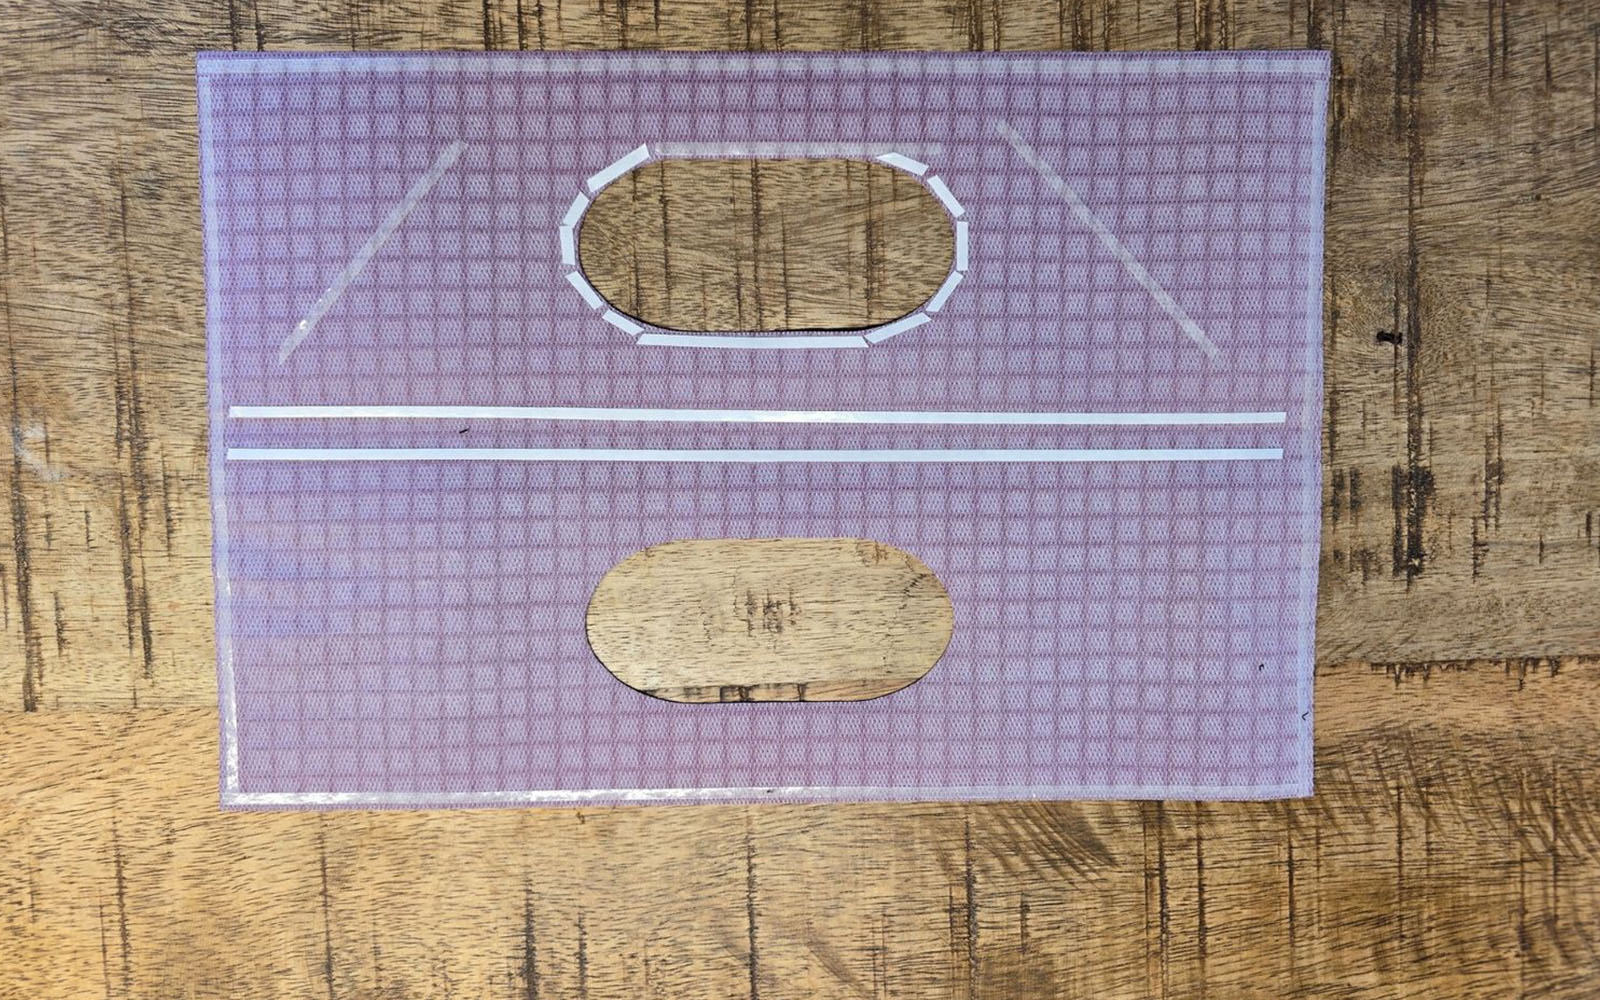
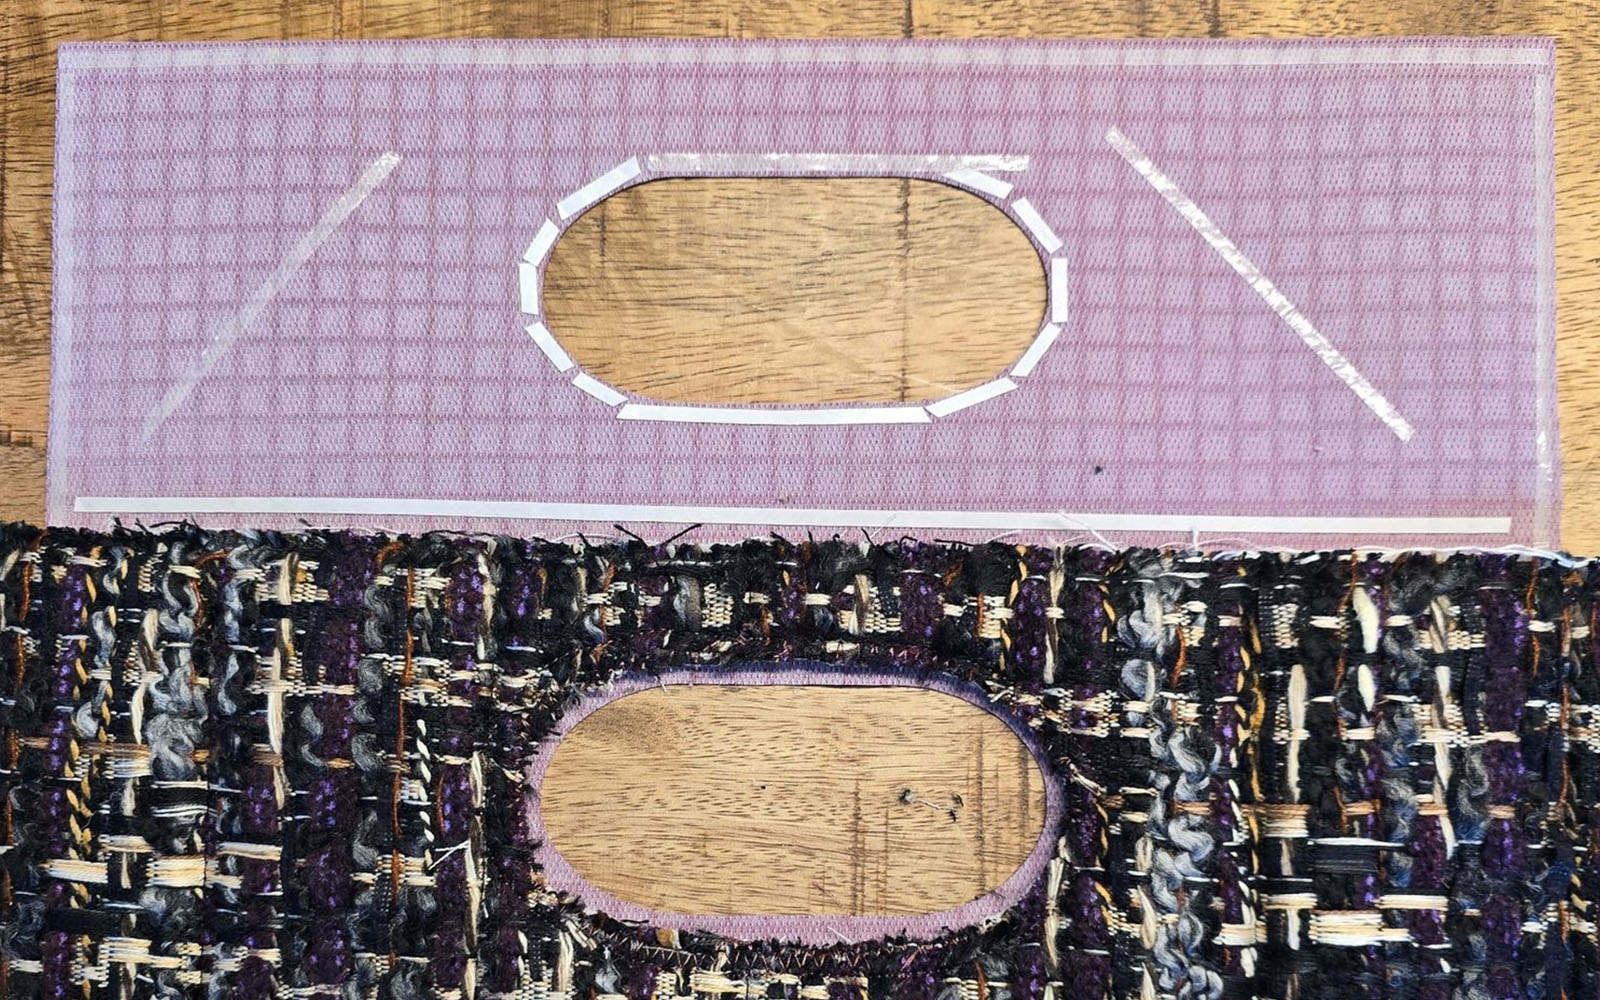
Step 8
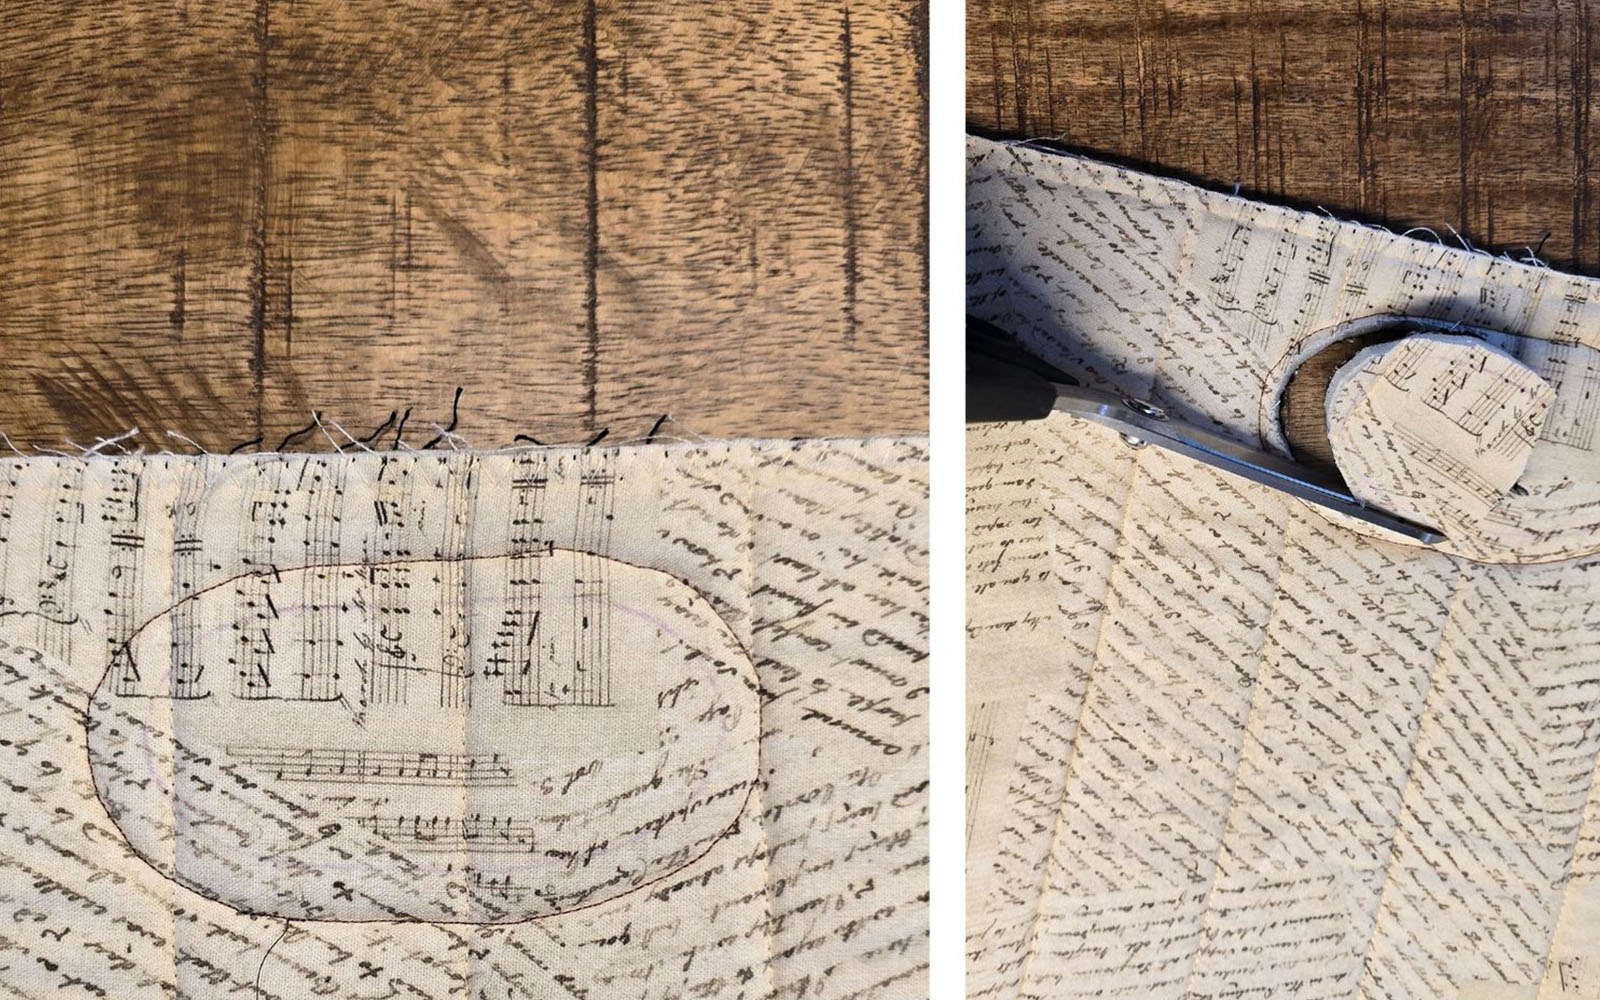
Measure and mark 1cm all around the handle hole you have marked.
Sew straight stitches on this line, then cut through all layers just on the inside of this line of stitching. Test to see that when you place the vinyl over the hole, the two edges of the vinyl can reach each other with a bit of room to spare. Zigzag all around the opening you have cut in the bag.
Step 9
Prepare the handle panels.
Lay both pieces with the wrong sides facing up. Place double sided basting tape along the edges and on the larger areas. Place small pieces around one of the openings on each panel.
Step 10
On the panel side that does not have tape around the opening, peel the protective layers off the tape. Carefully position it over the bag piece, matching the fold lines marked on the vinyl with the corresponding marks on the bag. Press down when in place.
Fold the other side over to test that the position is good. The hand holes should align exactly, and the fold should sit flush on the edge of the bag piece. If needed, trim some fabric away.
If all good, fold open again, remove the protective layer off the tape on this side and carefully place and press down. Check again: the edges need to align perfectly on both sides of the fabric, and more importantly, the holes should align. When you push the edges of the two sides together, they should lock together, enclosing the raw fabric edges.
If all matches, finger press well.
Step 11
With a long stitch length – around 3.5 – top stitch all along the short edges and one long edge of each handle panel.
With matching thread, sew first straight stitch and then a wide satin stitch all around the openings. Make sure that the needle is stitching through both layers of the vinyl on the one side and just off the edge of the vinyl on the other side of the needle movement.
Step 12
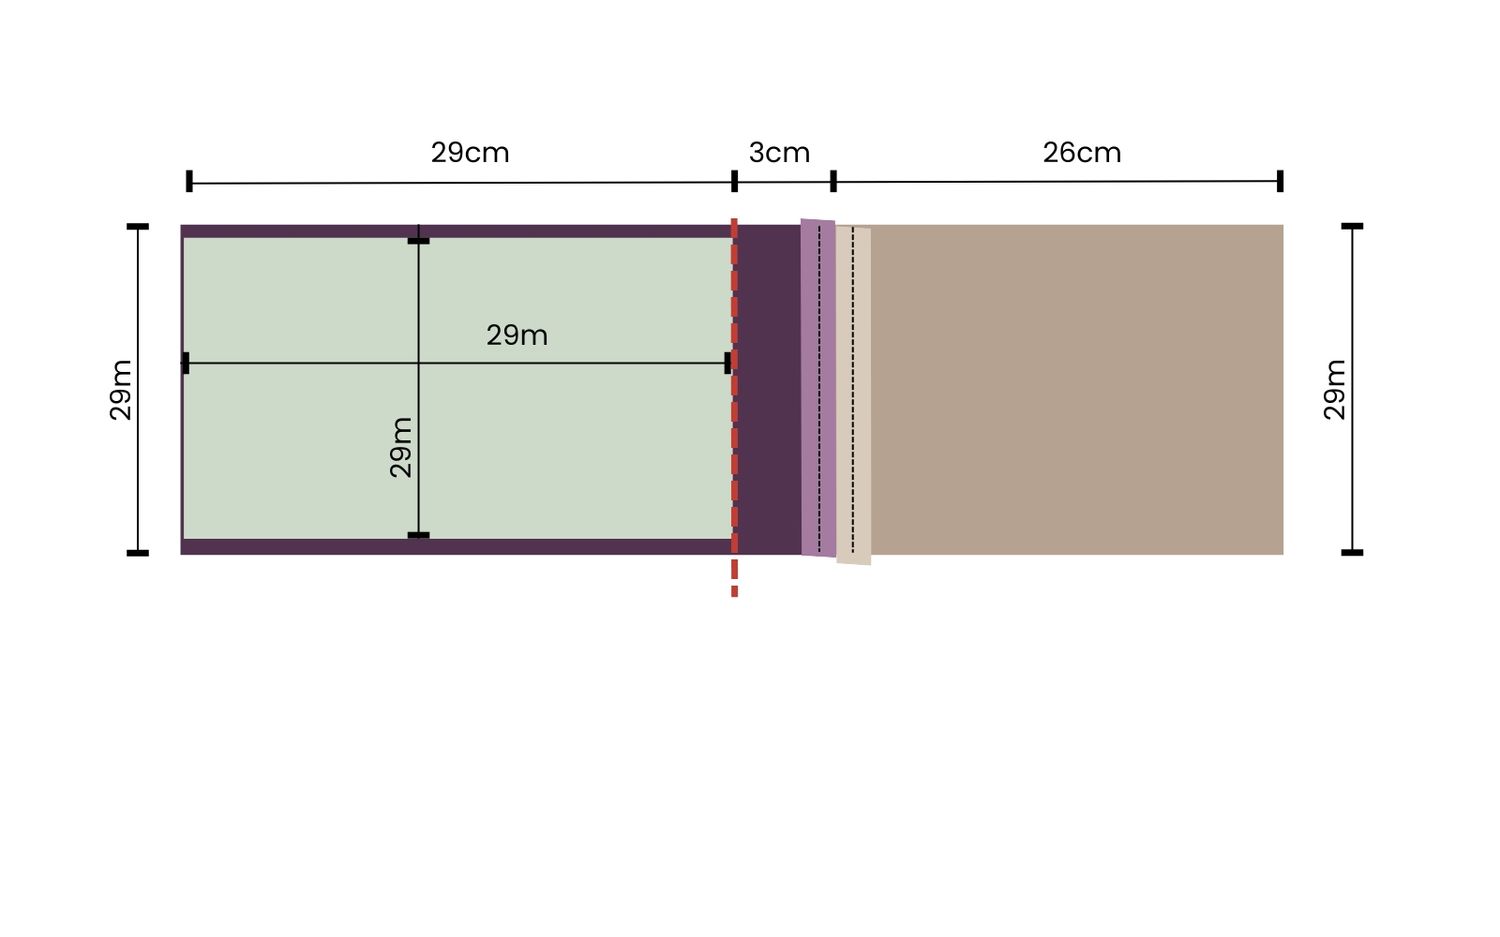
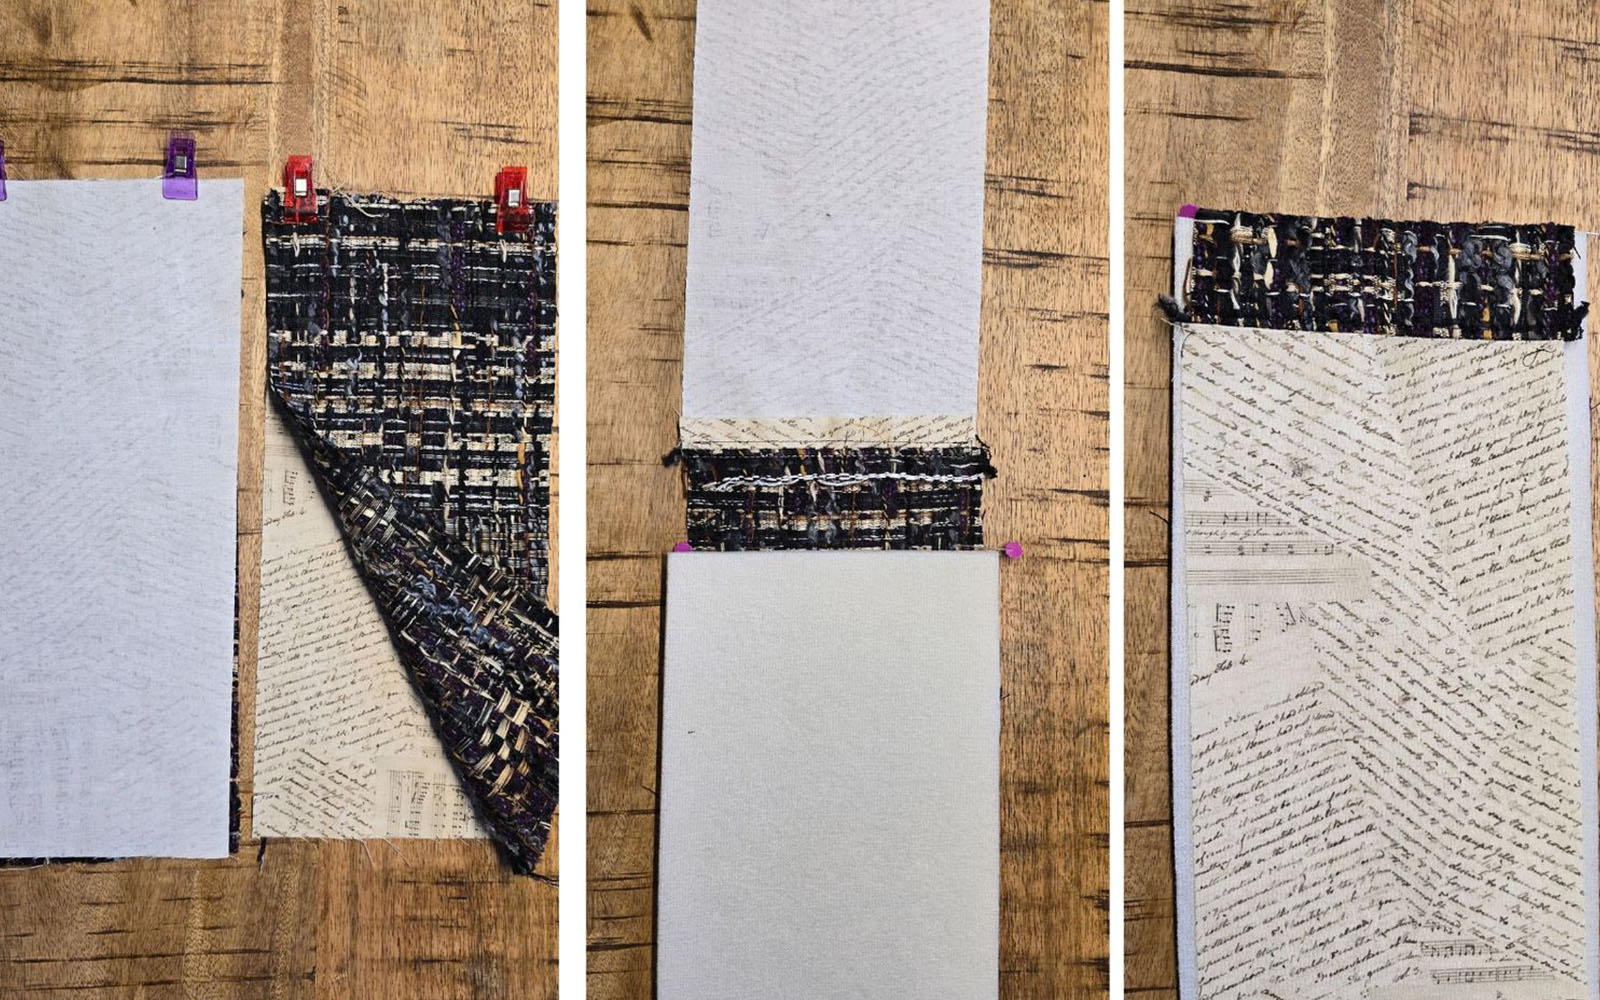
Now we will make the handbag gussets. Sew one main fabric gusset piece and one lining gusset piece together along the short ends. Press the seam open and top stitch 5mm from the seam on both sides of the seam.
On the main fabric, mark a fold line 3cm from the seam. Lay the strip with wrong sides facing up.
Spray a light layer of adhesive on one of the foam stabiliser gusset pieces and then place it with the sprayed side facing down on the main fabric piece – one short side of the stabiliser aligning with the fold line you marked. The foam is a little narrower than the fabric so you can see that you are placing it correctly – don’t worry if it is not exactly in the centre, there’s plenty of room! Press the foam down onto the fabric with your hand.
Spray the side of the foam stabiliser that is now facing up, then fold the rest of the fabric piece (which is mainly lining and a little bit of main fabric) over the short end to enclose it snugly. Smooth the rest of the lining towards the bottom end, making sure the sides align with the fabric beneath.
Step 13
Make a mark in the centre of each of the short sides of the gussets. Mark every 2cm on each side of the centre along the fold and the bottom edge.
You should have the centre line plus four lines on each side. Sew through all layers, starting just inside the folded edge at the top. Start each line of sewing with a tie off.
Trim each gusset to 26.5 x 14cm.
Sew a large zigzag stitch around the raw edges of each gusset piece.
Step 14
One you have sewn the gusset pieces, we’ll assemble the handbag.
On the main handbag piece, snip 1cm into each end of the two fold lines that you sewed earlier between A and C and between B and C. Mark the centre between these snips.
On the bottom raw edge of one gusset piece, mark the centre point. Lay the gusset with the right side facing up. Place the bag piece over the gusset, right side facing down, and match the centre points marked on the gusset and the bag. Pin.
Sew across the bag bottom from one snip to the other, 1cm from the edge. Tie off at the start and end.
Step 15
Take the corner of the bag next to the fold in the vinyl and bring it around to match the top of the gusset. Clip in place.
Fold the bulk away and align the one side of the gusset and the bag. The snip at the bottom will open up into an L-shaped gap.
Sew along the side, from the top edge, sewing right next to the edge of the vinyl to the snip at the bottom of the bag.
Sew the opposite side of the gusset to the side of the bag in the same way.
Repeat on the other side of the bag with the remaining gusset piece. Make sure to tie off securely at the start and end of each sewn section. The bag will now have a box shape.
Tip: if you’ve not sewn a gusset, or need a refresher – check out our handy YouTube How To Sew a Gusset video. Why not give us a follow too, we post lots of useful content there.
Step 16
Turn the bag right side out. Shape the sides and the seams. If the shape is good and the folds of the gussets and main bag piece align, you can turn the bag with the inside out again.
Trim and zigzag stitch over the seams to seal them and make them less bulky.
Step 17
Fold the bag flat so the seams where the gusset and bag body meet are aligned. Flatten the gusset and pin the fold that forms. Sew the fold down – start at the top where the two edges meet, sew 5mm from the fold. Sew 4cm down and tie off securely.
Repeat with the second gusset.
Step 18
Turn the bag back out and shape. At the top corners, hide the seam allowance between the gusset and the bag by pinching the seam from the outside, so enclosing the seam allowance between the main part of the bag and the gusset. Sew a few large stitches through all layers using a hand sewing needle and top stitching thread. Repeat on the other three corners. This, as well as the fold sewn on the gussets in Step 17 will let the gussets fold neatly in between the front and back.
Step 19
Make the bow.
Fold the piece of taffeta double with long edges aligned. Sew all around, leaving a gap to turn out.
Trim seam allowances, snip corners and turn right side out. Finger press the seams, or if your fabric can be ironed, press carefully. Hand sew the opening closed with invisible stitches.
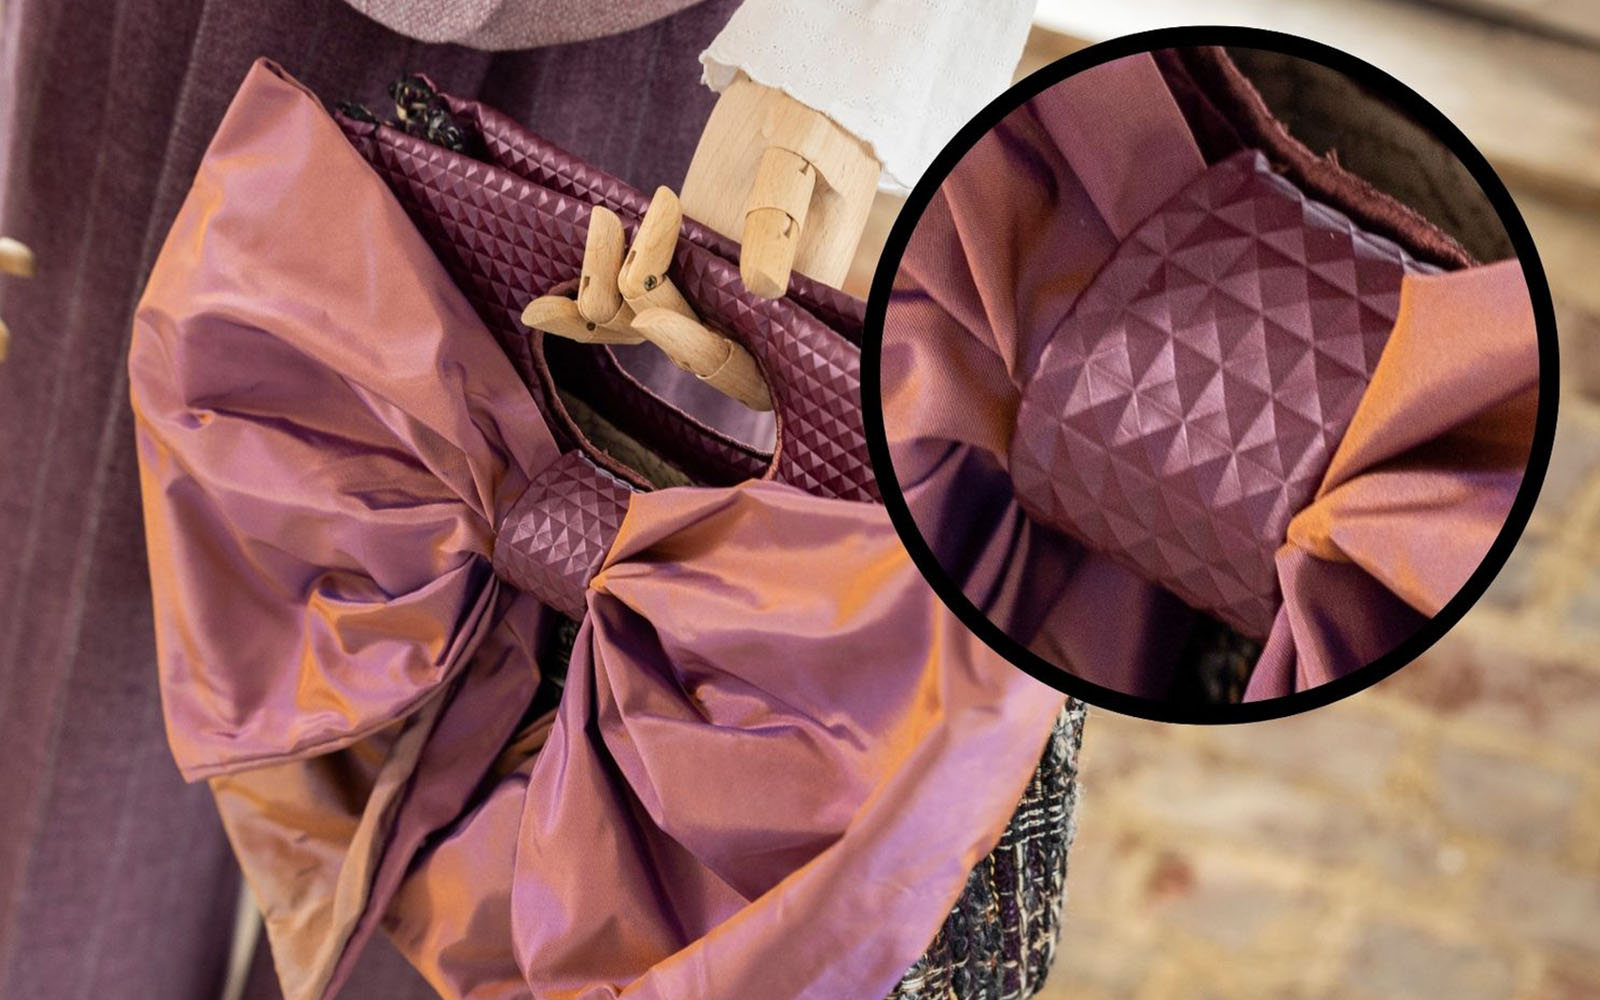
Cut a strip of vinyl 6 x 15cm. Fold the long edges to the wrong side so they meet in the centre. Top stitch along the folds.
On one side of the bag, lay the strip with the wrong side facing out and the long end extending over the hole in the handle. Sew over the end, just below the handle opening.
Form the bow, bunch up the centre and place it on the vinyl strip. Fold the vinyl over the bow and pull down until it holds the bow nicely in place. Tuck the loose end of the vinyl into the loop and sew to the bag by hand. Trim the vinyl strip before sewing if needed.
Arrange the bow so it is nice and poofy. If the fabric is a little slippery, you may have to catch the bow layers together and to the vinyl strip with a few invisible stitches.
You can add a pocket on the inside after quilting and trimming the main piece. Place the pocket on the inside of the front, so the bow will cover any sewing lines.