Reversible bucket hat


Bucket hats are not only a fashion statement but also practical accessories for any season!
In this step-by-step guide, I'll walk through my process of creating a reversible bucket hat using the Afternoon Hat pattern by afternoon.co.za.
I combined two stunning fabrics: a tartan wool dyed emerald green and a lustrous green wool-silk blend - but you can use almost any fabric of your liking (only avoid stretch fabric). I also wanted to play with my two fabrics on both sides by alternating them to create a mixed effect.
I adjusted the top piece to be made from two fabrics and alternated the pieces for the brim and the crown to add a fun element to this make. This clever idea laid the foundation for the patchwork quilt as we know it today. Traditionally, women would gather together in quilting bees to sew quilts by hand, bonding, sharing stories, and creating beautiful pieces of folk art at the same time. These quilting bees helped build strong community ties, and they're a testament to the social nature of quilt-making throughout history.
Materials needed
- Afternoon Hat pattern by afternoon.co.za (available for free on their website)
- Two different fabrics (cotton, canvas, denim etc, pair two fabrics that marry well together - could be contrasting or in similar colours, texture, or motif): 35cm of each
- Interfacing (optional for added structure)
- Matching thread
Equipment needed
- Sewing machine
- Scissors
- Pins
- Iron
- Measuring tape
- Fabric marker or chalk
Notes
- Seam allowances are 1cm throughout
- As the two sides of the hat encloses all seams, you do not need to finish them with zigzag stitching or overlocking.
- As it’s reversible, I’ll refer to the two sides of the hat as A side and B side.
How to
Step 1
Print and assemble the Afternoon Hat pattern according to the instructions provided. Once assembled, cut the sewing pattern along the line of your desired size (the pattern offers three sizes. Simply measure your head with a measuring tape and refer to their size guide).
Step 2
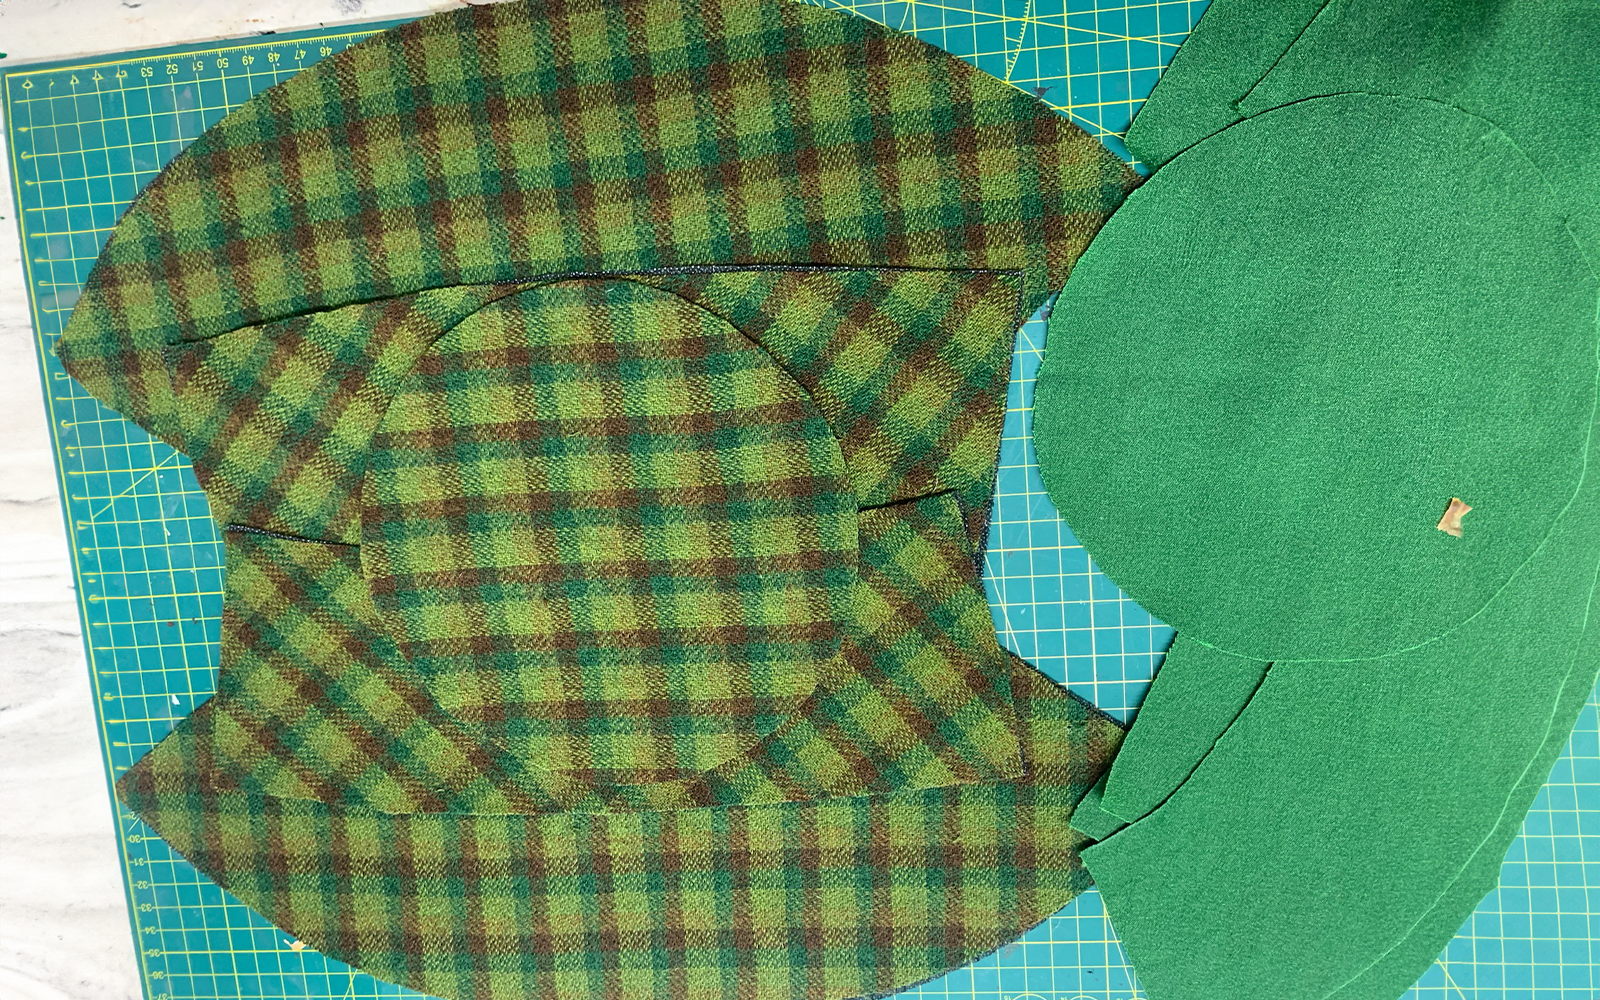
If you want to have a mixed placement on the top as I did, adjust the pattern like this: cut the oval piece (the top) in half and stick them each to a sheet of paper. Add a 1cm seam allowance along the line where you cut the pieces apart. Cut out the pattern pieces.Step 3
Fold your fabrics in half, right sides facing. Pin or trace the pattern pieces onto the fabrics and cut them out. If you are using interfacing, cut out the pieces and fuse to the wrong sides of the corresponding fabric pieces.
Step 4
Once all the pattern pieces have been cut out, it is time to decide which piece you’d like to be on which side. You can keep it simple and have each layer made of just the one fabric, or you can mix and alternate the brim, crown or tops of each panel.
Once decided, keep your pieces in 2 separate piles: one for the A side and the other one for the B side.
Step 5
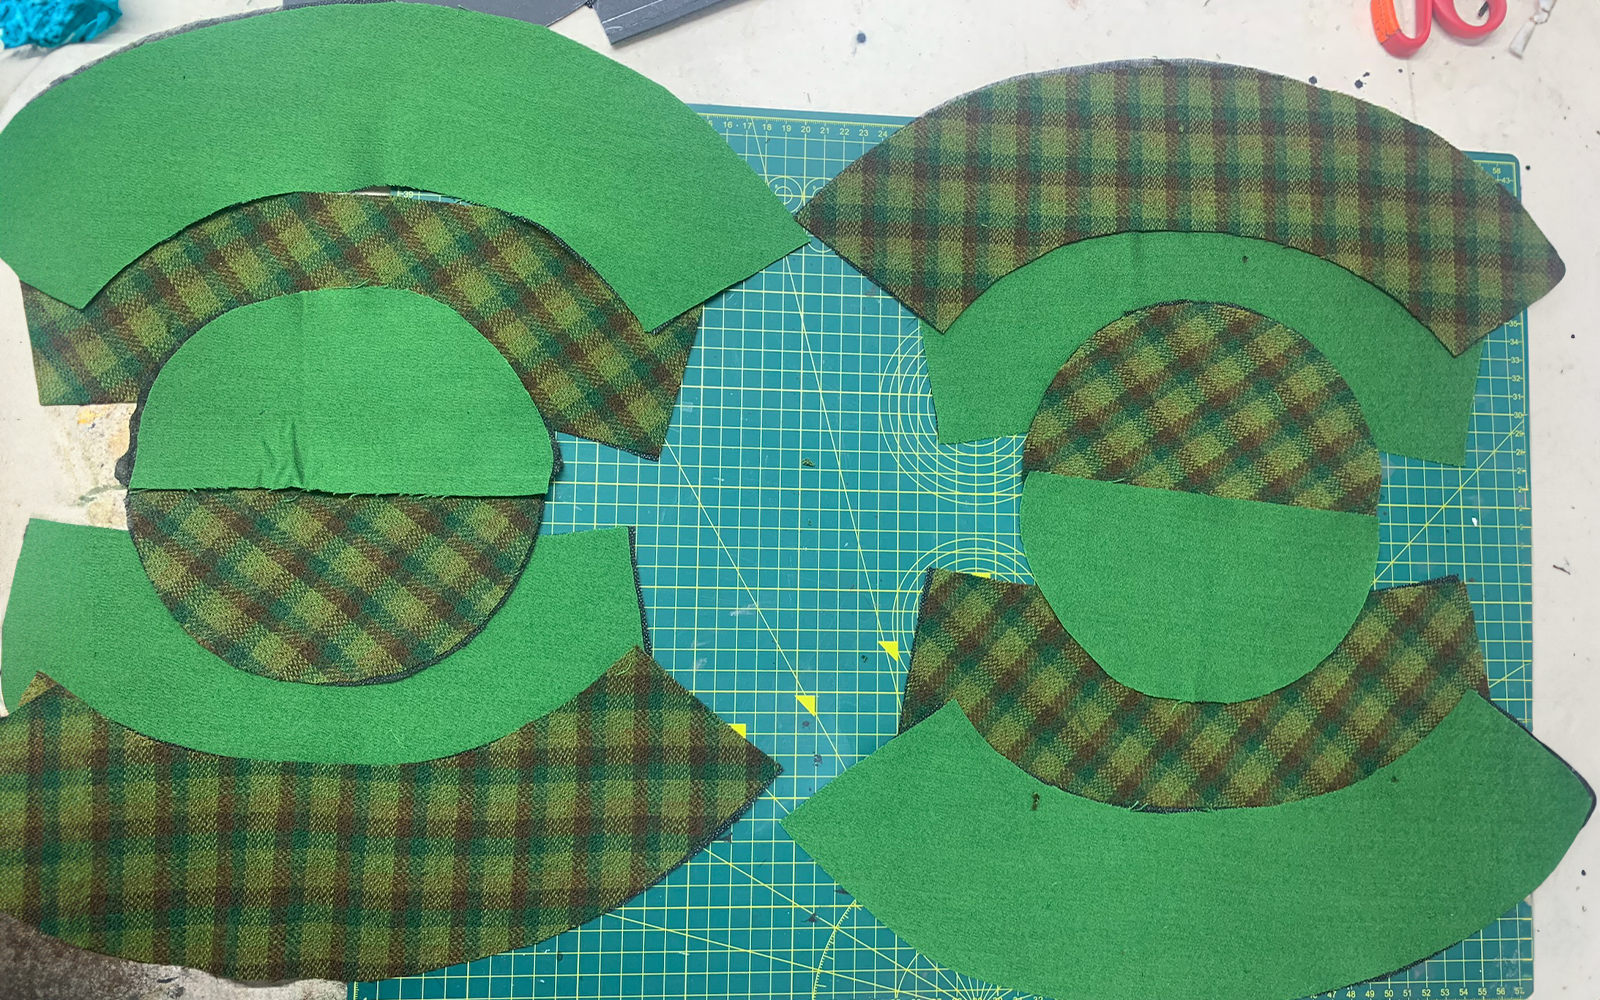
Sew the two brim pieces together with right sides facing. Press the seams open.Step 6
Place the crown pieces with right sides facing and stitch the side seams. Press the seam allowances open. Top-stitch the seam allowances flat, 3mm on either side of the seams.Step 7
Mark the top pieces as well as the top edge of the crown into quarters (one notch per front, sides and back). Align the top’s seam allowance to the crown’s top edge, right sides facing, notches matching and edges aligned. Pin in place. To help with easing the two seam allowances together, snip into the seam allowance of the crown at regular intervals and pin or clip all around. Stitch in place using a straight stitch.Press the seam allowances towards the crown. Turn right side out and top stitch the seam allowance in place on the crown, 3mm away from the seam.
Step 8
Mark quarters of the lower edge of the crown and the inside edge of the brim. Align the brim and the lower edge of the crown with right sides facing, taking care to line up the side seams and front and back marks. Snip into the shorter edge (the brim’s seam allowance) at regular intervals to make stitching easier.Sew together, then press the seam allowance up towards the crown. Turn right side out and top stitch on the crown, 3mm away from the seam.
Repeat steps 5 to 8 with the side B pieces.
Step 9
With right sides facing and fronts, backs and sides matching, place B side on top of A side, aligning the outer edges of the brim. Pin around the edge, leaving a 3-inch opening for turning. Sew all around, making sure to backstitch at the beginning and end of the opening. Trim the seam allowance to 5mm except for the part you left open. Snip a V-shaped notch every 2 – 3cm all around.Carefully bag out the hat through the opening. Use a turning tool or a blunt object to gently push out the seam. You can also shape it with your hands and finger press the seam open.
Step 10
Push one side into the other and align the seams. Press the brim flat with an iron, making sure to fold in the edges of the opening.Close the opening by hand sewing invisible slip stitches.
Step 11
To hold the brim in place and give the hat more structure, hand baste the two layers of the brim. Top stitch concentric circles around the brim at regular intervals, starting 2mm from the outer edgeTip: to make sure I stitched four parallel rows at regular intervals, I measured the width of the brim and divided that number by five - so as to know the exact distance to keep between each row of stitching.
Step 12
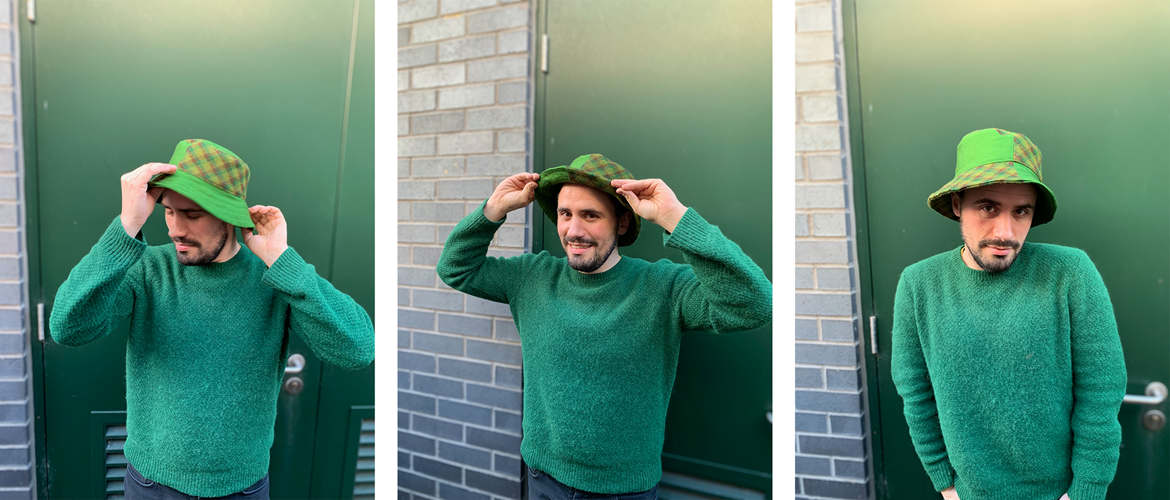
Give the hat a final press with the iron to smooth out any wrinkles and creases. Trim any loose threads, and your reversible bucket hat is ready to wear!
Conclusion: with just two fabrics and the Afternoon Hat pattern, you can create a stylish and versatile reversible bucket hat that's unique to you and your style. Experiment with different fabric combinations, colours and texture…the options are limitless!
If you make this, I’d love to see your final piece. You can find me on Instagram. Why not tag and follow Brother on Instagram, Facebook, Pinterest and YouTube too?


