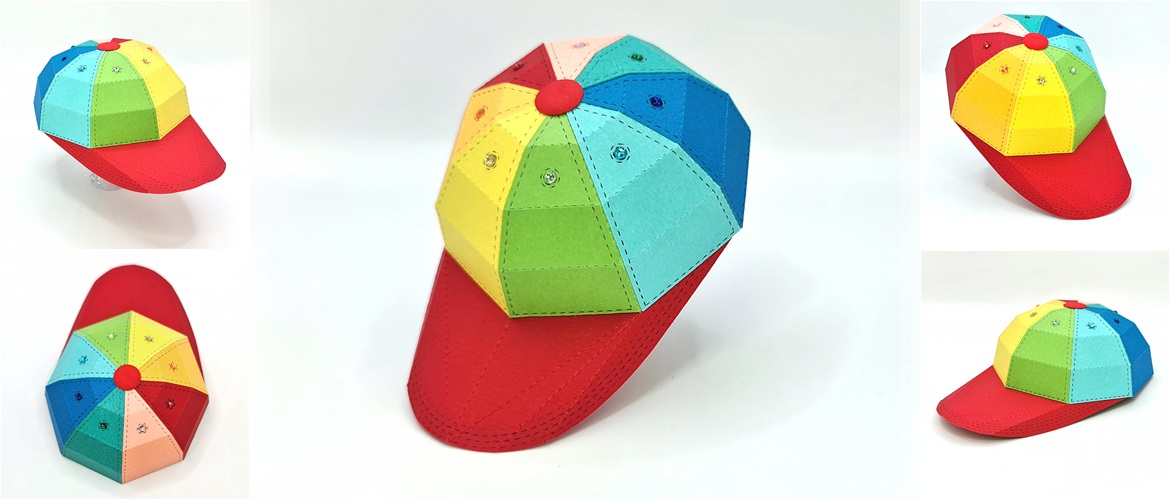
3D baseball cap


Make something unique as a memento for your loved ones with this 3D baseball cap project.
Decorate with the included drawn stitch detail using your ScanNCut or embellish and emblazon with the recipient’s favourite team logo, initials or anything else you like!Materials needed
- Bookbinding glue or low tack/quick grab glue.
- For scoring over the fold lines, I recommend a fine tipped stylus and a metal ruler.
- Assorted embellishments (optional) like eyelets or flat-backed gems.
Card (per hat)
If you plan to recreate this project using the multi-coloured theme shown in the preview image, you will need nine smaller pieces of cards as detailed below.
If, however you plan to make the hat a single colour, you will need one sheet of 300mm (12in) square cardstock.
- Colour 1 – one piece of cardstock measuring 70mm x 95mm, plus one piece of cardstock measuring 127mm x 101mm
- Colour 2 – one piece of cardstock measuring 70mm x 95mm
- Colour 3 – One piece of cardstock measuring 70mm x 95mm
- Colour 4 – One piece of cardstock measuring 70mm x 95mm
- Colour 5 – One piece of cardstock measuring 70mm x 95mm
- Colour 6 – One piece of cardstock measuring 70mm x 95mm
- Colour 7 – One piece of cardstock measuring 70mm x 95mm
- Colour 8 – One piece of cardstock measuring 70mm x 95mm.
Tip: I recommend a 180gsm colour-core cardstock. Using thicker card may make the project difficult or impossible to assemble effectively.
Equipment needed
ScanNCut - Hardware
- Brother ScanNCut – any CM Model
- Standard mat [CAMATSTD12]
- Standard blade [CABLDP1] and blade holder [CAHLP1]
- Optional (for drawing the stitched detail) - Pen Holder [CAPENHL1] and Colour Pen Set [CAPEN1]. You can replace this with one of Brother’s universal pen holders and your choice of pens if you prefer.
OR
- Brother ScanNCut – any SDX model
- Standard mat [CADXMATSTD12]
- Standard auto-blade [CADXBLD1] and holder [CADXHLD1]
- Optional (for drawing the stitched detail) - Pen Holder [CAPENHL1] and Colour Pen Set [CAPEN1]. You can replace this with one of Brother’s universal pen holders and your choice of pens if you prefer.
ScanNCut - Software
- CanvasWorkspace for PC or Mac
Download cutting files here
Size
The cap measures approximately 127mm (front to tip of peak), 89mm across and 38mm tall.
How to
Step 1
Download the CanvasWorkspace project file, ‘3D BASEBALL CAP PROJECT.cwprj’. Open it in CanvasWorkspace (the desktop version). Open the layers tab on the right.
Step 2
Make sure that all layers within the group are visible and unlocked. Transfer this to your machine using the File>Export/Transfer FCM File… menu option.
Step 3
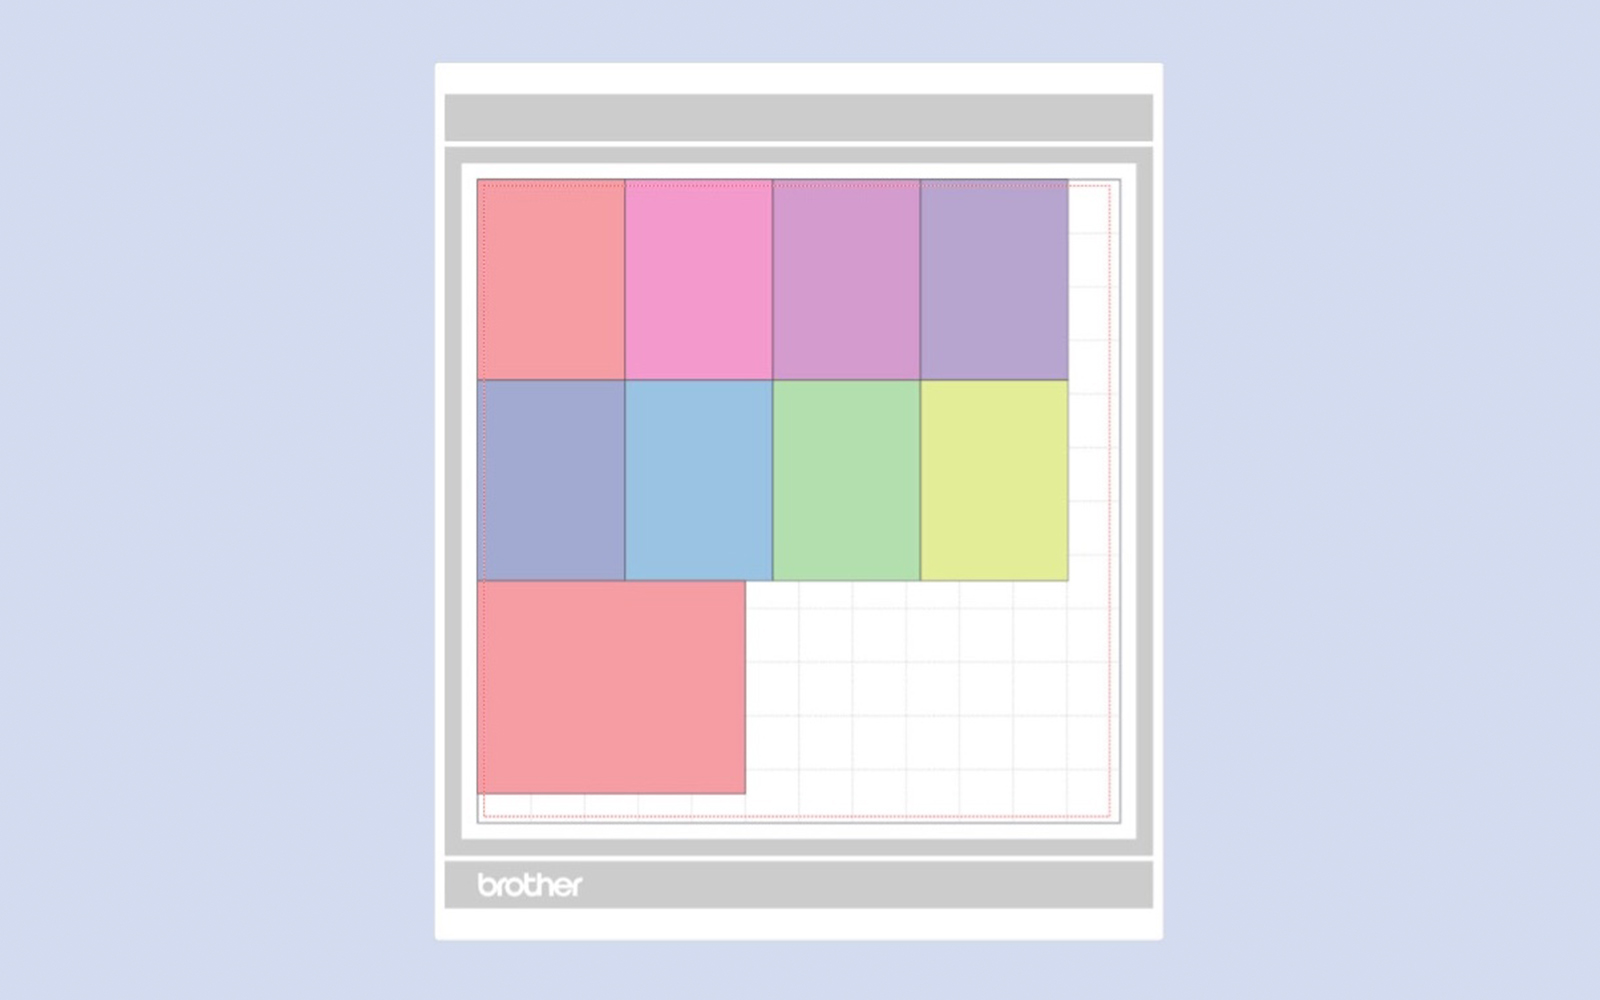
Load your cardstock onto the cutting mat as shown in the diagram below.
The two pieces that make up Colour 1 are positioned top left and bottom left – you can cut the large piece for the peak of the cap in a different colour if you like.
Step 4 (optional)
If you want to draw the stitched detail, insert the pen into the pen holder. Insert into the carriage of your ScanNCut machine and draw the design onto the card. If you do not wish to draw the stitched detail, simply skip to step 6.
IMPORTANT! DO NOT UNLOAD THE MAT!
Step 5
Remove the pen holder from the machine.
Step 6
Insert the cutting blade/holder into your ScanNCut.
Step 7
Cut the design and assemble as shown in the video.
If you make this, remember to tag in Brother on Instagram and Facebook, and myself on Facebook (and give us all a follow too)! You can also find Brother on Pinterest and YouTube for even more ScanNCut inspiration.


